
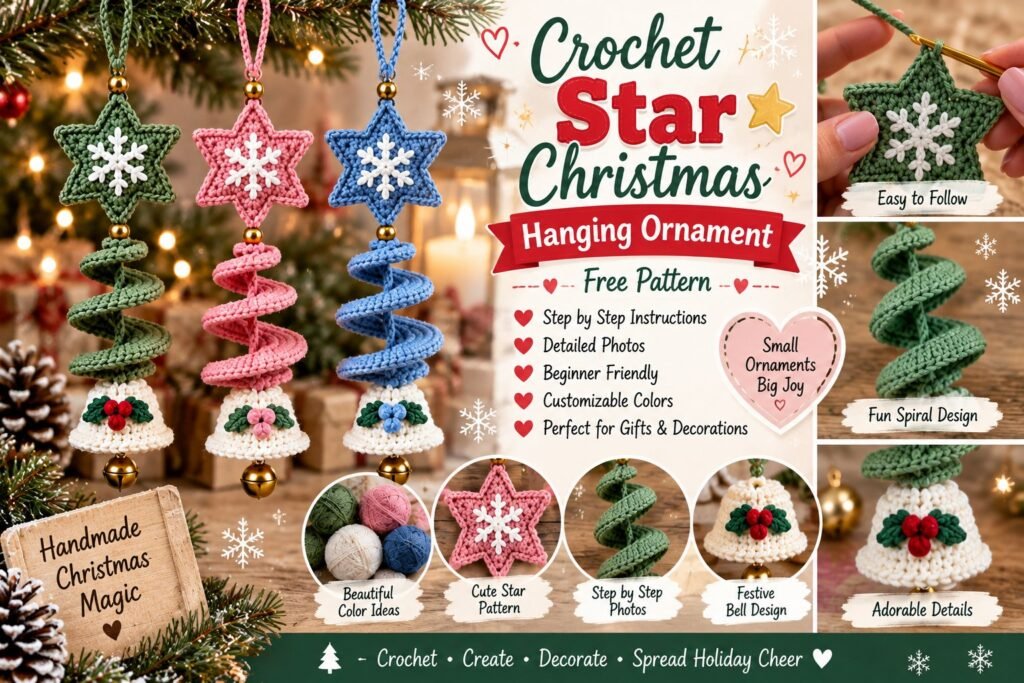
Add a handmade touch to your Christmas tree with this charming Crochet Star Christmas Hanging Ornament. This festive decoration combines a crocheted six-point star, a spiral crochet tree, a tiny bell-shaped base, and colorful holiday details.
It is a fun project for Christmas decorating, handmade gifts, craft fairs, and personalized holiday ornaments. You can make the ornament in traditional green and white or experiment with pink, blue, cream, red, and other seasonal colors.
Pattern note: This is an original, adaptable tutorial inspired by the provided image. Stitch counts may need adjustment depending on your yarn, hook size, and tension.
🎄 Crochet Star Christmas Ornament Details
- Project: Christmas hanging ornament
- Skill Level: Beginner to Intermediate
- Technique: Crochet + simple assembly
- Shape: Star, spiral tree, bell
- Style: Festive / Handmade / Christmas
- Crochet Terms: US terminology
- Approximate Size: 15–22 cm
- Best Yarn: Cotton or cotton-blend yarn
🧶 Materials
Yarn
You will need small amounts of:
- Green yarn – spiral Christmas tree
- White or cream yarn – bell
- Red, pink, or blue yarn – optional star
- White yarn – snowflake detail
- Green yarn – leaves
- Red yarn – berries
- Optional contrasting yarn for decorations
Additional Supplies
- Crochet hook, approximately 2.5–3.5 mm
- Small gold bells
- Small wooden or plastic beads, optional
- Yarn needle
- Scissors
- Stitch marker
- Polyester stuffing, optional
- Small metal hanging ring or ornament loop
✂️ Crochet Abbreviations
- MR – Magic Ring
- ch – Chain
- sc – Single Crochet
- hdc – Half Double Crochet
- dc – Double Crochet
- sl st – Slip Stitch
- inc – Increase
- dec – Decrease
- FO – Fasten Off
- BLO – Back Loop Only
STEP-BY-STEP CROCHET STAR
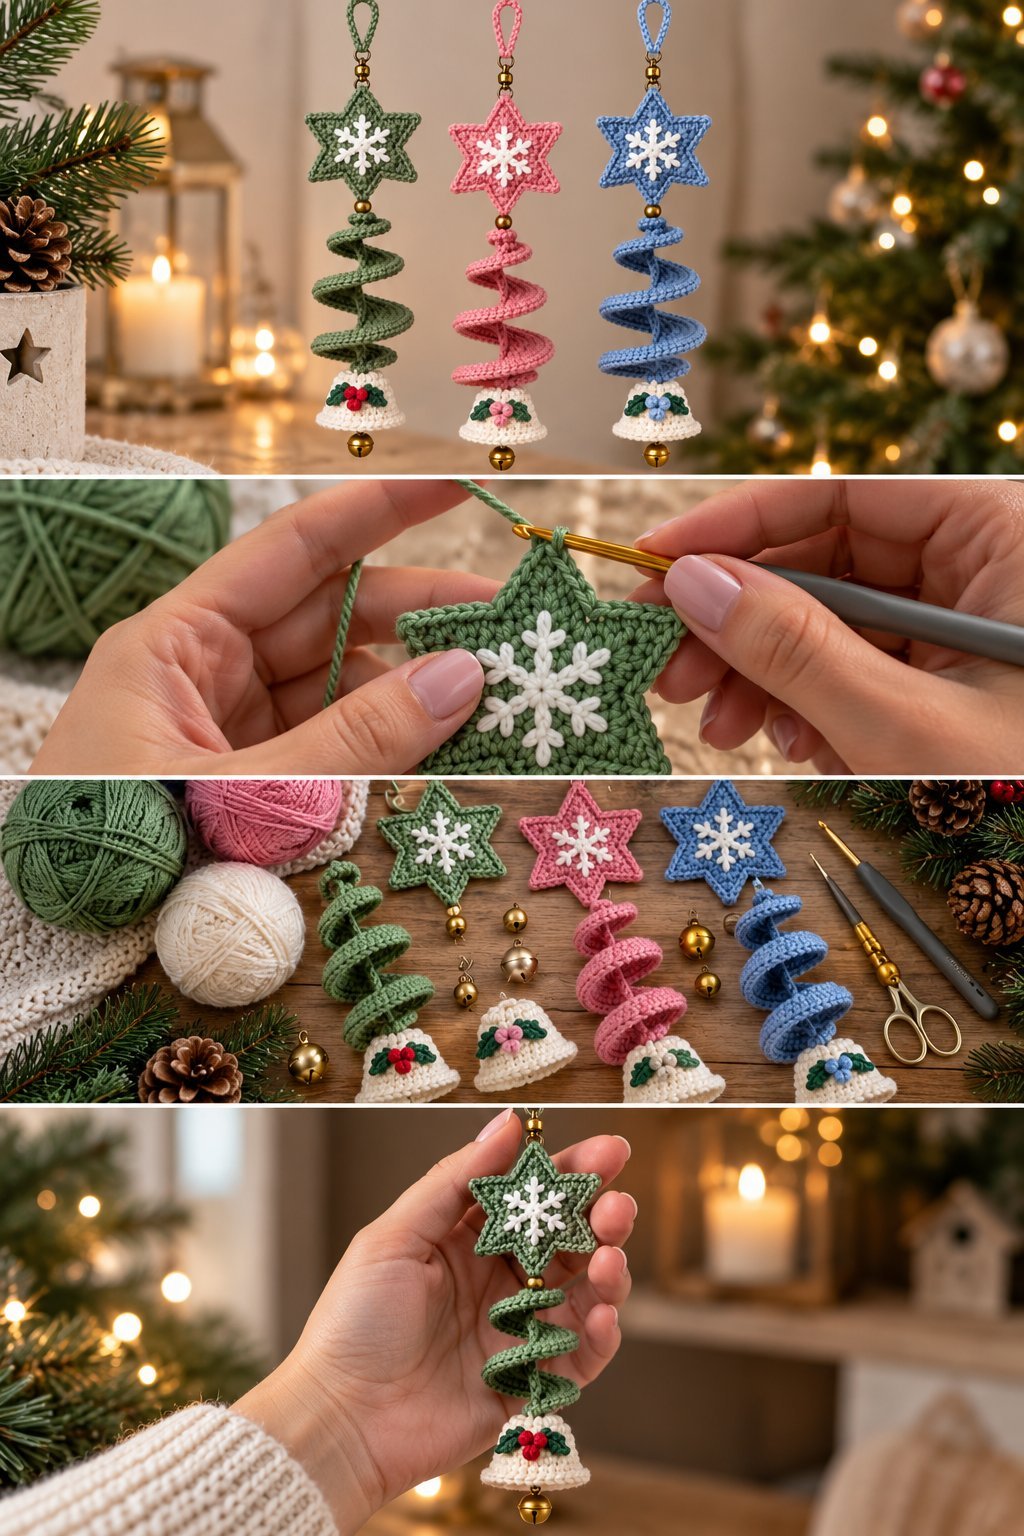
Step 1 — Create the Center
Using your chosen star color, make a magic ring.
Work 10–12 sc into the ring.
Pull the ring closed.
Join with a slip stitch.
Step 2 — Begin the Star Points
Chain 3.
Work a combination of:
- sc
- hdc
- dc
- hdc
- sc
into the appropriate stitches or spaces to create the first pointed section.
Repeat the same sequence around the center.
The taller stitches form the points while the shorter stitches create the valleys between them.
Step 3 — Shape the Six Points
Continue around the star until you have six evenly spaced points.
Keep the center relatively flat.
If your star begins to curl, gently block it later.
Fasten off and weave in the yarn end.
❄️ Step 4 — Add the Snowflake
Using white yarn, embroider a simple snowflake onto the center of the star.
Create:
- One vertical line
- One horizontal line
- Two diagonal lines
Add tiny branches to each arm.
For a more dimensional look, crochet a tiny snowflake separately and sew it onto the star.
🌟 Step 5 — Add a Hanging Loop
Attach yarn to the top point of the star.
Chain approximately 12–15 stitches.
Slip stitch back into the attachment point.
Fasten securely.
You can also add a small metal ring between the crochet loop and the ornament.
🎄 CROCHET THE SPIRAL CHRISTMAS TREE
Step 6 — Make the Foundation Chain
Using green yarn, chain approximately 25–40 stitches.
The number of chains determines the length of the spiral.
For a longer ornament, make a longer chain.
Step 7 — Create the Spiral
Work multiple stitches into the chain.
A simple method is to work 2–3 dc into each chain stitch.
As you continue, the fabric naturally begins to curl.
Keep the tension consistent.
The more stitches you add into each chain, the tighter and fuller the spiral becomes.
🌲 Step 8 — Shape the Tree
Allow the crocheted strip to naturally coil.
Gently pull and arrange it into a Christmas-tree shape.
You can secure the top and bottom with small stitches.
For a more pronounced spiral, gradually reduce the number of stitches toward the top.
🔔 CROCHET THE BELL
Step 9 — Start the Bell
Using cream or white yarn, make a magic ring.
Work 6 sc into the ring.
Increase evenly over the next few rounds.
Continue crocheting in rounds to create a small cup-shaped piece.
Step 10 — Shape the Bell
Once the bell reaches the desired height, begin adding stitches around the lower edge.
This creates the flared bell shape.
Work one decorative border round.
A simple scalloped edge works beautifully:
sc, skip 1, 3 dc in next stitch, skip 1
Repeat around.
Fasten off.
🌿 Step 11 — Add the Bell Decorations
Use green yarn to crochet two tiny leaves.
Then use red yarn to create three small berries.
Sew the leaves and berries to the front of the bell.
You can also add a small red or pink flower in the center.
🔔 Step 12 — Add the Bell
Attach a small gold jingle bell underneath the crochet bell.
Use strong yarn to secure it.
Make several stitches so it remains firmly attached.
🧵 STEP 13 — Assemble the Ornament
Now place the pieces in order:
Star → bead → spiral tree → bead → crochet bell → jingle bell
The exact arrangement can be adjusted according to the length you prefer.
Use yarn or small decorative beads between each section.
⭐ Step 14 — Attach the Star to the Tree
Use matching green or contrasting yarn.
Sew the top of the spiral tree to the bottom point of the star.
Make several secure stitches.
Keep the connection centered.
🎄 Step 15 — Attach the Bell
Connect the bottom of the spiral tree to the top of the crochet bell.
Use a yarn needle and matching yarn.
Check that the ornament hangs straight.
✨ Step 16 — Add Decorative Beads
For an extra festive appearance, place small beads between the sections.
Gold beads look especially beautiful with traditional Christmas colors.
You can also add:
- Silver beads
- Wooden beads
- Pearl-style beads
- Red beads
For ornaments intended for young children, avoid small detachable beads.
🌲 Step 17 — Shape the Spiral
Hold the finished ornament by the hanging loop.
Let the spiral naturally fall downward.
Gently adjust each curve.
Spread the spiral sections evenly.
If necessary, use small stitches to keep the desired shape.
🧵 Step 18 — Hide All Yarn Ends
Use your yarn needle to weave loose ends through the back of the crochet pieces.
Secure each end.
Trim the excess yarn carefully.
Check the ornament for any visible loose strands.
💧 Step 19 — Block the Star
Lightly dampen the crochet star.
Lay it flat.
Shape each of the six points evenly.
Pin the points if necessary.
Allow the star to dry completely.
Blocking gives the ornament a crisp, professional appearance.
🎀 Step 20 — Final Finishing
Check that:
- The star is flat
- The snowflake is centered
- The spiral hangs evenly
- The bell is secure
- The jingle bell is firmly attached
- The hanging loop is strong
- All yarn ends are hidden
Your Crochet Star Christmas Hanging Ornament is ready!
🎨 Christmas Color Combinations
🎄 Traditional Christmas
- Forest green
- Red
- Cream
- Gold
🌸 Pastel Christmas
- Sage green
- Blush pink
- Cream
- Gold
❄️ Winter Wonderland
- Ice blue
- White
- Silver
- Soft gray
🍓 Candy Cane
- Red
- White
- Pink
🌲 Rustic Christmas
- Olive green
- Beige
- Cream
- Brown
- Gold
🧶 Easy Ways to Customize Your Ornament
Make a larger star
Use a larger crochet hook and thicker yarn.
Make a smaller ornament
Use thinner yarn and a smaller hook.
Add snowflakes
Decorate the star and bell with small white snowflakes.
Add beads
Place decorative beads between the crochet sections.
Change the star color
Try pink, blue, cream, burgundy, or purple instead of green.
Add more bells
Attach a tiny jingle bell to the bottom of each ornament.
🎁 How to Use Your Crochet Christmas Ornament
This handmade ornament is perfect for:
- Christmas tree decorations
- Holiday wreaths
- Garland
- Mantel decorations
- Gift wrapping
- Christmas stockings
- Handmade gifts
- Craft fairs
- Holiday table decorations
- Christmas party favors
You can make several ornaments in different colors to create a coordinated handmade Christmas collection.
⭐ Beginner Tips
Count your stitches
The star points need to be evenly spaced.
Keep the spiral loose
Very tight tension can prevent the spiral from curling naturally.
Use smooth yarn
Cotton yarn makes the stitch details easy to see.
Reinforce hanging points
The ornament will hang from this area, so make the loop strong.
Block the star
A few minutes of blocking can make a major difference in the finished appearance.
Secure decorative pieces
Always reinforce bells, beads, and appliqués carefully.
❓ Frequently Asked Questions
Is this Christmas ornament beginner-friendly?
Yes. The individual components use basic crochet techniques. Beginners may want to practice the star and spiral separately before assembling the complete ornament.
What yarn is best?
Cotton and cotton-blend yarn are excellent choices because they hold their shape well and provide clear stitch definition.
Can I make the ornament without a jingle bell?
Absolutely. Simply finish the crochet bell with a small decorative bead or crocheted ball.
Can I make a five-point star instead?
Yes. You can adapt the center and point spacing to create a traditional five-point star.
How can I make the spiral longer?
Simply begin with a longer foundation chain.
Can I sell finished ornaments?
If you’re using your own original version of the design, you can generally sell your handmade finished pieces. Check any restrictions that apply to the specific pattern or design you’re using.
❤️ Final Thoughts
This Crochet Star Christmas Hanging Ornament is a beautiful little project for adding handmade charm to your holiday decorations. The combination of a delicate star, curling crochet Christmas tree, festive bell, and tiny holiday embellishments creates a whimsical ornament that looks wonderful hanging from a Christmas tree.
Experiment with different yarn colors and decorations to create a whole collection. Make traditional green and red ornaments, soft pastel versions, or icy blue winter designs.
Whether you’re crocheting for yourself, preparing handmade Christmas gifts, or creating decorations for a holiday craft fair, these little ornaments are a fun and rewarding seasonal project.
SEO Keywords: Crochet Star Christmas Hanging Ornament, crochet Christmas ornament, free crochet ornament pattern, Christmas crochet patterns, crochet star pattern, crochet Christmas tree ornament, handmade Christmas decorations, crochet holiday decor, easy crochet Christmas ornament, crochet hanging decoration, DIY Christmas crochet, Christmas tree crochet ideas, crochet Christmas gift, festive crochet patterns.

