
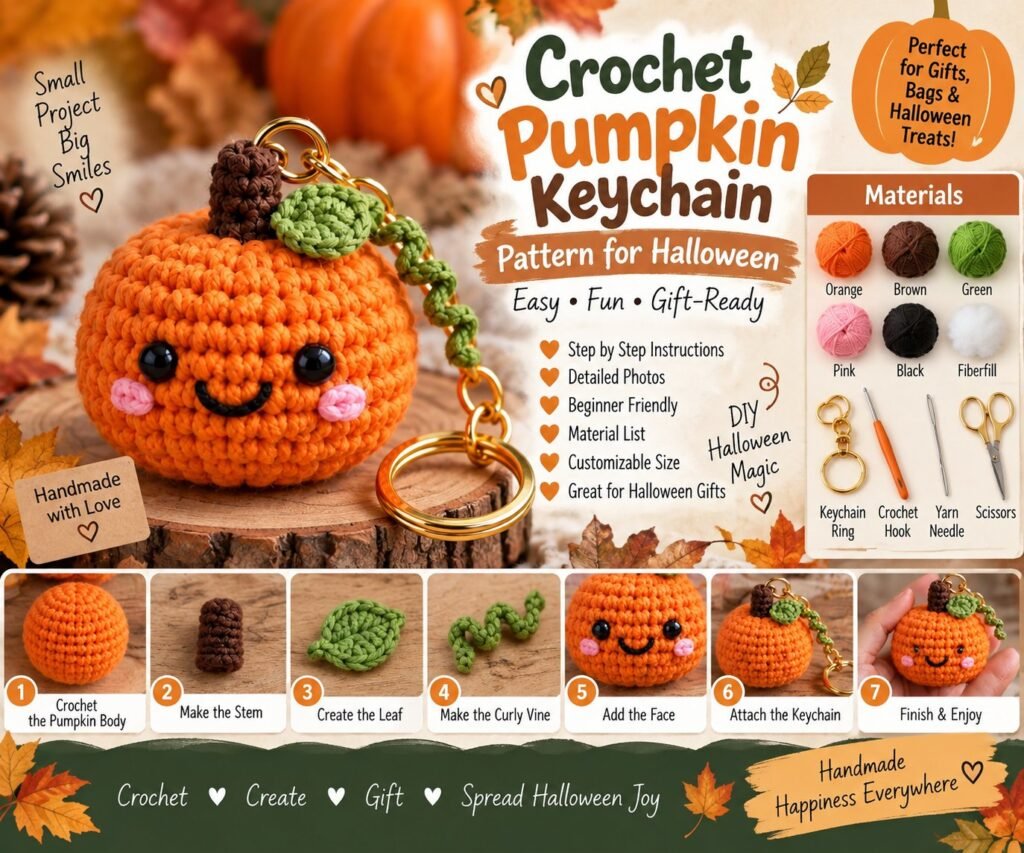
Create a cute handmade decoration for Halloween with this easy Crochet Pumpkin Keychain Pattern. This tiny pumpkin features a cheerful face, a textured orange body, a small brown stem, a green leaf, and a curly vine attached to a gold keychain.
It is a fun crochet project for beginners and makes an excellent handmade Halloween gift, bag charm, backpack accessory, or seasonal decoration.
This pattern is written as an adaptable original design based on the pumpkin shown in the reference image. The finished size can vary depending on your yarn, hook size, and crochet tension.
Crochet Pumpkin Keychain Pattern
This small amigurumi pumpkin is crocheted in the round and stuffed with fiberfill. The pumpkin body is made first, followed by the stem, leaf, vine, and face details.
The finished pumpkin can then be attached to a keychain clasp or split ring.
Materials Needed
Orange yarn, worsted or DK weight
Brown yarn for the stem
Green yarn for the leaf and vine
Pink yarn for the cheeks
Black embroidery thread or black yarn for the smile
Black safety eyes, approximately 6 mm
Crochet hook suitable for your yarn
Fiberfill stuffing
Yarn needle
Scissors
Stitch marker
Gold keychain clasp or split ring
Small connecting chain
Optional sewing needle and thread
Finished Size
The finished pumpkin is approximately 6–8 cm wide when made with medium-weight yarn.
Using thinner yarn will create a smaller keychain.
Using thicker yarn and a larger hook will create a larger pumpkin.
Because this is an amigurumi project, use a smaller hook than you would normally use for the same yarn. This helps create tight stitches and prevents the stuffing from showing through.
Crochet Abbreviations
ch — chain
sl st — slip stitch
sc — single crochet
inc — increase
dec — decrease
st — stitch
sts — stitches
BLO — back loop only
FO — fasten off
MR — magic ring
Skill Level
Beginner to intermediate
You should be comfortable with:
Working a magic ring
Crocheting in continuous rounds
Single crochet
Increasing
Decreasing
Basic sewing
Attaching small crochet pieces
Crochet Pumpkin Body
Use orange yarn.
Work the pumpkin in continuous rounds unless otherwise indicated. Place a stitch marker at the beginning of each round.
Round 1
Make a magic ring.
Work 6 sc into the ring.
6 sts
Round 2
Work 2 sc in each stitch around.
12 sts
Round 3
Repeat:
1 sc in the next stitch, 2 sc in the next stitch.
Repeat around.
18 sts
Round 4
Repeat:
1 sc in each of the next 2 stitches, 2 sc in the next stitch.
Repeat around.
24 sts
Round 5
Repeat:
1 sc in each of the next 3 stitches, 2 sc in the next stitch.
Repeat around.
30 sts
Rounds 6–10
Work 1 sc in each stitch around.
30 sts
The pumpkin should now begin to look rounded.
Round 11
Repeat:
1 sc in each of the next 3 stitches, sc2tog.
Repeat around.
24 sts
Round 12
Repeat:
1 sc in each of the next 2 stitches, sc2tog.
Repeat around.
18 sts
Begin adding fiberfill.
Stuffing the Pumpkin
Add small amounts of fiberfill through the opening.
Gently distribute the stuffing around the inside of the pumpkin.
Do not overstuff it.
The pumpkin should remain round and slightly soft.
Add additional stuffing as you continue closing the top.
Finishing the Pumpkin Body
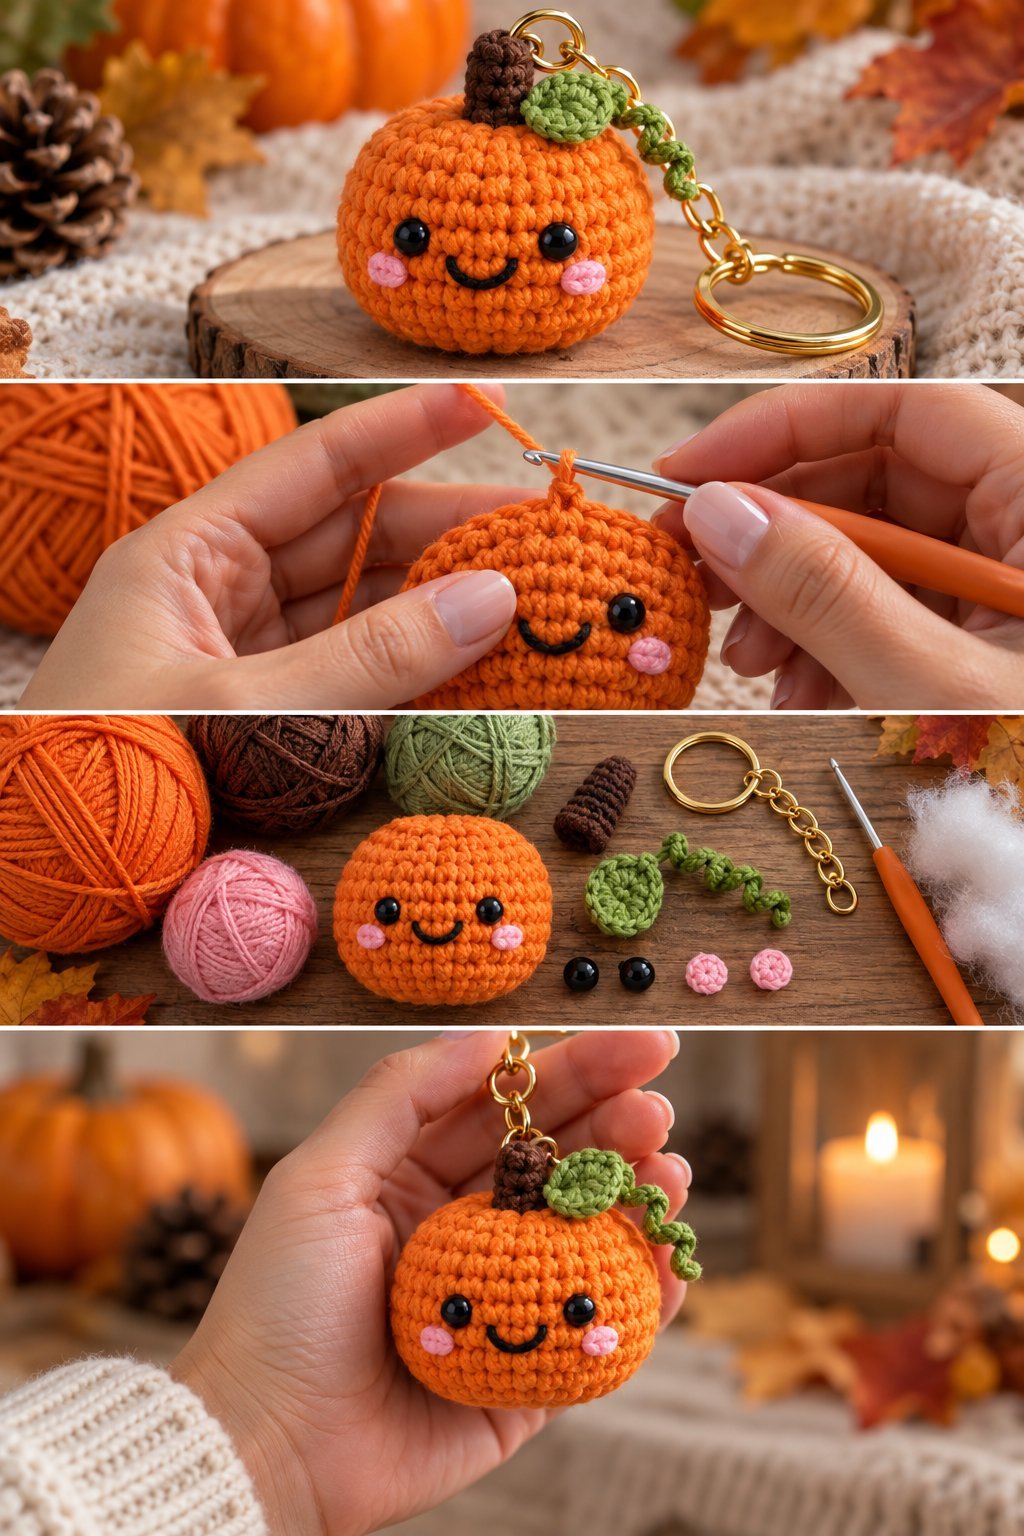
Round 13
Repeat:
1 sc in the next stitch, sc2tog.
Repeat around.
12 sts
Add a little more stuffing if necessary.
Round 14
Work sc2tog around.
6 sts
Cut the yarn, leaving a long tail.
Thread the tail through the remaining stitches.
Pull gently to close the opening.
Secure the yarn and hide the remaining tail inside the pumpkin.
Creating the Pumpkin Shape
For a more realistic pumpkin shape, use orange yarn and a yarn needle.
Insert the needle from the bottom center of the pumpkin and bring it up through the top center.
Wrap the yarn around the outside of the pumpkin and pull gently.
Repeat several times around the pumpkin to create vertical sections.
Do not pull too tightly.
The goal is to create gentle grooves rather than deep indentations.
This simple technique gives the amigurumi a more recognizable pumpkin shape.
How to Crochet the Pumpkin Stem
Use brown yarn.
Round 1
Make a magic ring.
Work 6 sc into the ring.
6 sts
Rounds 2–4
Work 1 sc in each stitch around.
6 sts
Fasten off, leaving a sewing tail.
Lightly stuff the stem if necessary.
Sew the stem securely to the top center of the pumpkin.
How to Crochet the Pumpkin Leaf
Switch to green yarn.
Step 1
Chain 5.
Step 2
Starting in the second chain from the hook:
1 sc
1 hdc
1 dc
1 hdc
1 sc
This creates one side of the leaf.
Step 3
Work a few stitches along the opposite side of the foundation chain to create the second side.
Finish with a slip stitch.
Fasten off and leave a long tail for sewing.
Position the leaf beside the brown stem.
Sew it securely to the top of the pumpkin.
How to Make the Curly Pumpkin Vine
Use green yarn.
Chain approximately 12–16 stitches.
Work 2 sc into each chain.
The stitches will naturally curl into a spiral.
For a tighter spiral, increase the number of stitches worked into each chain.
For a looser vine, work fewer increases.
Fasten off and sew one end beside the stem.
Allow the remaining section to curl naturally.
Adding the Pumpkin Face
The cheerful face gives this Halloween keychain its personality.
Safety Eyes
Insert two small black safety eyes near the upper-middle section of the pumpkin.
Position them evenly.
Before permanently securing the backs, check that both eyes are aligned.
For a child-oriented project, embroidered eyes can be used instead of safety eyes.
Embroidered Smile
Use black embroidery thread.
Create a small curved smile underneath the eyes.
Several short stitches can be used to form the mouth.
Keep the smile centered between the eyes.
How to Crochet the Pink Cheeks
Use pink yarn.
Make two tiny crochet circles.
Round 1
Make a magic ring.
Work 6 sc into the ring.
Join with a slip stitch.
Fasten off.
Leave a small sewing tail.
Sew one cheek beneath each eye.
You can also embroider small circular cheeks directly onto the pumpkin.
Attaching the Keychain
Place the connecting chain or small metal ring at the top of the pumpkin.
Secure it around the base of the stem.
Use strong sewing thread or the brown yarn to reinforce the attachment point.
Attach the gold keychain clasp to the connecting ring.
Pull gently on the clasp to make sure the pumpkin is firmly attached.
For a keychain that will be used frequently, reinforce this area with several passes of thread.
Step-by-Step Assembly
Step 1: Crochet the Pumpkin
Create the orange pumpkin body using continuous single-crochet rounds.
Step 2: Add the Stuffing
Fill the pumpkin gradually with fiberfill before closing the top.
Step 3: Shape the Pumpkin
Use orange yarn to create gentle vertical grooves around the pumpkin.
Step 4: Make the Stem
Crochet the small brown stem and sew it onto the top.
Step 5: Add the Leaf
Crochet a small green leaf and attach it next to the stem.
Step 6: Create the Vine
Chain green yarn and work multiple stitches into the chain to create the curly tendril.
Step 7: Add the Face
Attach the black eyes and embroider the smiling mouth.
Step 8: Add the Cheeks
Sew small pink cheeks beneath the eyes.
Step 9: Attach the Keychain
Secure a metal ring and keychain clasp to the top.
Step 10: Finish
Weave in all loose ends and check every attachment before using the finished keychain.
Tips for Making a Better Crochet Pumpkin Keychain
Keep your stitches tight so the stuffing does not show.
Use a stitch marker to avoid losing the beginning of each round.
Add stuffing gradually instead of filling the pumpkin all at once.
Use a yarn needle to shape the pumpkin grooves.
Choose lightweight yarn so the finished keychain does not become too heavy.
Reinforce the metal keychain attachment because this area receives the most pulling.
Embroidered facial details can create a softer handmade appearance.
Use contrasting colors for the stem, leaf, cheeks, and face to make the pumpkin more expressive.
Halloween Color Variations
Classic Halloween Pumpkin
Orange pumpkin
Brown stem
Green leaf
Black face
Pink cheeks
Black and Orange Pumpkin
Use black yarn for the pumpkin body and orange details for a spooky Halloween look.
White Ghost Pumpkin
Use white or cream yarn and add a simple embroidered face.
Purple Halloween Pumpkin
Combine purple yarn with orange and green details for a playful seasonal design.
Mini Jack-O’-Lantern
Use bright orange yarn and embroidered black facial details for a traditional jack-o’-lantern appearance.
Crochet Pumpkin Keychain Gift Ideas
This little pumpkin makes a useful handmade gift for Halloween.
Attach one to a:
Backpack
Purse
Handbag
Keyring
Halloween gift basket
Treat bag
School bag
Crochet project bag
You can also make several pumpkins in different colors and give them to friends, family members, teachers, or coworkers.
How to Make This Pumpkin Without Safety Eyes
If you prefer not to use plastic safety eyes, simply embroider the eyes using black yarn or embroidery floss.
Small stitched eyes work particularly well for tiny crochet projects.
They also allow you to customize the expression.
You can make the pumpkin happy, surprised, sleepy, or spooky by changing the shape and placement of the embroidered details.
How to Make a Smaller Pumpkin Keychain
For a miniature version, use crochet thread or lightweight yarn with a smaller hook.
Reduce the number of increase rounds.
Stop increasing when the pumpkin reaches your preferred width.
Then work a few even rounds before decreasing.
This creates a tiny pumpkin that works especially well as a zipper charm or small bag accessory.
How to Make a Larger Pumpkin
For a larger decorative pumpkin, use worsted or bulky yarn and a larger crochet hook.
Add additional increase rounds before working the straight rounds.
Then add more decrease rounds to maintain the rounded shape.
A larger version can be used as seasonal home décor rather than a keychain.
Frequently Asked Questions
How long does it take to crochet a pumpkin keychain?
A small pumpkin can usually be completed in a relatively short crafting session once you are familiar with the pattern. Beginners may need additional time for assembly and facial details.
What yarn is best for a crochet pumpkin keychain?
Cotton yarn is an excellent choice because it provides defined stitches and holds its shape well. Acrylic yarn can also be used for a softer finished piece.
What size crochet hook should I use?
A hook around 2.5–3.5 mm works well with many DK and worsted-weight yarns, but the best size depends on your yarn and tension.
Can I sell finished crochet pumpkin keychains?
If you make your own original finished items from this type of pattern, you can choose how to sell or gift your finished work. If you use a designer’s copyrighted pattern, always check that designer’s specific terms before selling finished items.
Can I use embroidered eyes instead of safety eyes?
Yes. Embroidered eyes are a great alternative and work particularly well for small crochet toys and accessories.
How do I stop the keychain from coming loose?
Reinforce the top attachment point with several strong stitches and make sure the metal ring is securely connected before using the keychain.
Final Thoughts
This Crochet Pumpkin Keychain Pattern is a quick and creative Halloween project that combines simple amigurumi techniques with fun seasonal details. The round orange pumpkin, tiny stem, green leaf, curly vine, rosy cheeks, and smiling face create a charming handmade accessory that is perfect for autumn.
Make one for yourself, create a collection in different colors, or turn several into handmade Halloween gifts for friends and family.

