
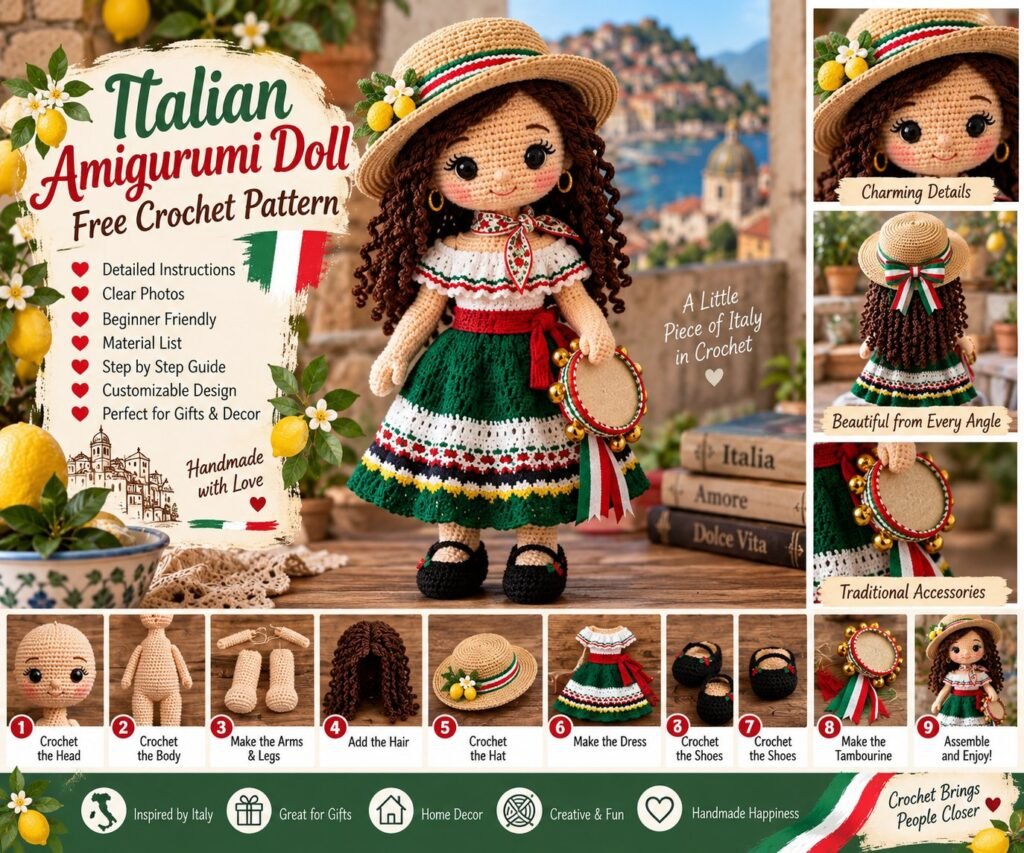
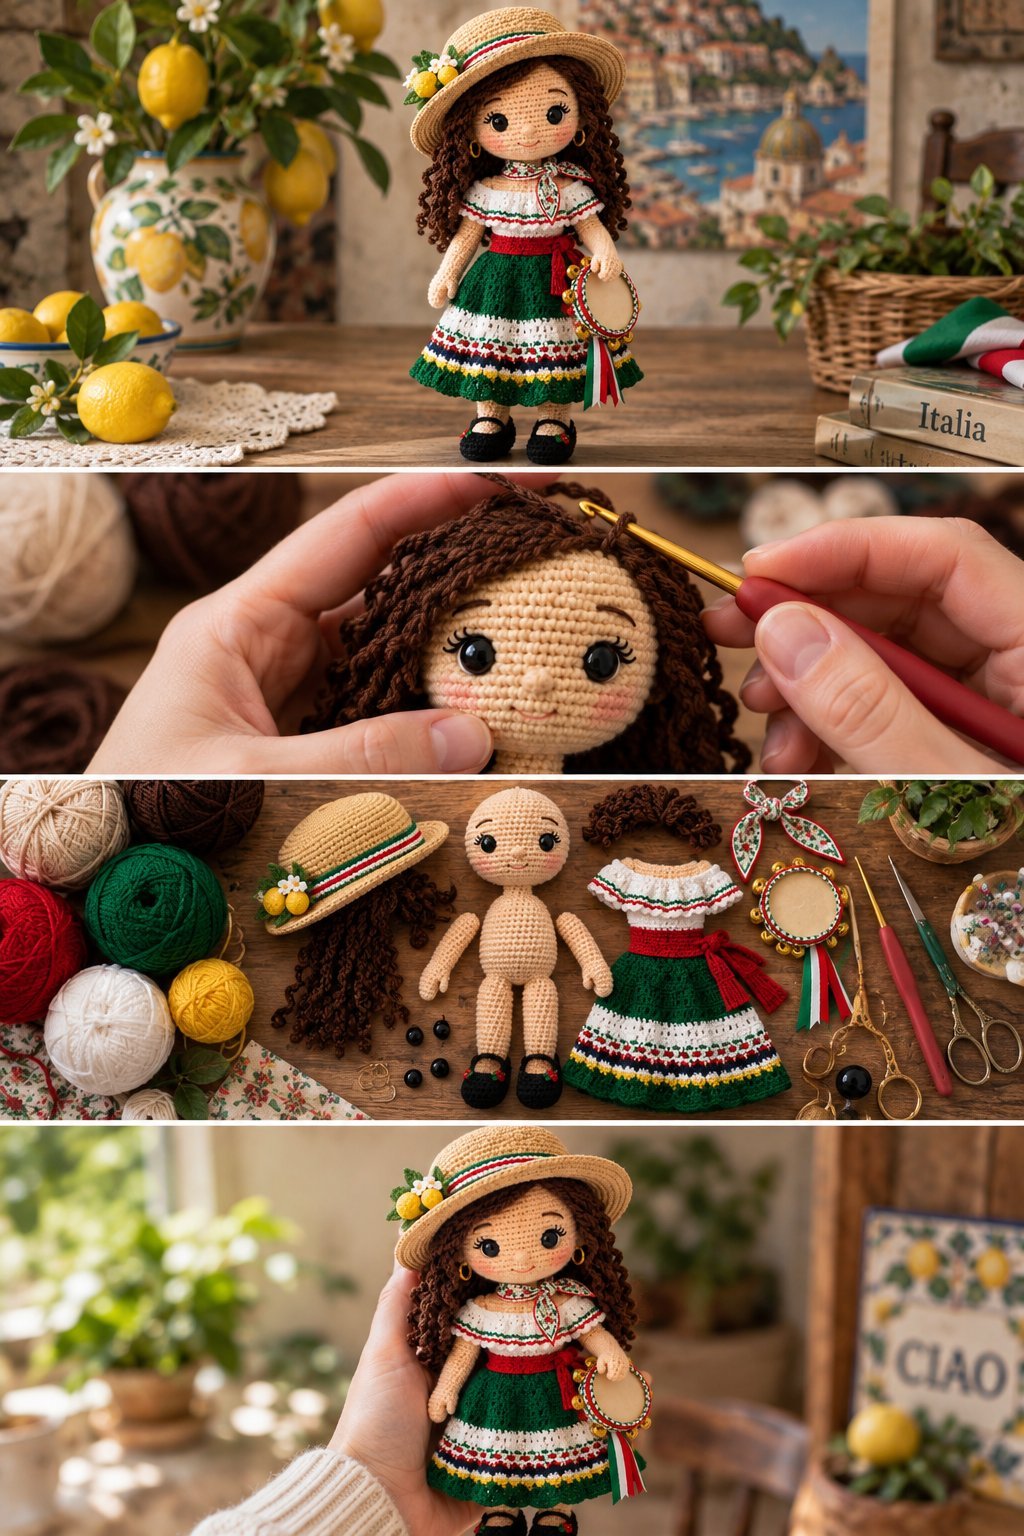
Create a charming Italian-inspired amigurumi doll with curly brown hair, a traditional-style green, white, and red dress, a decorated sun hat, tiny black shoes, and a miniature tambourine accessory.
This Italian Amigurumi Doll is designed as a decorative crochet project inspired by the reference image. The pattern combines classic amigurumi construction with colorful clothing and Italian-inspired details, making it a lovely handmade gift, crochet collectible, or decoration for anyone who loves Italy and crochet.
This is an original, adaptable pattern based on the visual design. Exact proportions may vary depending on yarn weight, hook size, crochet tension, and stuffing. The pattern uses US crochet terminology. Written crochet patterns commonly use abbreviations such as sc, inc, and dec to keep instructions compact and easy to follow.
Italian Amigurumi Doll Pattern
Skill Level: Intermediate
Finished Size: Approximately 10–12 inches tall
Crochet Terms: US terminology
Construction: The head, body, arms, legs, hair, clothing, hat, and accessories are made separately and assembled at the end.
Gauge: Gauge is not essential for amigurumi, but stitches should be tight enough that the stuffing does not show through. Single crochet creates a dense fabric that works particularly well for stuffed crochet toys.
Materials Needed
Cream or light beige yarn for the doll’s skin
Dark brown yarn for the hair
Green yarn for the skirt and Italian-inspired details
White yarn for the blouse and dress trim
Red yarn for decorative stripes and sash
Black yarn for the shoes and facial embroidery
Yellow or gold yarn for small decorative details
Small amount of pink yarn for the cheeks
3.0 mm crochet hook
2.75 mm crochet hook for smaller details
Polyester fiberfill stuffing
8–10 mm safety eyes or black embroidery thread
Yarn needle
Embroidery needle
Scissors
Stitch marker
Two small gold-colored beads or buttons for earrings
Small embroidery hoop or lightweight ring for the tambourine
Optional tiny jingle bells
Optional fabric glue for securing decorative details
Crochet Abbreviations
ch = chain
sc = single crochet
sl st = slip stitch
inc = increase
dec = decrease
st = stitch
sts = stitches
BLO = back loop only
FLO = front loop only
hdc = half double crochet
dc = double crochet
FO = fasten off
rnd = round
rep = repeat
A single crochet increase means working two single crochet stitches into one stitch, while a single crochet decrease combines two stitches into one. These techniques are commonly used to shape amigurumi pieces.
Pattern Notes
Work the head, body, arms, and legs in continuous rounds unless otherwise stated.
Use a stitch marker to identify the beginning of each round.
Stuff the doll gradually as you crochet.
Keep your stitches firm and consistent.
Do not overstuff the head because too much stuffing can distort the facial shape.
For a child-safe doll, embroider the eyes instead of using safety eyes.
The green, white, and red color scheme can be changed to create a different traditional or modern outfit.
Step 1: Crochet the Head
Use cream or beige yarn.
Rnd 1: Make a magic ring and work 6 sc into the ring. (6)
Rnd 2: inc around. (12)
Rnd 3: sc in next st, inc in next st around. (18)
Rnd 4: sc in next 2 sts, inc in next st around. (24)
Rnd 5: sc in next 3 sts, inc in next st around. (30)
Rnd 6: sc in next 4 sts, inc in next st around. (36)
Rnd 7: sc in next 5 sts, inc in next st around. (42)
Rnd 8: sc in next 6 sts, inc in next st around. (48)
Rnd 9–17: sc around. (48)
Place the safety eyes between Rounds 11 and 12.
Leave approximately 8–10 stitches between the eyes.
Rnd 18: sc in next 6 sts, dec around. (42)
Rnd 19: sc in next 5 sts, dec around. (36)
Rnd 20: sc in next 4 sts, dec around. (30)
Begin stuffing the head.
Rnd 21: sc in next 3 sts, dec around. (24)
Rnd 22: sc in next 2 sts, dec around. (18)
Rnd 23: sc in next st, dec around. (12)
Add the final amount of stuffing.
Rnd 24: dec around. (6)
FO and leave a long yarn tail.
Pull the opening closed and weave in the yarn end.
Step 2: Create the Face
The face is one of the most important parts of the doll because small details create the sweet expression seen in the reference.
Use black embroidery thread to create delicate eyelashes.
Embroider small curved eyebrows above the eyes.
Use cream or light beige yarn to create a tiny nose with a few horizontal stitches.
Embroider a small curved smile underneath the nose.
Use pink yarn to add two small blush patches to the cheeks.
Keep the facial features centered before securing them permanently.
Step 3: Crochet the Body
Use cream yarn.
Rnd 1: 6 sc into a magic ring. (6)
Rnd 2: inc around. (12)
Rnd 3: sc in next st, inc around. (18)
Rnd 4: sc in next 2 sts, inc around. (24)
Rnd 5–10: sc around. (24)
Rnd 11: sc in next 2 sts, dec around. (18)
Rnd 12–14: sc around. (18)
Rnd 15: sc in next st, dec around. (12)
Rnd 16–17: sc around. (12)
FO and leave the bottom opening available for attaching the legs.
Stuff the body firmly but evenly.
Step 4: Crochet the Legs
Make two identical legs.
Begin with cream yarn.
Rnd 1: 6 sc into a magic ring. (6)
Rnd 2: inc around. (12)
Rnd 3: sc in next st, inc around. (18)
Rnd 4–6: sc around. (18)
Rnd 7: sc in next 2 sts, dec around. (12)
Rnd 8–13: sc around. (12)
Stuff the leg lightly.
FO and leave a long sewing tail.
Make the second leg.
Position both legs evenly underneath the body.
Sew them securely into place.
Step 5: Crochet the Black Shoes
Use black yarn.
Rnd 1: 6 sc into a magic ring. (6)
Rnd 2: inc around. (12)
Rnd 3: sc in next st, inc around. (18)
Rnd 4: sc around. (18)
Rnd 5: sc in next 4 sts, dec around. (15)
Rnd 6–7: sc around. (15)
FO and leave a sewing tail.
Stuff the toe area lightly.
Sew one shoe onto the bottom of each leg.
For the Mary Jane style shown in the reference, add a thin black yarn strap across the top of each shoe.
Step 6: Crochet the Arms
Make two arms using cream yarn.
Rnd 1: 6 sc into a magic ring. (6)
Rnd 2: inc around. (12)
Rnd 3–5: sc around. (12)
Rnd 6: sc in next 2 sts, dec around. (9)
Rnd 7–13: sc around. (9)
Add a small amount of stuffing.
FO and leave a long sewing tail.
Sew the arms onto the sides of the body.
Position them slightly forward if you want the doll to hold the tambourine.
Step 7: Crochet the Blouse
The blouse is worked separately and placed over the upper body.
Use white yarn.
Chain approximately 24 stitches.
Row 1: sc across. (23)
Row 2: ch 1, sc across. (23)
Row 3: ch 1, inc in first st, sc across, inc in last st. (25)
Row 4–7: sc across. (25)
FO.
For the neckline, attach white yarn around the top edge and work a round of sc.
Add a narrow green stripe around the neckline.
Add a narrow red stripe underneath the green stripe.
This creates the Italian-inspired tricolor detailing shown in the reference.
Step 8: Add the Blouse Sleeves
Attach white yarn to one side of the blouse.
Work:
Rnd 1: sc around the arm opening.
Rnd 2: sc around.
Rnd 3: inc evenly around.
Rnd 4: sc around.
Finish with a small green or red border.
Repeat for the second sleeve.
Keep the sleeves slightly loose so the arms can move naturally.
Step 9: Crochet the Green Skirt
Use green yarn.
The skirt is worked from the waist downward.
Attach green yarn around the doll’s waist.
Rnd 1: sc evenly around. (approximately 30 sts)
Rnd 2: sc around. (30)
Rnd 3: inc every 5th stitch. (36)
Rnd 4–6: sc around. (36)
Rnd 7: inc every 6th stitch. (42)
Rnd 8–11: sc around. (42)
Rnd 12: inc evenly around. (48)
Rnd 13–16: sc around. (48)
Rnd 17: inc evenly around. (54)
Rnd 18–20: sc around. (54)
FO.
The skirt should flare gently toward the bottom.
Step 10: Create the Tricolor Skirt Border
Use white yarn.
Attach yarn around the bottom edge of the green skirt.
Work one round of sc.
FO.
Change to red yarn.
Work another round of sc directly underneath or above the white stripe.
For a more decorative finish, add small repeating green, white, and red sections around the lower edge.
You can also add a row of tiny yellow stitches to create a decorative floral effect.
Step 11: Add the Red Waist Sash
Use red yarn.
Chain approximately 35–40 stitches.
Work one row of sc.
FO.
Wrap the sash around the doll’s waist and tie it slightly to one side.
Leave two yarn ends hanging down.
Add small yellow beads or crocheted balls to the ends for decoration.
Step 12: Crochet the Curly Hair
Use dark brown yarn.
The reference design has long, curly hair, so the hair can be created with individual yarn strands or crochet curls.
Cut multiple strands of brown yarn approximately 10–14 inches long.
Fold each strand in half.
Attach the folded strands around the head using a crochet hook.
Cover the back and sides of the head.
Leave the facial area open.
For thicker hair, add additional strands around the crown.
Step 13: Create the Curly Texture
To make the hair appear curly, separate the strands into small sections.
Twist each section tightly.
Allow the yarn to naturally coil.
Alternatively, crochet individual curls:
Chain 20.
Work 2 sc into each chain across.
The strip will naturally curl.
FO and sew the curl onto the head.
Repeat until you have the desired amount of curls.
This method creates a more controlled hairstyle and is especially useful for amigurumi dolls.
Step 14: Crochet the Italian-Inspired Hat
Use beige or straw-colored yarn.
Rnd 1: 6 sc into a magic ring. (6)
Rnd 2: inc around. (12)
Rnd 3: sc in next st, inc around. (18)
Rnd 4: sc in next 2 sts, inc around. (24)
Rnd 5: sc in next 3 sts, inc around. (30)
Rnd 6: sc in next 4 sts, inc around. (36)
Rnd 7: sc in next 5 sts, inc around. (42)
Rnd 8: sc in next 6 sts, inc around. (48)
Rnd 9–13: sc around. (48)
Begin shaping the brim.
Rnd 14: sc in next 3 sts, inc in next st around. (60)
Rnd 15: sc in next 4 sts, inc in next st around. (72)
Rnd 16: sc around. (72)
Rnd 17: sc in next 5 sts, inc in next st around. (84)
Rnd 18: sc around. (84)
Rnd 19: sl st around.
FO and weave in the end.
The hat should have a gently curved crown and wide brim.
Step 15: Add the Green, White, and Red Hat Band
Use green yarn.
Chain enough stitches to fit around the crown of the hat.
Work one or two rows of sc.
Attach a narrow white strip underneath.
Add a narrow red strip next to the white strip.
Wrap the finished band around the hat and sew the ends together.
Step 16: Add the Hat Decorations
For the decorative detail shown on the hat, create tiny flowers and leaves.
For a small flower:
Make a magic ring.
Work 5 groups of:
sl st, ch 2, 2 dc, ch 2, sl st.
Pull the ring closed.
FO and sew the flower onto the hat.
Use yellow yarn to create tiny berries or small decorative balls.
Add a few green leaves around the flowers.
Position the decoration on one side of the hat rather than directly in the center.
Step 17: Make the Mini Tambourine
The miniature tambourine is an optional accessory but adds character to the finished Italian-inspired doll.
Use a small lightweight embroidery hoop or plastic ring.
Wrap the ring completely with white, green, or beige yarn.
Add a thin red yarn stripe around part of the ring.
Create a small handle using several tightly wrapped strands of yarn.
Attach the handle securely to the bottom of the ring.
For extra detail, add tiny bells around the outside.
If the accessory will be used by a young child, avoid small detachable bells and beads.
Step 18: Add the Tricolor Ribbon
Cut three small lengths of ribbon or yarn in green, white, and red.
Tie them together.
Attach the ribbon to the tambourine.
Trim the ends into neat points.
You can also attach the ribbon to the doll’s waist as an alternative accessory.
Step 19: Add Small Gold Earrings
Use tiny gold-colored beads, embroidery, or miniature crocheted rings.
Attach one to each side of the doll’s head near the ears.
If making the doll for a small child, embroidered gold-colored details are safer than beads.
Step 20: Assemble the Italian Amigurumi Doll
Before sewing everything permanently, arrange all pieces on the doll.
Attach the legs to the bottom of the body.
Secure the arms to both sides.
Attach the head to the neck.
Put the blouse over the body.
Position the green skirt around the waist.
Attach the red sash.
Place the curly hair around the head.
Position the hat.
Add the flowers and leaves.
Finally, place the tambourine in one hand.
Check the doll from the front and sides to make sure everything is balanced.
Step 21: Finishing Details
Use a yarn needle to hide all loose yarn ends.
Adjust the stuffing inside the head and body.
Shape the skirt so that it flares naturally.
Separate and arrange the curls.
Straighten the hat brim.
Adjust the facial expression if necessary.
Check every sewn component carefully.
Your Italian Amigurumi Doll is now finished.
Italian Amigurumi Doll Color Palette
Traditional Italian-Inspired Colors
Green
White
Red
Cream
Brown
Black
For a softer vintage look, use:
Sage green
Ivory
Terracotta red
Warm beige
Dark brown
For a more colorful Mediterranean style, add:
Mustard yellow
Lemon yellow
Olive green
Coral
Warm orange
Tips for Making the Doll
Use a smaller crochet hook than you would normally use with the selected yarn to create firm amigurumi stitches.
Keep your tension consistent throughout the head and body.
Stuff the doll gradually so the shape remains smooth.
Use pins to position the arms, legs, hair, clothing, and accessories before sewing.
Count your stitches at the end of every round.
When shaping amigurumi, increases add stitches while decreases reduce the stitch count and create the rounded shape of the doll.
For a cleaner finish, use invisible decreases where appropriate.
Weave yarn tails securely through several stitches before trimming them.
How to Customize the Italian Doll
This pattern can easily be adapted into different Italian-inspired characters.
Change the hair color to black, blonde, auburn, or dark brown.
Make the hair short, curly, wavy, or long.
Change the dress colors.
Add a small crochet handbag.
Replace the tambourine with a miniature flower basket.
Add a tiny scarf.
Make a different hat.
Create a matching boy doll using the same basic head and body construction.
You can also create an entire Mediterranean-inspired crochet doll collection by changing the clothing and accessories.
Frequently Asked Questions
Is this Italian Amigurumi Doll suitable for beginners?
The basic head, body, arms, and legs use simple amigurumi techniques. However, the detailed clothing, curly hair, hat, and accessories make the complete project more suitable for an intermediate crocheter.
What yarn should I use?
A smooth worsted-weight or DK-weight yarn works well. Cotton and cotton-blend yarns are particularly useful when you want clearly defined crochet stitches.
What crochet hook size should I use?
A 3.0 mm hook is a good starting point for medium-weight yarn. Adjust the hook according to your yarn and tension.
How tall will the finished doll be?
With the suggested materials, the doll should be approximately 10–12 inches tall. Different yarn weights and hook sizes will change the finished size.
Can I make the doll smaller?
Yes. Use DK or sport-weight yarn with a smaller hook and reduce the number of plain rounds in the head, body, arms, and legs.
Can I make the doll larger?
Yes. Use thicker yarn and a larger hook. You can also add additional increase and plain rounds to the main body sections.
Can I embroider the eyes?
Yes. Embroidered eyes are recommended when making the doll for young children because there are no detachable plastic parts.
Is the tambourine necessary?
No. It is an optional accessory. The doll looks complete without it, but the tambourine adds an attractive finishing detail.
SEO Information
SEO Title:
Italian Amigurumi Doll – Free Crochet Pattern
Meta Description:
Learn how to crochet an Italian Amigurumi Doll with curly hair, traditional green white and red dress, decorated hat, shoes, and tambourine with this step-by-step pattern.
Focus Keyword:
Italian Amigurumi Doll
Secondary Keywords:
Italian crochet doll
Italian amigurumi crochet pattern
Italian doll crochet pattern
amigurumi girl doll
crochet doll pattern
free amigurumi doll pattern
crochet doll with curly hair
crochet doll with dress
Italian-inspired crochet doll
crochet doll with hat
Suggested URL Slug:
italian-amigurumi-doll-free-crochet-pattern
Featured Image Filename:
italian-amigurumi-doll-free-crochet-pattern.jpg
Featured Image Alt Text:
Italian amigurumi doll with curly brown hair, decorated hat, green white and red crochet dress, black shoes, and tambourine
Image Title:
Italian Amigurumi Doll Free Crochet Pattern
Image Caption:
A handmade Italian-inspired amigurumi doll featuring curly crochet hair, a decorated sun hat, colorful dress, black shoes, and a miniature tambourine.
Final Thoughts
This Italian Amigurumi Doll is a detailed crochet project that combines classic amigurumi techniques with colorful clothing and charming accessories. The green, white, and red dress, curly brown hair, decorated hat, and miniature tambourine create a distinctive Italian-inspired character.
Once you understand the basic doll construction, you can easily create different versions by changing the hairstyle, clothing colors, hat decorations, and accessories. The same body pattern can become the foundation for an entire collection of handmade crochet dolls.

