
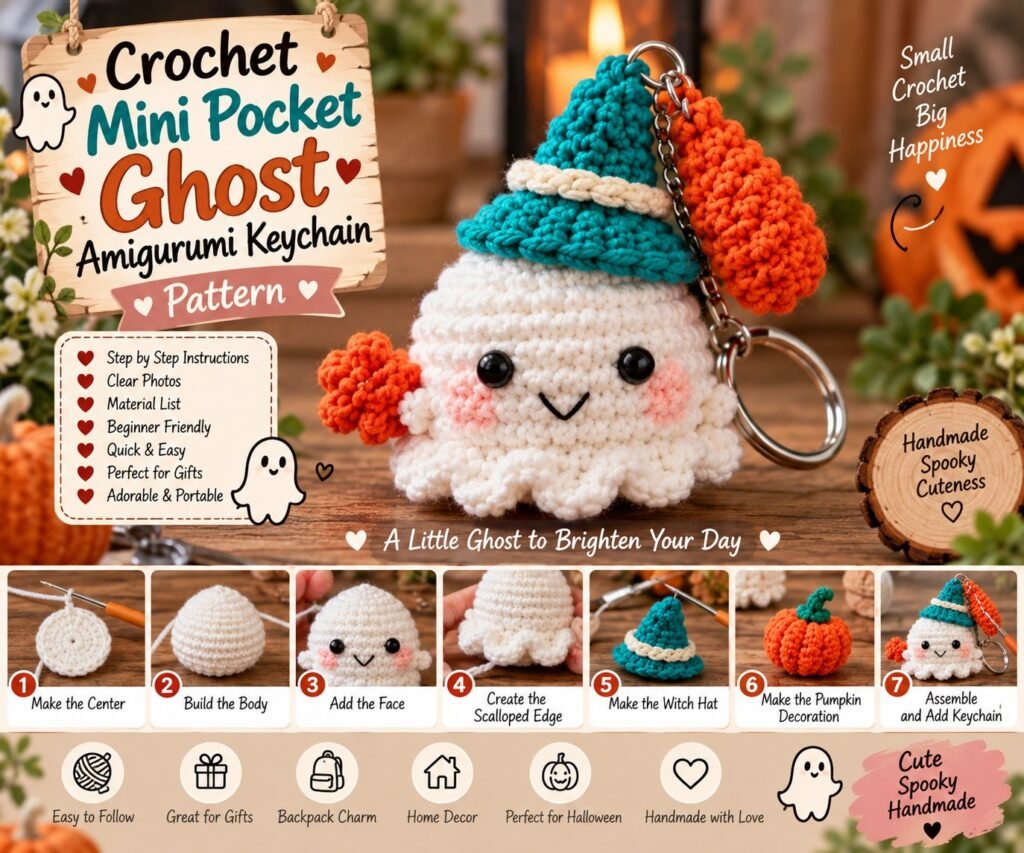
This Crochet Mini Pocket Ghost Amigurumi Keychain is a cute and beginner-friendly Halloween crochet project that combines a tiny ghost with a colorful little witch hat and playful pumpkin-inspired accessories. Its small size makes it perfect for keychains, backpacks, purses, Halloween gifts, party favors, and handmade decorations.
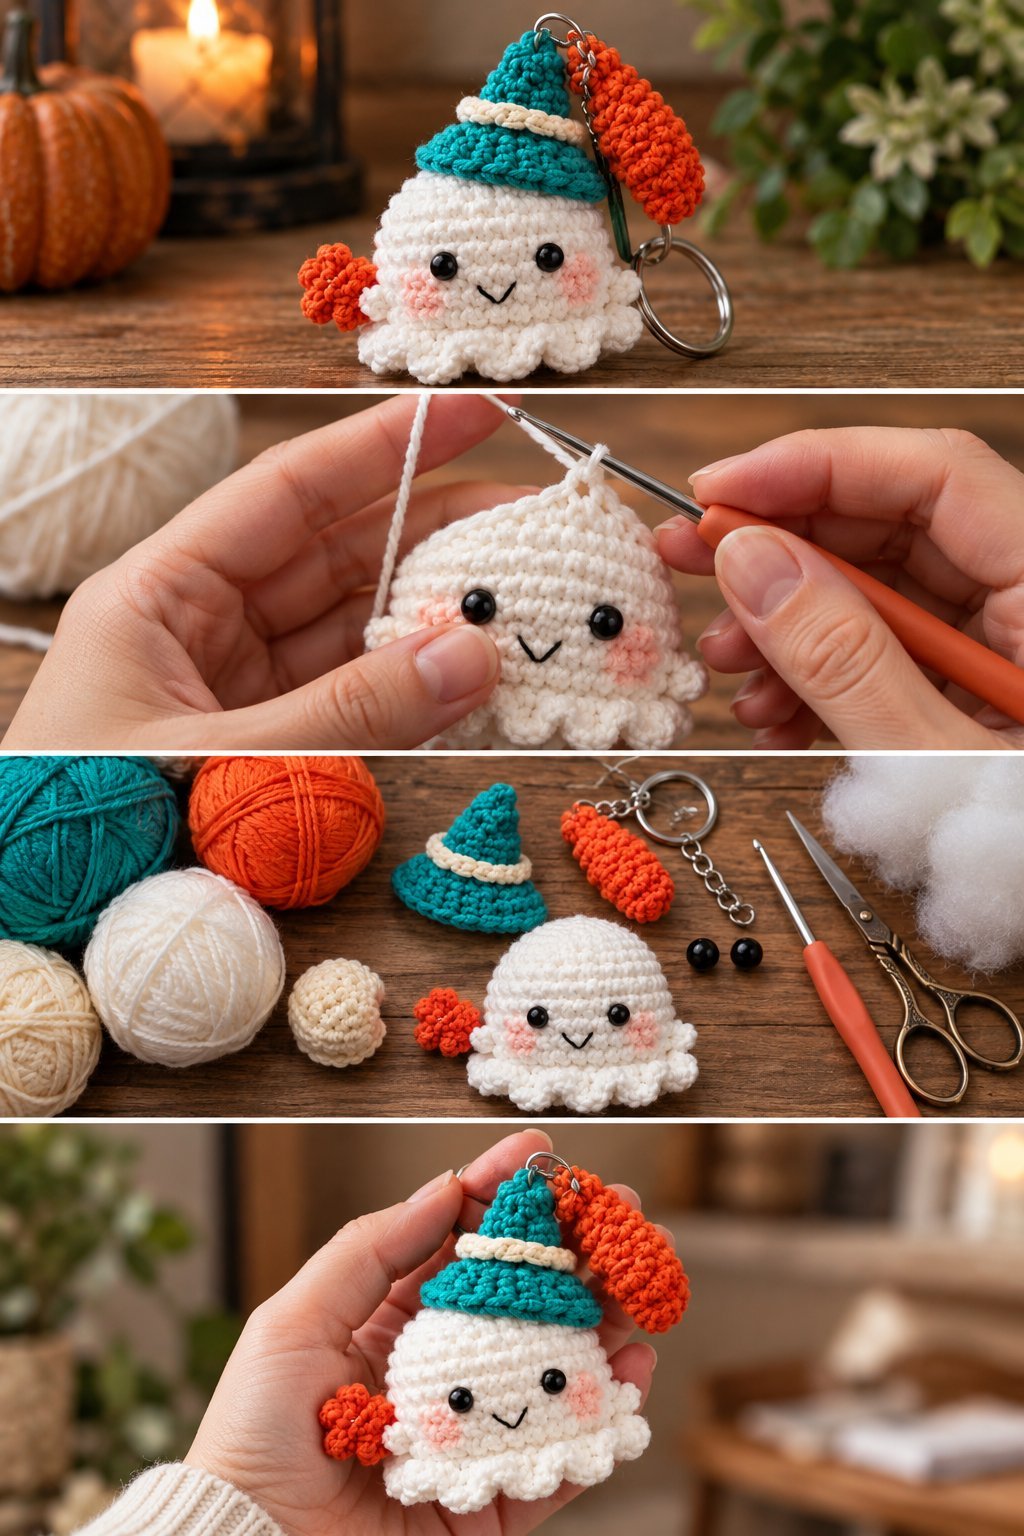
The finished ghost features a soft white body, tiny black safety eyes, embroidered facial details, rosy cheeks, a scalloped bottom edge, and a removable-looking pointed hat design in turquoise and orange. You can easily change the colors to match your favorite Halloween palette.
This pattern is written in US crochet terminology.
CROCHET MINI POCKET GHOST KEYCHAIN OVERVIEW
The ghost is crocheted in a compact amigurumi style using simple stitches worked in rounds. The body is stuffed lightly and finished with a scalloped lower edge to create the cute floating-ghost appearance.
The hat is crocheted separately and attached to the top of the ghost. A small orange crochet pumpkin or decorative piece can be added beside the hat for extra Halloween character.
The keychain hardware is attached securely through the top of the finished piece.
MATERIALS NEEDED
White worsted-weight or DK yarn for the ghost
Turquoise or teal yarn for the hat
Orange yarn for the pumpkin and hat decoration
Small amount of cream yarn for the hat band
Black embroidery thread or 6 mm safety eyes
Pink yarn or embroidery thread for the cheeks
Small amount of black embroidery thread for the mouth
3 mm crochet hook
Tapestry needle
Polyester fiberfill stuffing
Small scissors
Stitch marker
Keychain ring
Small lobster clasp or swivel clasp
Optional small metal chain
CROCHET ABBREVIATIONS
MR – Magic Ring
SC – Single Crochet
INC – Increase
DEC – Invisible Decrease
SL ST – Slip Stitch
CH – Chain
FLO – Front Loop Only
BLO – Back Loop Only
ST – Stitch
STS – Stitches
SKILL LEVEL
Beginner to intermediate.
The main ghost uses basic amigurumi techniques, including single crochet, increases, decreases, stuffing, embroidery, and simple color changes.
FINISHED SIZE
Using DK or worsted-weight yarn with a 3 mm hook, the finished ghost will be approximately 7–9 cm tall without the keychain hardware.
The final size can vary depending on your yarn weight, hook size, and crochet tension.
IMPORTANT PATTERN NOTES
Work the ghost tightly so that the stuffing does not show through the stitches.
Use a smaller crochet hook than you would normally use for the same yarn if your stitches are loose.
Place a stitch marker at the beginning of each round.
Stuff gradually rather than adding all the stuffing at the end.
Do not overstuff the lower part of the ghost because the scalloped edge should remain soft and rounded.
The pattern below is an original adaptable construction based on the supplied reference image. The photograph does not provide the exact original stitch counts, so measurements and stitch counts may vary slightly from the pictured piece.
STEP-BY-STEP CROCHET GHOST PATTERN
STEP 1 — CROCHET THE GHOST HEAD
Begin with white yarn.
Round 1:
Make a magic ring.
Work 6 SC into the ring.
Pull the ring closed.
6 STS
Round 2:
Work 2 SC in each stitch around.
12 STS
Round 3:
SC in the first stitch.
INC in the next stitch.
Repeat around.
18 STS
Round 4:
SC in the next 2 stitches.
INC in the next stitch.
Repeat around.
24 STS
Round 5:
SC in the next 3 stitches.
INC in the next stitch.
Repeat around.
30 STS
Continue crocheting evenly around for approximately 4–5 rounds until the ghost reaches the desired head height.
The piece should begin looking like a small rounded ghost body.
STEP 2 — SHAPE THE GHOST BODY
Continue using white yarn.
Work several rounds of SC without increasing.
Keep the sides relatively straight.
At this stage, begin adding small amounts of stuffing.
Gently push the stuffing into the center of the body using the back of your crochet hook or a stuffing tool.
Do not pack the stuffing too tightly.
The body should remain soft and slightly squishy.
STEP 3 — CREATE THE FACE
Before closing the body, attach the safety eyes.
Position the eyes approximately 2–3 rounds apart, depending on the size of your ghost.
For an embroidered version, use black embroidery thread to create two small round eyes.
For the cute expression shown in the reference, embroider a small curved mouth underneath the eyes.
Use pink yarn or embroidery thread to add two small rosy cheeks.
Keep the cheeks symmetrical for a polished appearance.
STEP 4 — SHAPE THE BOTTOM
Begin decreasing gradually.
Round:
SC in the next 3 stitches.
DEC in the next stitch.
Repeat around.
Continue with additional decrease rounds until the opening becomes small enough to close.
Add a little more stuffing if necessary before completely closing the body.
Do not overfill the bottom.
Fasten off and weave in the yarn tail securely.
STEP 5 — MAKE THE GHOST SCALLOPED EDGE
To create the adorable wavy bottom shown in the reference, attach white yarn around the lower edge of the ghost.
Work a series of small shell-like sections.
A simple version can be made by working:
SL ST into the next stitch.
CH 2.
Work 3 DC into the same stitch.
SL ST into the next stitch.
Repeat around the lower edge.
This creates small rounded scallops around the ghost.
For a more delicate finish, use 2 DC instead of 3 DC.
Adjust the number of stitches according to the size of your ghost.
Fasten off and weave in the ends.
STEP 6 — CROCHET THE MINI WITCH HAT
Use turquoise or teal yarn.
Start with a magic ring.
Round 1:
Work 6 SC into the magic ring.
6 STS
Round 2:
SC around.
6 STS
Round 3:
INC around.
12 STS
Round 4:
SC around.
12 STS
Round 5:
SC in the next stitch.
INC in the next stitch.
Repeat around.
18 STS
Continue increasing gradually every few rounds until the bottom of the hat is wide enough to sit comfortably on the ghost’s head.
Once the desired height is reached, stop increasing.
Continue working several rounds of SC to create the pointed hat shape.
Fasten off and leave a long tail for sewing.
STEP 7 — ADD THE HAT BAND
Use cream yarn.
Attach the yarn around the lower portion of the turquoise hat.
Work one or two rounds of SC.
For a thicker decorative band, work a second round.
Keep the band slightly raised from the main hat so that the color contrast is visible.
Fasten off and weave in the ends.
STEP 8 — CROCHET THE ORANGE HAT DECORATION
Use orange yarn.
Create a small narrow crochet piece using SC stitches worked in short rows or rounds.
For a pumpkin-inspired shape, start with a small magic ring and increase to approximately 12–18 stitches.
Work several rounds evenly.
Decrease slightly toward the top.
Add a small amount of stuffing.
Close the opening.
Use orange yarn to make several vertical stitches around the piece to create pumpkin-like sections.
Attach the small orange decoration to the side of the hat.
STEP 9 — ADD THE SMALL ORANGE GHOST ACCESSORY
The reference also shows a small orange decoration beside the ghost.
This can be made as a tiny pumpkin.
Make a magic ring with orange yarn.
Work 6 SC into the ring.
Increase to 12 stitches.
Work 2–3 rounds of SC.
Decrease gradually.
Add a tiny amount of stuffing.
Close the opening.
Use orange yarn to create subtle pumpkin ridges.
Attach a small green or turquoise stem if desired.
Sew the pumpkin securely to the side of the ghost or near the hat.
STEP 10 — ATTACH THE HAT
Place the finished turquoise hat on top of the ghost.
Position it slightly toward one side for a playful appearance.
Using the long yarn tail and a tapestry needle, sew the hat securely to the top of the ghost.
Make several stitches around the base of the hat.
Check that the hat does not wobble or fall off.
Weave the remaining yarn securely inside the ghost.
STEP 11 — ADD THE KEYCHAIN HARDWARE
Choose a strong point at the top of the ghost.
A small crochet loop can be created by attaching yarn to the top of the hat.
Chain approximately 6–8 stitches.
Slip stitch back into the starting point to create a small loop.
Alternatively, sew a small metal keychain loop directly into the top of the hat.
Attach the metal keyring or lobster clasp.
Make several passes with strong yarn through the crochet stitches and hardware.
Secure the yarn firmly on the inside.
This step is especially important because the keychain will be pulled and handled regularly.
STEP 12 — FINAL DETAILS
Check the position of the eyes.
Make sure the mouth is centered.
Adjust the cheeks if necessary.
Shape the ghost gently with your fingers.
Fluff the stuffing evenly.
Straighten the hat.
Check all sewn-on decorations.
Trim any visible yarn tails.
Your Crochet Mini Pocket Ghost Amigurumi Keychain is now finished.
COLOR IDEAS
Classic Halloween
White ghost
Black facial details
Orange pumpkin
Black or purple hat
Cute Pastel Halloween
White ghost
Turquoise hat
Peach or orange accessories
Cream hat band
Pink cheeks
Autumn Halloween
Cream ghost
Burnt orange hat
Rust-colored pumpkin
Brown or mustard details
Traditional Halloween
White ghost
Purple hat
Orange pumpkin
Black facial details
TIPS FOR MAKING THE KEYCHAIN
Use tight stitches throughout the amigurumi body.
Choose safety eyes appropriate for the yarn and finished size.
If making the keychain for a young child, embroidered eyes are a safer alternative to plastic safety eyes.
Stuff the body lightly so it remains soft.
Use a strong yarn tail when attaching the keychain hardware.
Double-check every sewn connection before using the finished keychain.
For a more polished finish, hide all yarn tails inside the amigurumi.
HOW TO CUSTOMIZE YOUR GHOST
You can easily turn this basic ghost into several different Halloween characters.
Try adding a purple witch hat.
Replace the hat with a tiny black wizard hat.
Add embroidered eyelashes for a feminine ghost.
Make the ghost completely white for a minimalist design.
Add a tiny crochet broom.
Attach a miniature pumpkin.
Create different facial expressions.
Use glow-in-the-dark yarn for a spooky effect.
Make several ghosts in different colors and attach them to a Halloween garland.
HOW TO MAKE A SMALLER GHOST
For a miniature keychain, use lightweight yarn and a 2–2.5 mm crochet hook.
Start with only 6 stitches in the magic ring and use fewer increase rounds.
Keep the body short and reduce earlier.
A smaller ghost works particularly well as a backpack charm or zipper pull.
HOW TO MAKE A LARGER GHOST
For a larger plushie, use chunky yarn and a larger crochet hook.
Increase the number of rounds before beginning the decreases.
Use proportionally larger safety eyes.
The same construction can become a small plush toy instead of a keychain.
COMMON CROCHET MISTAKES
If the stuffing is visible, your crochet hook may be too large or your stitches may be too loose.
If the ghost looks too flat, add slightly more stuffing before closing.
If the body becomes oval instead of round, check that your increases are evenly distributed.
If the hat does not fit, add or remove one increase round.
If the scalloped edge curls too much, reduce the number of stitches in each shell.
If the keychain feels loose, reinforce the hardware attachment with additional stitches.
CARE INSTRUCTIONS
Gently spot clean the finished ghost using mild soap and cool water.
Do not use harsh bleach.
Avoid placing the finished amigurumi in a hot dryer.
Allow it to air dry completely.
Keep metal keychain hardware dry whenever possible to prevent rust or discoloration.
FREQUENTLY ASKED QUESTIONS
Is this crochet ghost suitable for beginners?
Yes. The main body uses basic amigurumi techniques such as single crochet, increases, decreases, stuffing, and simple embroidery.
What yarn is best for this ghost keychain?
Cotton or cotton-blend yarn works particularly well because it creates defined stitches and holds the small shape nicely.
Can I use different colors?
Yes. The hat, pumpkin, cheeks, and ghost body can all be customized.
Can I make this without safety eyes?
Yes. Embroidered eyes are an excellent alternative, especially when making the keychain for children.
Can I sell finished ghost keychains?
If you make the item yourself from this original/adaptable pattern, you can generally sell your finished handmade pieces. Do not redistribute or sell the written pattern itself as your own.
Can this pattern be made into a plush toy?
Yes. Simply use thicker yarn, a larger hook, and add additional body rounds to create a larger version.
SEO INFORMATION
SEO Title: Crochet Mini Pocket Ghost Amigurumi Keychain Pattern
Meta Description: Make a cute Crochet Mini Pocket Ghost Amigurumi Keychain with this easy step-by-step pattern. Learn how to crochet the ghost, witch hat, pumpkin details, and keychain loop.
Focus Keyword: Crochet Mini Pocket Ghost Amigurumi Keychain
Secondary Keywords:
Crochet Ghost Keychain Pattern
Mini Ghost Amigurumi Pattern
Halloween Crochet Keychain
Ghost Amigurumi Crochet Pattern
Crochet Halloween Keychain
Mini Crochet Ghost
Easy Amigurumi Keychain
Crochet Ghost Pattern
Halloween Amigurumi
Cute Crochet Keychain
Suggested URL Slug:
crochet-mini-pocket-ghost-amigurumi-keychain-pattern
IMAGE SEO
Featured Image Filename:
crochet-mini-pocket-ghost-amigurumi-keychain-pattern.jpg
Alt Text:
Crochet Mini Pocket Ghost Amigurumi Keychain with colorful witch hat
Image Title:
Crochet Mini Pocket Ghost Amigurumi Keychain Pattern
Caption:
Cute handmade mini ghost amigurumi keychain with a colorful crochet witch hat and Halloween-inspired details.
PINTEREST SEO TITLE
Crochet Mini Pocket Ghost Keychain Pattern – Cute Halloween Amigurumi
PINTEREST DESCRIPTION
Learn how to make a cute Crochet Mini Pocket Ghost Amigurumi Keychain with a tiny colorful witch hat, pumpkin details, rosy cheeks, and an adorable ghost face. This beginner-friendly Halloween crochet project is perfect for keychains, backpacks, purses, gifts, party favors, and seasonal handmade decorations. Save this easy crochet ghost pattern for your next Halloween project.
RECOMMENDED PIN KEYWORDS
Crochet Ghost Pattern, Ghost Amigurumi, Halloween Crochet, Crochet Keychain, Mini Amigurumi, Halloween Keychain, Crochet Halloween Ideas, Cute Crochet Patterns, Amigurumi Keychain, Easy Crochet Project, Crochet Ghost Keychain, Handmade Halloween Decor, Crochet Gifts

