
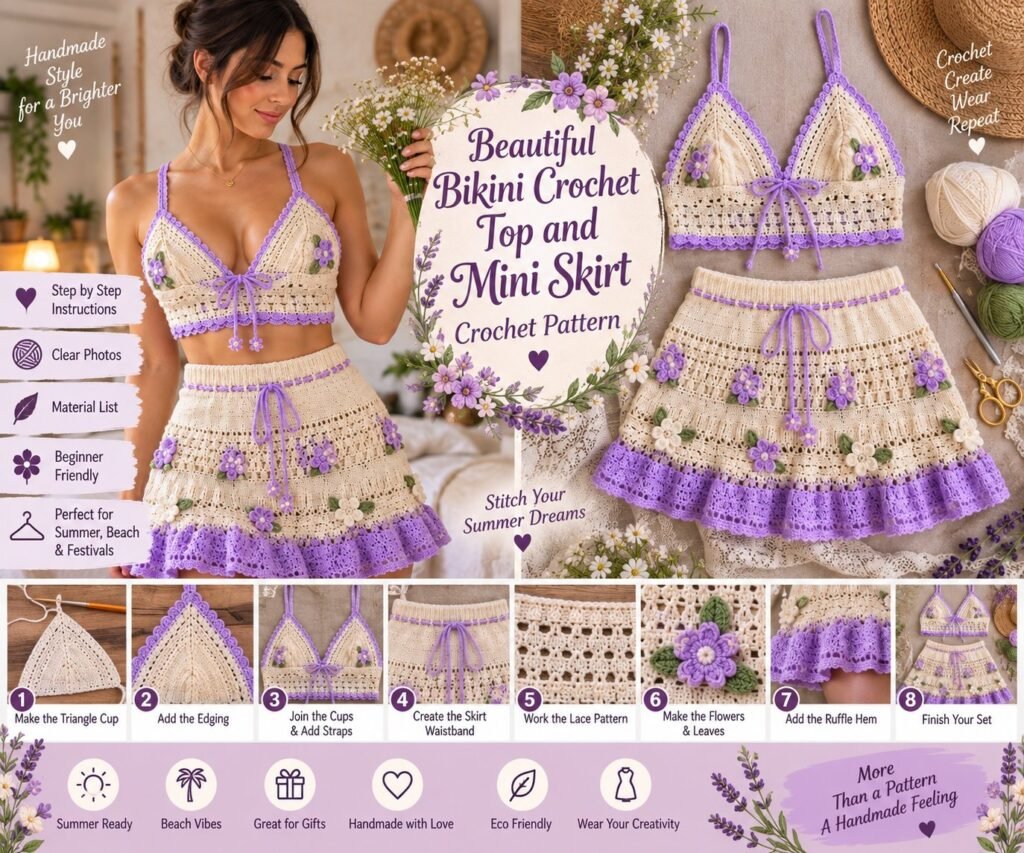
Create a beautiful handmade crochet bikini top and mini skirt set with a romantic cottagecore aesthetic, delicate lace details, soft cream yarn, lavender edging, and tiny crochet flowers.
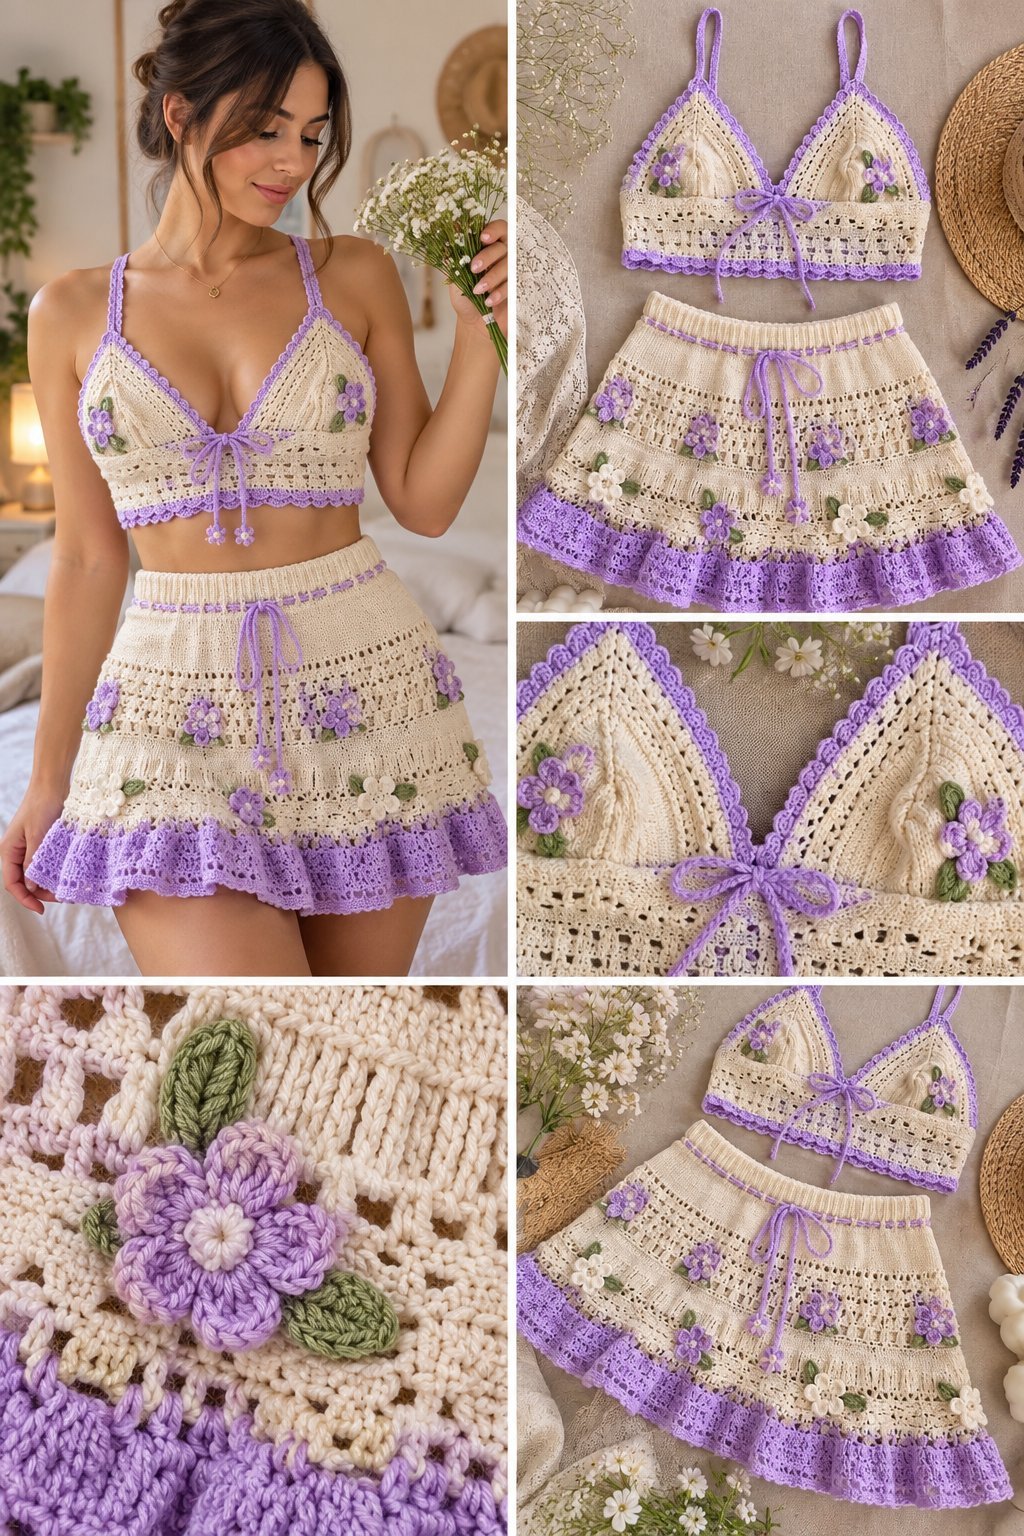
This crochet two-piece set is perfect for summer vacations, beach days, festivals, poolside outfits, photo sessions, and relaxed warm-weather styling. The matching triangle bikini top features adjustable straps, a center tie, decorative floral motifs, and a delicate scalloped border. The mini skirt has a comfortable drawstring waist, open lace sections, floral details, and a pretty ruffled hem.
This tutorial uses US crochet terminology and is designed as an adaptable pattern based on the supplied reference image. Because the photograph does not provide the original designer’s stitch counts or written pattern, the measurements below are a customizable construction rather than a claim to reproduce the exact original pattern.
PROJECT OVERVIEW
The set consists of two main pieces:
- A triangle crochet bikini top
- A matching crochet mini skirt
The main color is a warm ivory or cream, while lavender is used for the edging, decorative details, flowers, and accents. Small green crochet leaves complete the floral design.
The top can be adjusted by changing the number of rows in each triangle and the length of the straps.
The skirt can be adjusted by changing the waist circumference and the number of lace pattern repeats.
MATERIALS NEEDED
Lightweight cotton or cotton-blend yarn in cream or ivory
Small amounts of lavender yarn
Small amount of green yarn for leaves
Small amount of white or cream yarn for flower centers
2.5–3 mm crochet hook
Tapestry needle
Scissors
Stitch markers
Flexible measuring tape
Optional thin elastic for the skirt waistband
Optional lining or swimwear fabric for the bikini top
Optional removable bra cups
RECOMMENDED YARN
Cotton is an excellent choice because it provides good stitch definition and is comfortable for warm-weather clothing.
For a lighter summer garment, choose a sport-weight or fine DK cotton yarn.
For a firmer bikini top, use tightly spun cotton rather than a very soft, stretchy yarn.
CROCHET ABBREVIATIONS
CH – Chain
SC – Single Crochet
HDC – Half Double Crochet
DC – Double Crochet
SL ST – Slip Stitch
INC – Increase
DEC – Decrease
ST – Stitch
STS – Stitches
SK – Skip
SP – Space
SKILL LEVEL
Intermediate beginner to intermediate.
The individual techniques are relatively simple, but making fitted crochet clothing requires careful measuring and checking your gauge.
IMPORTANT FIT NOTE
A crochet bikini top should be treated as a decorative or fashion garment unless it has been specifically constructed and tested as functional swimwear.
For swimming, consider adding a suitable swimwear lining and secure support. Crochet can stretch significantly when wet.
Always measure the intended wearer and adjust the pattern rather than relying only on the sample measurements.
PART 1 — CROCHET BIKINI TOP
STEP 1 — MAKE THE FIRST TRIANGLE CUP
Begin with cream yarn.
Chain 3.
Work 2 DC into the third chain from the hook.
CH 2.
Turn.
Work 2 DC into the same space.
CH 1.
Work 3 DC into the same space.
Turn.
Continue building the triangle by increasing at the center and along the outer edges.
A simple construction is:
CH 2 at the beginning of each row.
Work DC stitches across the row.
Work a center increase into the middle space.
The center increase creates the point of the triangle.
Continue until the triangle reaches the desired height.
For a smaller cup, stop earlier.
For a larger cup, add additional rows.
STEP 2 — SHAPE THE TRIANGLE
Continue working the triangle rows.
At the center point, create a consistent increase so the fabric expands evenly.
For example, a center increase can be made by working:
2 DC, CH 2, 2 DC
into the center space.
Repeat this construction on each row.
The triangle should gradually become wider toward the bottom.
Keep checking the piece against the intended bust measurement.
STEP 3 — CREATE THE LACEWORK
Once the main triangle has reached the desired size, add an open lace section.
Work a repeating combination of:
CH 1
Skip 1 stitch
DC in the next stitch
CH 1
Skip 1 stitch
Repeat across the row.
On the next row, work into the chain spaces.
This creates the delicate openwork visible in the reference.
Repeat the lace rows while maintaining the triangle shape.
STEP 4 — ADD THE LAVENDER BORDER
Attach lavender yarn around the outer edges of the triangle.
Work SC evenly along the sides.
At the pointed section, work several stitches into the center point so the border does not pull or curl.
For a scalloped finish, use:
SL ST
Skip 1 stitch
5 DC in the next stitch
Skip 1 stitch
SL ST in the next stitch
Repeat around the edge.
This produces the delicate lavender scalloped trim shown in the reference.
STEP 5 — MAKE THE SECOND CUP
Repeat the same triangle construction for the second cup.
Try to keep the stitch count and number of rows identical.
Place both cups side by side and compare their measurements before continuing.
If one cup is larger than the other, add or remove a row before adding the final edging.
STEP 6 — JOIN THE BIKINI CUPS
Place the two triangle cups next to each other.
The inner points should meet near the center of the bust.
Using cream or lavender yarn, join the cups with several secure stitches.
For a decorative center, create a small chain section between the cups.
A lavender ribbon or crochet cord can then be threaded through this area to create the adjustable center tie.
STEP 7 — MAKE THE SHOULDER STRAPS
Attach lavender yarn to the upper corner of each triangle.
Chain approximately 35–45 cm, depending on the desired strap length.
Work SC back across the chain.
For a thicker strap, work another row of SC.
Fasten off.
Repeat for the second shoulder strap.
The exact length should be determined by measuring the wearer.
STEP 8 — MAKE THE BACK TIES
Attach yarn to the outer bottom corner of each cup.
Create long crochet chains that can be tied around the back.
For stronger ties, work one or two rows of SC across the chain.
Make sure both ties are long enough to adjust comfortably.
The back ties allow the top to fit different body shapes.
PART 2 — CROCHET FLOWER DECORATIONS
The floral details give this set its romantic handmade appearance.
STEP 9 — MAKE A SMALL CROCHET FLOWER
Using lavender yarn:
Make a magic ring.
CH 1.
Work 5 SC into the ring.
SL ST to close.
For the petals, attach the lighter yarn.
Work:
SL ST into the next stitch.
CH 2.
Work 3 DC into the same stitch.
CH 2.
SL ST into the same stitch.
Repeat around.
Pull the center gently closed.
Sew a small cream center into the middle.
STEP 10 — ADD THE LEAVES
Use green yarn.
CH 6.
Beginning in the second chain from the hook, work:
SL ST
SC
HDC
DC
SL ST
Fasten off.
Shape the leaf with your fingers.
Make several leaves in different sizes.
Sew the leaves underneath the crochet flowers.
STEP 11 — ATTACH THE FLOWERS TO THE TOP
Position the flowers near the outer portions of each triangle.
Sew them securely using a tapestry needle.
Add one or two small leaves next to each flower.
Avoid placing too many heavy decorations directly over the bust area because they can change how the fabric hangs.
PART 3 — CROCHET MINI SKIRT
STEP 12 — MEASURE THE WAIST
Measure around the natural waist.
Decide how much ease you want.
For a comfortable skirt, make the waistband slightly adjustable rather than creating a completely fixed measurement.
The skirt in the reference has a drawstring-style waist, which makes it easier to customize.
STEP 13 — CREATE THE WAISTBAND
Using cream yarn, chain enough stitches to reach the desired waistband height.
Join the chain carefully without twisting it.
Work SC around.
Continue for approximately 4–6 rounds.
The waistband should be firm but comfortable.
For additional stability, you can work around a thin elastic band.
STEP 14 — CREATE THE DRAWSTRING CHANNEL
Work one round of SC.
Then create small spaces for the drawstring by working:
SC
CH 1
Skip 1 stitch
SC in the next stitch
Repeat around.
On the following round, work SC into each stitch and chain space.
This creates a channel through which the crochet drawstring can pass.
STEP 15 — MAKE THE SKIRT BODY
Begin increasing gradually around the waistband.
A simple increase pattern is:
SC in the next 4 stitches
INC in the next stitch
Repeat around.
Continue adding increases until the skirt reaches the desired hip width.
For a closer-fitting skirt, use fewer increases.
For a more flared skirt, increase more frequently.
STEP 16 — CREATE THE FIRST LACE BAND
Once the main skirt width is established, begin the openwork section.
Work:
CH 1
Skip 1 stitch
DC in the next stitch
CH 1
Skip 1 stitch
Repeat around.
On the next round, work into the chain spaces.
Continue the lace pattern for several rounds.
This creates the horizontal openwork visible throughout the reference skirt.
STEP 17 — ADD THE FLORAL MOTIFS
Make small lavender flowers using the flower instructions above.
Create green leaves.
Sew the flowers and leaves around selected areas of the skirt.
You can space the motifs evenly around the skirt or create small floral clusters.
For a more delicate appearance, alternate flowers with leaves.
STEP 18 — CREATE THE SECOND LACE SECTION
Continue working the skirt downward.
Repeat the lace pattern.
You can vary the stitch arrangement slightly to create horizontal decorative bands.
For example:
Round 1:
SC around.
Round 2:
CH 1, skip 1, DC in the next stitch, repeat.
Round 3:
SC around.
Round 4:
CH 3, skip 2, SC in the next stitch, repeat.
Repeat the desired lace structure until the skirt reaches the upper thigh.
STEP 19 — CREATE THE FLARED LOWER SKIRT
Begin adding additional increases.
Increase approximately every 6–10 stitches.
Continue for several rounds.
The lower portion should gradually become wider than the waist.
This creates the soft A-line shape visible in the reference.
Do not add too many increases at once or the skirt may become overly ruffled.
STEP 20 — MAKE THE LAVENDER RUFFLE
Attach lavender yarn around the bottom edge.
Work a round of SC.
Then increase regularly to create fullness.
For example:
SC in the next stitch.
INC in the next stitch.
Repeat around.
Continue with one or two additional rounds.
For a more dramatic ruffle, increase more frequently.
STEP 21 — ADD THE SCALLOPED HEM
For the final decorative edge, use lavender yarn.
Work:
SL ST
Skip 1 stitch
5 DC in the next stitch
Skip 1 stitch
SL ST
Repeat around the entire skirt.
This creates a pretty scalloped finish.
Fasten off and weave in all loose ends.
STEP 22 — ADD THE SKIRT DRAWSTRING
Make a long crochet cord using lavender yarn.
A simple cord can be created by chaining approximately 100–140 stitches and slip stitching back along the chain.
Adjust the length according to the waist measurement.
Thread the cord through the waistband channel.
Tie small knots or decorative crochet flowers to each end.
STEP 23 — ADD THE FINAL FLOWERS
Add additional flowers around the skirt.
The reference design uses flowers across several horizontal sections.
Try placing larger flowers toward the sides and smaller flowers around the front.
Add small green leaves between the flowers.
Secure every motif carefully.
FINISHING THE CROCHET TWO-PIECE SET
Lay the bikini top and skirt flat.
Check that both pieces have matching lavender edging.
Trim all loose yarn ends.
Weave the ends into the wrong side of the fabric.
Gently stretch the lace sections into shape.
Do not pull aggressively.
If necessary, lightly wet-block the pieces and allow them to dry completely.
FITTING AND CUSTOMIZATION
SMALLER BIKINI TOP
Use fewer triangle rows.
Use a smaller hook if your gauge is too loose.
Shorten the straps.
Reduce the width of the center section.
LARGER BIKINI TOP
Add additional triangle rows.
Continue the center increases until the desired cup depth is reached.
Lengthen the straps.
Add additional back-tie length.
HIGH-WAIST SKIRT
Add more rounds to the waistband before beginning the skirt body.
This creates additional coverage around the waist.
MINI SKIRT
Stop crocheting the main skirt body earlier.
Begin the ruffle sooner.
Keep the decorative lace bands closer together.
LONGER SKIRT
Continue the lace and mesh sections for additional rounds.
Increase gradually toward the lower portion.
You can transform the same design into a knee-length crochet skirt.
COLOR COMBINATIONS
Cream and Lavender
Cream yarn with lavender edging and purple flowers creates the soft romantic appearance shown in the reference.
Cream and Dusty Pink
Replace lavender with dusty pink for a feminine pastel look.
White and Lilac
Use bright white yarn with lilac edging for a fresh summer aesthetic.
Cream and Sage Green
Use sage green for the edging and flowers for a natural cottagecore style.
Cream and Blue
Replace lavender with soft blue for a coastal summer set.
CROCHET BIKINI TOP TIPS
Always measure the finished cup against the intended wearer.
Keep the stitches tight enough to prevent excessive stretching.
Use cotton yarn for better stitch definition.
Make the straps adjustable whenever possible.
Reinforce the center and side ties.
If the garment is intended for swimming, add appropriate swimwear lining and test the finished piece for stretch and security before use.
CROCHET SKIRT TIPS
Measure the waist before beginning.
Use a drawstring if you want an adjustable fit.
Keep the lace sections consistent for a professional appearance.
Block the finished skirt to open the lacework.
Secure every decorative flower with multiple stitches.
Do not make the lower ruffle excessively heavy.
COMMON CROCHET MISTAKES
If the bikini cups curl, check your tension and increase placement.
If the triangle becomes too wide, reduce the number of increases.
If the skirt is too tight at the hips, add more increase rounds.
If the lace looks too loose, try a smaller hook.
If the ruffle does not have enough volume, add more increases.
If the flowers look flat, add additional stitches to the petals.
If the waistband stretches too much, reinforce it with elastic.
CARE INSTRUCTIONS
Hand wash the crochet set gently in cool water.
Use a mild detergent.
Do not wring or twist the fabric.
Gently press out excess water with a towel.
Lay flat to dry.
Keep the garment away from high heat.
Store folded rather than hanging for long periods to reduce stretching.
FREQUENTLY ASKED QUESTIONS
What yarn should I use for a crochet bikini top?
A lightweight cotton or cotton-blend yarn is a practical choice for this style because it provides good stitch definition and works well for summer garments.
Can I make this crochet set in another color?
Yes. The cream and lavender combination can easily be changed to pink, blue, green, yellow, purple, or any other color palette.
Can beginners make this crochet bikini set?
The individual stitches are beginner-friendly, but creating fitted clothing requires some experience with measuring and adjusting stitch counts.
How do I make the bikini top fit correctly?
Measure the intended wearer and adjust the number of triangle rows, strap length, center connection, and back ties accordingly.
Can I wear the crochet bikini in water?
Crochet yarn can stretch and become heavier when wet. For swimming, use appropriate swimwear yarn and lining, reinforce the construction, and test the garment before wearing it in water.
Can I make the skirt longer?
Yes. Simply continue the lace and mesh sections before starting the final ruffle.
Can I make the skirt more fitted?
Yes. Use fewer increases around the hip and lower skirt sections.

