
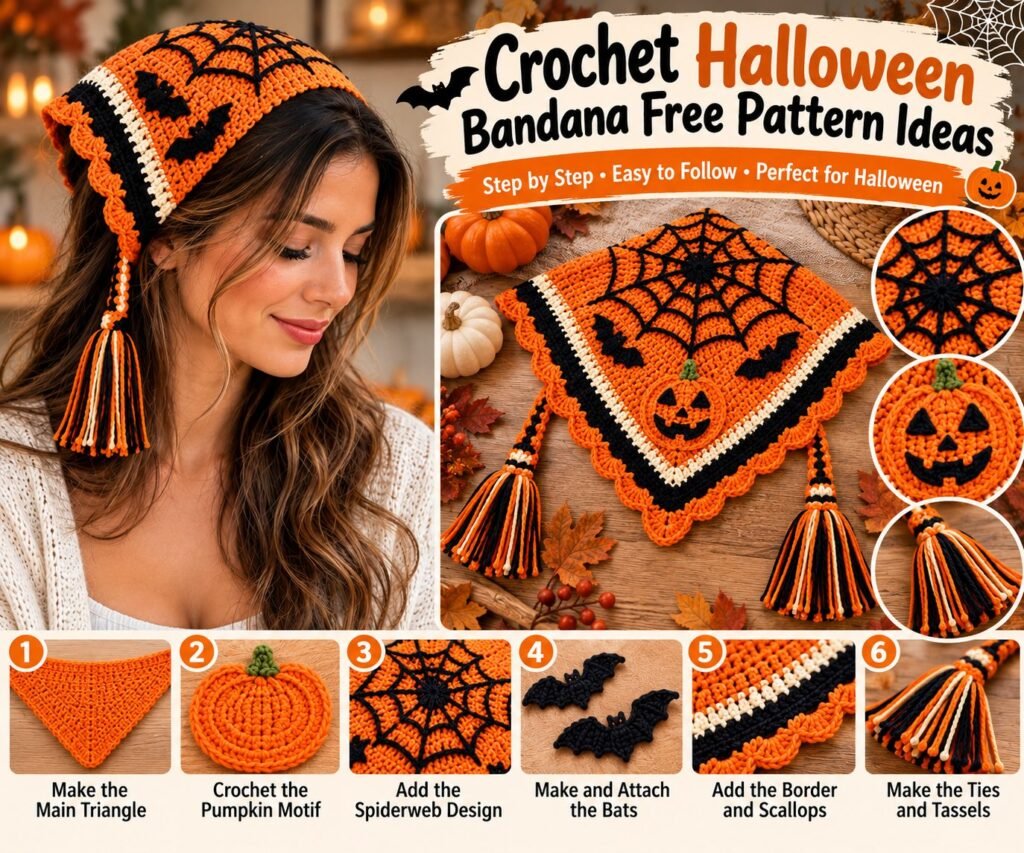
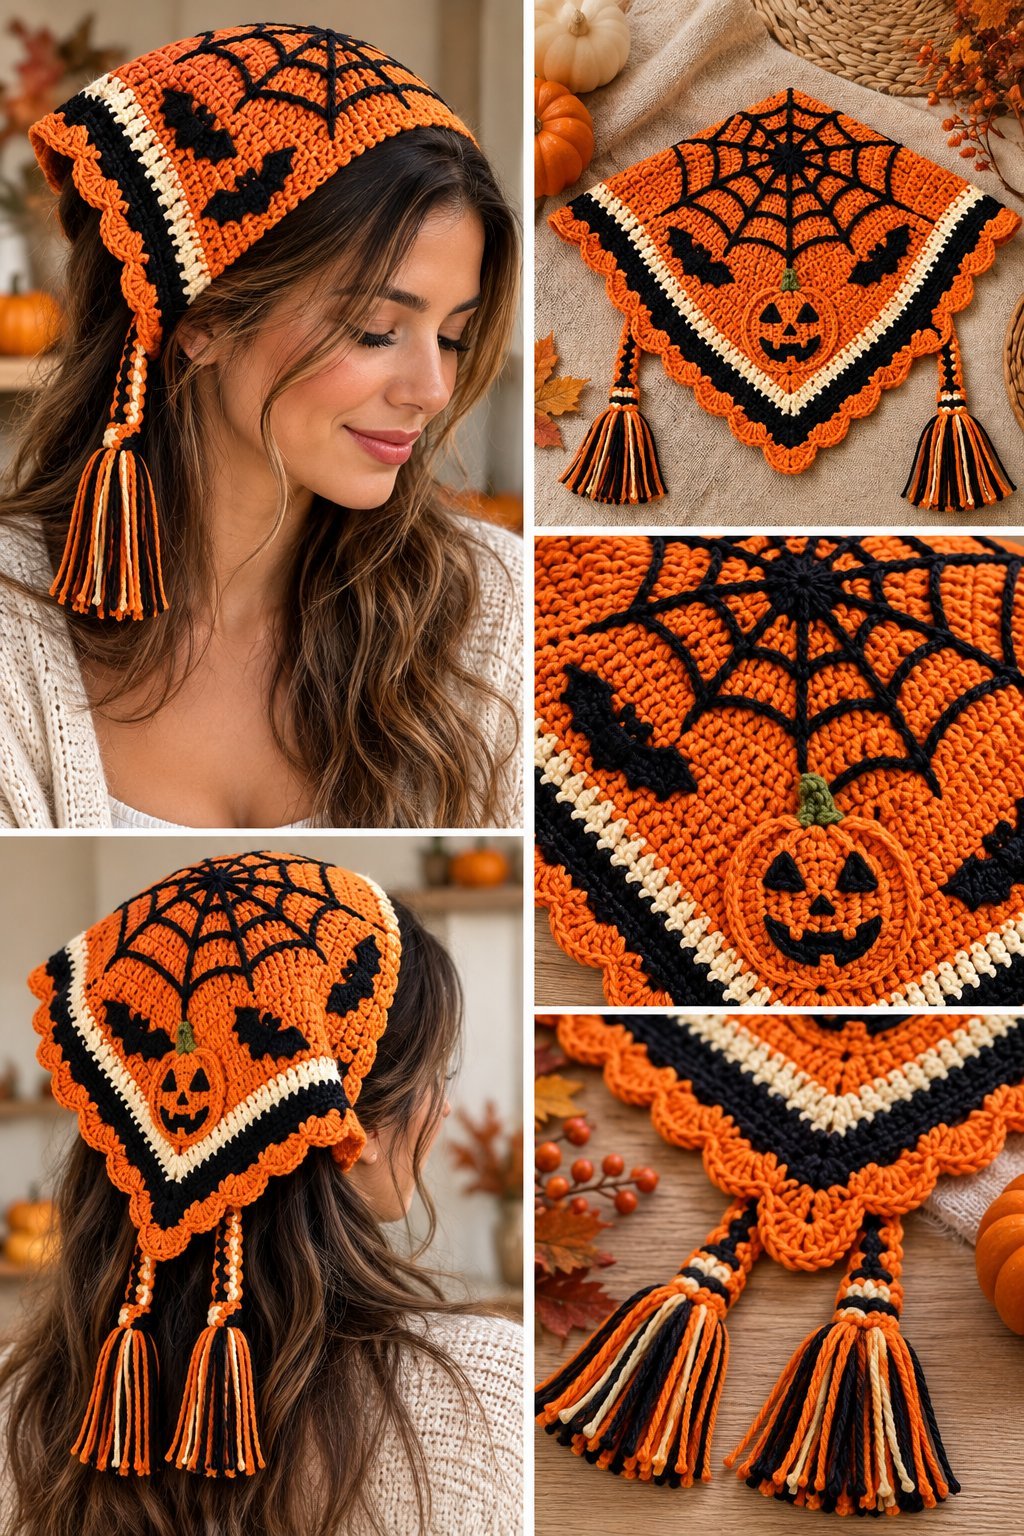
Create a fun and festive crochet accessory with these Crochet Halloween Bandana Free Pattern Ideas. Inspired by the orange, black, and cream bandana in the reference, this design features a classic triangular shape, spiderweb details, Halloween motifs, scalloped edging, and long decorative tassels.
The bandana is a great seasonal crochet project for Halloween parties, autumn outfits, costume accessories, photoshoots, craft fairs, or handmade gifts. You can also customize the colors and motifs to create your own unique Halloween style.
The instructions below are an original, adaptable pattern inspired by the reference image. The exact original written pattern and stitch counts for the photographed piece were not provided, so measurements can be adjusted according to your preferred fit, yarn, hook size, and tension.
Project Details
Project type: Crochet Halloween bandana
Style: Halloween, gothic, vintage-inspired
Skill level: Beginner to intermediate
Crochet terminology: US terms
Main colors: Orange, black, and cream
Suggested size: Adult
Shape: Triangle
Main features: Spiderweb design, pumpkin motif, bat details, scalloped border, side ties, decorative tassels
Construction: Triangle worked from the center downward
Materials Needed
Orange DK or light worsted weight yarn: approximately 100–150 g
Black DK or light worsted weight yarn: approximately 50–75 g
Cream or ivory yarn: approximately 25–50 g
Green yarn: small amount for the pumpkin stem
3.5 mm crochet hook
Tapestry needle
Embroidery needle
Scissors
Stitch markers
Measuring tape
Blocking mat and pins
Optional: small amount of cardboard for making tassels
Use soft yarn with good stitch definition so the spiderweb and decorative details remain clearly visible.
Crochet Abbreviations
ch — chain
sc — single crochet
hdc — half double crochet
dc — double crochet
sl st — slip stitch
st — stitch
sts — stitches
inc — increase
dec — decrease
sk — skip
sp — space
rep — repeat
rnd — round
FO — fasten off
BLO — back loop only
FLO — front loop only
Finished Size
A finished adult bandana can measure approximately:
Width: 45–55 cm
Center length: 25–32 cm
Tie length: 25–40 cm per side
The finished measurements are adjustable.
For a smaller bandana, stop crocheting earlier.
For a larger bandana, continue adding rows.
Gauge
Gauge is not extremely critical for this project because the bandana can easily be adjusted by adding or removing rows.
As a starting point:
18–20 stitches = approximately 10 cm
20–22 rows = approximately 10 cm
If your fabric feels too stiff, use a larger hook.
If it feels too loose, use a smaller hook.
Pattern Notes
The bandana is worked from the center top downward.
Each row gradually increases the width.
The spiderweb can be created with surface crochet or embroidery.
The pumpkin can be crocheted separately and sewn onto the center.
Small bats can be crocheted or embroidered.
The scalloped edging is added after the main triangle is finished.
Tassels are added to the two side corners.
Part 1: Crochet the Main Bandana
Step 1: Create the Foundation
Using orange yarn, chain 4.
Join with a sl st to form a small ring.
Alternatively, you can use a magic ring if you prefer a tighter center.
Step 2: Work the First Triangle Row
Chain 3.
Work 2 dc into the center ring.
Chain 2.
Work 3 dc into the ring.
Turn.
You now have the beginning of the triangular bandana.
Step 3: Build the Triangle
The bandana is increased at both ends and at the center.
Row 2
Ch 3.
Work 2 dc into the first space.
Dc across the first section.
Work 2 dc into the center chain-2 space.
Ch 2.
Work 2 dc into the same center space.
Continue across the second section.
Work 3 dc into the final space.
Turn.
Step 4: Continue Increasing
For each new row:
Ch 3.
Work 2 dc into the first stitch or space.
Dc across until you reach the center.
Work 2 dc, ch 2, 2 dc into the center space.
Continue working dc across.
Work 3 dc into the final stitch or space.
Turn.
Repeat this row until the bandana reaches approximately 20–25 cm from the center to the bottom point.
Part 2: Add the Color Sections
The reference design uses strong Halloween colors, so changing colors creates a striped effect.
Step 5: Add the Cream Stripe
After several orange rows, attach cream yarn.
Work one or two rows using the same increase pattern.
Keep the center increase consistent.
Fasten off.
Step 6: Add the Black Stripe
Attach black yarn.
Continue the same triangular increase pattern.
Work one or two rows.
Fasten off.
Step 7: Return to Orange
Attach orange yarn again.
Continue working the triangle until you reach the desired size.
You can change colors every 1–3 rows depending on how many stripes you want.
Part 3: Create the Spiderweb
The spiderweb is the main decorative feature of this Halloween bandana.
Step 8: Create the Center of the Web
Using black yarn, identify the center point of the bandana.
Attach the yarn at the center.
Work several surface slip stitches or embroidery stitches extending outward.
Create approximately 6–8 lines radiating from the center.
These lines form the main structure of the web.
Step 9: Add the Curved Web Lines
Connect the radiating lines with curved sections.
Start close to the center.
Create a small ring around the center.
Then create another larger ring.
Continue until the web reaches the outer section of the bandana.
Keep the lines slightly curved instead of completely straight.
This creates a more natural spiderweb appearance.
Step 10: Add Smaller Web Details
Add small sections of webbing near the sides.
You can also add small stars or tiny crosses between the web lines.
Keep the details balanced on both sides.
Part 4: Crochet the Pumpkin Motif
The pumpkin sits near the lower center of the bandana.
Step 11: Make the Pumpkin
Using orange yarn:
Make a magic ring.
Round 1
Work 6 sc into the ring.
6 sts
Round 2
Inc around.
12 sts
Round 3
Sc, inc around.
18 sts
Round 4
2 sc, inc around.
24 sts
Round 5
3 sc, inc around.
30 sts
Round 6
4 sc, inc around.
36 sts
Round 7
Sc around.
36 sts
Step 12: Shape the Pumpkin
Round 8
4 sc, dec around.
30 sts
Round 9
3 sc, dec around.
24 sts
Round 10
2 sc, dec around.
18 sts
Round 11
Sc, dec around.
12 sts
Round 12
Dec around.
6 sts
Fasten off.
Close the opening using a tapestry needle.
Part 5: Add the Pumpkin Face
Step 13: Embroider the Eyes
Using black yarn, embroider two small triangular eyes.
Position them evenly.
Keep the triangles slightly angled for a playful jack-o’-lantern expression.
Step 14: Add the Nose
Embroider a small black triangle between the eyes.
Step 15: Add the Mouth
Create a curved black smile.
Add small vertical lines across the smile to create a traditional jack-o’-lantern appearance.
Step 16: Add the Stem
Using green yarn, chain 5.
Sc across the chain.
Work 2–3 rows.
Fasten off.
Sew the stem securely to the top of the pumpkin.
Part 6: Attach the Pumpkin
Step 17: Position the Pumpkin
Place the pumpkin near the lower center of the bandana.
Pin it in place.
Check that it is centered.
Step 18: Sew the Pumpkin
Use orange yarn and a tapestry needle.
Sew around the outer edge of the pumpkin.
Make several secure stitches.
Weave the yarn ends into the back of the bandana.
Part 7: Add the Bat Motifs
Small black bats give the bandana an additional Halloween detail.
Step 19: Make a Simple Bat
Using black yarn:
Make a small magic ring.
Work 6 sc into the ring.
Pull the ring closed.
For the wings, work several chain stitches and slip stitches to create pointed edges.
Fasten off.
Alternatively, embroider small bat silhouettes directly onto the bandana.
Step 20: Add the Bats
Place the bats around the spiderweb.
Good locations include:
Upper corners
Side sections
Near the pumpkin
Between the spiderweb sections
Sew each bat securely.
Part 8: Create the Scalloped Border
Step 21: Work Around the Edge
Attach orange yarn to one corner.
Work sc evenly around the entire outer edge.
When you reach a corner, work several sc into the same space so the corner remains flat.
Continue until you return to the beginning.
Join with a sl st.
Step 9: Add the Decorative Scallops
Using orange yarn:
Sc in the first stitch.
Skip 2 stitches.
Work 5 dc into the next stitch.
Skip 2 stitches.
Sc in the next stitch.
Repeat around the entire bandana.
At the bottom point, add enough stitches to create a smooth corner.
Finish with a sl st.
Fasten off.
Part 10: Add the Black and Cream Border
Step 22: Add a Black Border
Attach black yarn inside the orange scalloped edge.
Work one round of sc.
Keep the stitches even.
Fasten off.
Step 23: Add a Cream Accent
Attach cream yarn above the black border.
Work one round of sc.
This creates the layered orange, cream, and black border shown in the reference.
Fasten off.
Step 24: Finish With Orange
Attach orange yarn to the outer edge.
Work another decorative scallop round.
This creates a bold Halloween finish.
Part 11: Make the Side Ties
Step 25: Crochet the First Tie
Attach black yarn to one upper corner.
Chain approximately 35–45 cm.
Work sl sts across the chain.
Fasten off.
Repeat for the opposite corner.
Step 26: Add Orange Detail
For a more colorful look, crochet a second shorter chain using orange yarn.
Twist or braid the orange chain together with the black tie.
Repeat on the opposite side.
Part 12: Make the Tassels
The long tassels are an important feature of the reference design.
Step 27: Prepare the Yarn
Cut multiple strands of:
Orange yarn
Black yarn
Cream yarn
Each strand can be approximately 25–30 cm long.
Combine several strands together.
Step 28: Attach the Tassel
Fold the yarn strands in half.
Insert the folded center through the end of the crochet tie.
Pull the loose ends through the loop.
Tighten gently.
Step 29: Shape the Tassel
Wrap a small piece of yarn around the upper section.
Tie it securely.
Trim the ends evenly.
Repeat for the second side.
Part 13: Add Optional Decorative Stars
Step 30: Make Small Stars
Using orange yarn:
Create a small magic ring.
Work a combination of chains and slip stitches to create pointed sections.
Fasten off.
Sew the stars around the spiderweb.
Alternatively, embroider tiny star shapes directly onto the bandana.
Part 14: Finishing
Step 31: Weave in the Ends
Turn the bandana over.
Use a tapestry needle to weave all loose yarn ends through several stitches.
Trim the excess.
Pay special attention to the pumpkin, spiderweb, bats, borders, and tassels.
Step 32: Block the Bandana
Lightly dampen the finished bandana.
Lay it flat on a blocking mat.
Shape the triangle carefully.
Straighten the side edges.
Arrange the scallops evenly.
Pin the corners and outer edge.
Allow the bandana to dry completely.
Blocking will help the triangular shape and decorative edging look cleaner.
Step 33: Final Check
Before wearing the bandana, check:
The triangle is symmetrical.
The spiderweb is centered.
The pumpkin is securely attached.
The bats are firmly sewn.
The scalloped border lies flat.
The ties are secure.
The tassels are firmly attached.
All yarn ends are hidden.
How to Customize the Halloween Bandana
Make a Smaller Bandana
Use fewer triangle rows.
Reduce the length of the side ties.
Use thinner yarn and a smaller hook.
Make a Larger Bandana
Continue adding triangle rows.
Increase the length of the ties.
Add additional decorative rows.
Change the Colors
Classic Halloween:
Orange, black, and cream
Gothic:
Black, burgundy, and purple
Witchy:
Black, lime green, and purple
Pumpkin:
Orange, brown, and cream
Vintage Halloween:
Burnt orange, ivory, and black
Pastel Halloween:
Peach, lavender, cream, and soft orange
Crochet Tips
Keep the center increase consistent throughout the pattern.
Count your stitches regularly.
Use stitch markers at the center point.
Do not pull the surface crochet too tightly.
Block the bandana before attaching the tassels if possible.
Measure the ties before finishing them.
Sew all motifs securely.
Use a sharp tapestry needle for clean embroidery.
Common Problems and Solutions
The Bandana Is Curling
Add a blocking step.
If the fabric still curls, check your tension and consider using a larger hook.
The Triangle Is Not Symmetrical
Check the center increase.
Make sure the same increase is worked at both outer edges.
The Spiderweb Looks Uneven
Mark the center and main web lines before adding the curved sections.
The Pumpkin Looks Too Small
Add another increase round before beginning the decrease section.
The Scallops Are Too Wavy
Reduce the number of stitches worked into each scallop.
The Tassels Look Uneven
Cut all strands to the same length before attaching them.
Trim the finished tassels after they are attached.
Care Instructions
Hand wash the bandana gently.
Use mild detergent.
Avoid harsh bleach.
Do not wring aggressively.
Reshape while damp.
Lay flat to dry.
Allow the tassels to dry completely before storing.
Store the bandana flat or loosely folded to prevent the decorative edges from becoming stretched.
Frequently Asked Questions
Is this crochet Halloween bandana suitable for beginners?
The basic triangular construction is beginner-friendly, but the spiderweb embroidery, pumpkin appliqué, scalloped edging, and tassels add intermediate techniques. A confident beginner can complete the project by working through each section slowly.
What yarn is best for a crochet Halloween bandana?
DK or light worsted weight yarn works well. Cotton provides clear stitch definition and a slightly structured finish, while acrylic blends can create a softer and lighter accessory.
Can I make this bandana for a child?
Yes. Reduce the width and length according to the child’s measurements. Make sure the ties are an appropriate length and do not create a safety concern.
Can I remove the tassels?
Yes. You can replace the tassels with simple crochet ties, small pom-poms, or short braided cords.
Can I change the Halloween motif?
Yes. Replace the pumpkin and bats with ghosts, spiders, moons, stars, witches’ hats, or other seasonal motifs.
Can I make the spiderweb in orange?
Yes. Orange spiderweb embroidery looks especially striking against a black background.
Can I wear this crochet bandana as a head covering?
Yes. Adjust the width and ties to create a comfortable fit around your head. Measure before beginning so the finished bandana has enough coverage.
How can I make the bandana more colorful?
Use multiple color sections throughout the triangle and combine orange, black, cream, purple, green, and burgundy. You can also use different colors for the spiderweb, pumpkin, border, and tassels.
Final Project
This Crochet Halloween Bandana Free Pattern Ideas project combines simple crochet construction with eye-catching seasonal details. The triangular shape is easy to customize, while the spiderweb, pumpkin, bats, scalloped edging, and multicolor tassels give the finished accessory a distinctive Halloween look.
You can keep the design close to the classic orange, black, and cream color palette or experiment with your own Halloween-inspired combinations. The same basic construction can also be adapted into smaller children’s bandanas, matching accessories, or different seasonal designs.

