
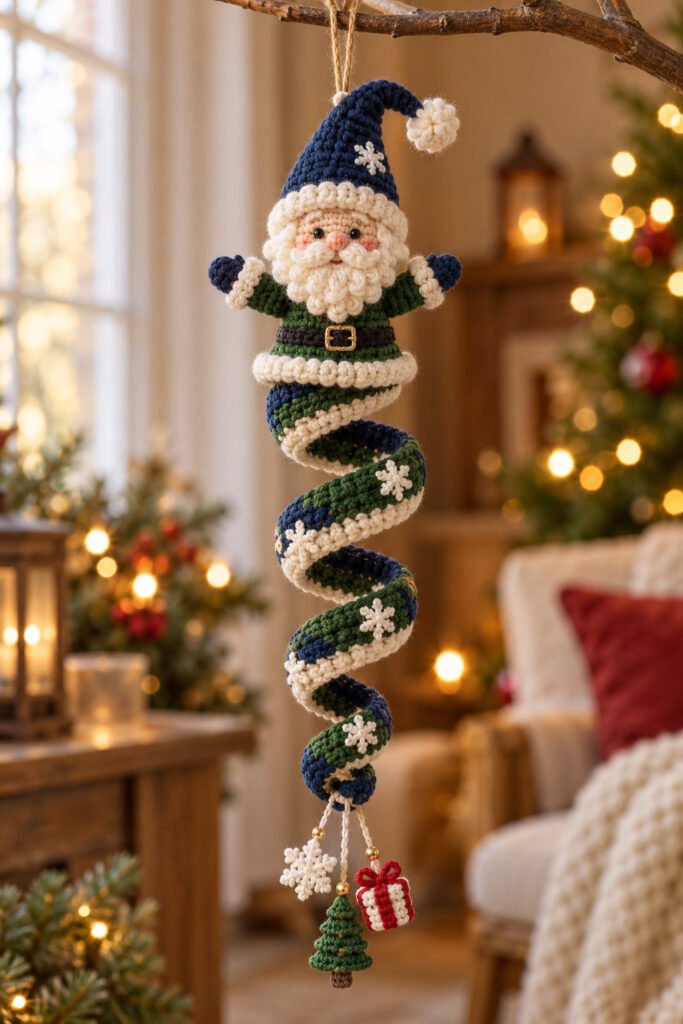
Bring a touch of handmade holiday charm to your home with a crochet spiral Santa wind spinner ornament. The visual inspiration combines a cheerful little Santa topper with a long, curled body in winter colors, tiny snowflake details, and dangling Christmas motifs. It makes a playful decoration for a tree, doorway, or craft-room window.
This article is an adaptable visual construction guide, not a tested stitch-by-stitch pattern. The reference image does not provide stitch counts, yarn quantities, gauge, hook size, or finished measurements, so those details are intentionally left open. Use the guidance below to plan your own version and check every fit and attachment as you work.

Why You’ll Love This Crochet Santa Ornament
- It combines a recognizable Santa figure with a curling striped tail for a cheerful Christmas silhouette.
- The modular design lets you make the figure, spiral, and dangling motifs in manageable sections.
- You can personalize the colors and charms to match a tree, mantle, or handmade gift theme.
- Small leftover amounts of yarn can work well for the trim and miniature decorations.
- The finished ornament is lightweight and easy to display indoors.
Skill Level
Intermediate is a reasonable starting point because the design appears to combine color changes, a three-dimensional Santa figure, spiral shaping, small motifs, and careful assembly. A confident advanced beginner can simplify the face and charms, work slowly, and use stitch markers to keep the shaping even. The image alone cannot confirm the exact techniques used.
Materials
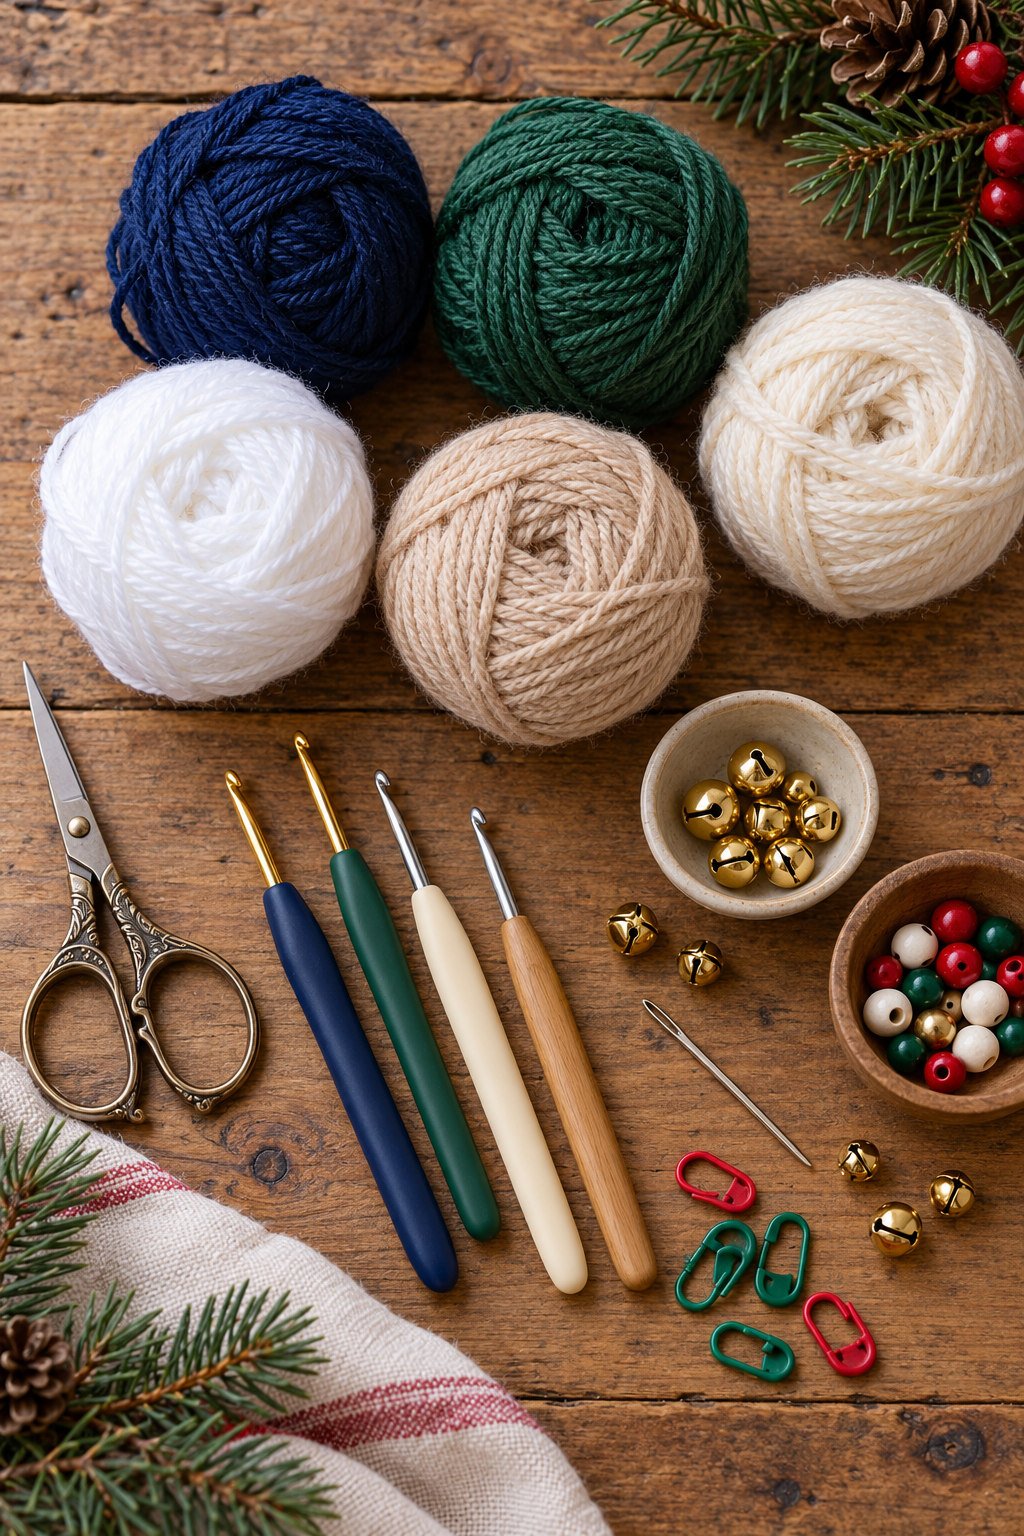
- Smooth yarn in a main spiral shade such as navy, a second shade such as evergreen, and cream or white for snowy trim.
- Small amounts of skin-tone, black, and belt-color yarn for the Santa figure; optional red or gold accents for miniature holiday charms.
- A crochet hook suited to your chosen yarn and fabric density.
- Yarn needle, scissors, and removable stitch markers.
- A small amount of stuffing if you choose a softly padded Santa head or body.
- Black embroidery thread or securely attached safety eyes for the face.
- Optional lightweight bells, beads, or small crocheted motifs for the hanging ends.
Yarn Recommendations
Choose a smooth, tightly spun cotton or acrylic yarn so color changes, small facial details, and the spiral edge remain easy to see. A DK or light-worsted yarn is a practical starting range for a small ornament, but the image does not establish a specific yarn weight or yardage. Use the same yarn thickness throughout the spiral for consistent stripes; save a finer strand for tiny details only if it can be securely sewn in.
For a Santa topper that holds its shape, avoid very fuzzy or loosely spun yarn around the face. If the ornament will be handled often, pick a fiber that tolerates gentle cleaning and check its care label before finishing.
Hook Size
No hook size can be read from the reference. Match your hook to the yarn label, then crochet a small sample. For a stuffed Santa section, choose a hook that makes a firm fabric with no visible gaps; for the spiral, prioritize an edge that curls smoothly without feeling stiff. You may find that the same yarn needs different hook sizes for the figure and the decorative strip.
Gauge
A formal gauge is not available or essential for this visual design guide. Instead, check fabric behavior: the Santa section should be firm enough to hold its shape, and the striped spiral should bend into a curl without pulling out of shape. Record your hook and yarn choices if you want repeated ornaments to match.
Finished Measurements
The reference does not provide finished dimensions. Decide how long you want the hanging ornament to be before attaching the charms, then measure your own work from the top loop to the lowest dangle. Keep the charm drops short enough that they do not tangle with the spiral when the ornament moves.
Crochet Abbreviations
The following standard US terms may be useful if you write or adapt your own stitch sequence. They are not a row-by-row instruction set for the pictured design.
- ch = chain
- sl st = slip stitch
- sc = single crochet
- hdc = half double crochet
- dc = double crochet
- inc = increase
- dec = decrease
- st(s) = stitch(es)
- rep = repeat
- FO = fasten off
Construction Overview
The image suggests three main parts: a small Santa figure at the top, a long striped crochet section shaped into a spring-like spiral, and a few lightweight holiday charms hanging from the lower end. A practical interpretation is to crochet and finish each section separately, then sew or tie them together with reinforced yarn joins. The exact stitch sequence and shaping method are not visible, so treat the steps as a design plan rather than prescribed rounds.
Step-by-Step Visual Guidance
- Plan the color order. Lay out your yarn shades and decide where the cream trim and snowflake accents will repeat. Sketch the overall length and placement of the dangling pieces before crocheting.
- Make the Santa topper. Crochet a compact head and body in your chosen style, adding a hat, beard, mustache, and simple coat details that echo the reference. These pieces may be worked as one small figure or assembled from separate elements; use a method you already know and secure the face details firmly.
- Shape the striped spiral. Create a narrow crocheted strip or tube in alternating colors, then shape it into a loose corkscrew. One possible approach is to build extra fullness along one edge so the piece naturally curves, but the reference does not show an exact stitch formula. Test the behavior on a short sample and adjust the shaping method before continuing.
- Add snowy accents. Sew small cream snowflakes or simple stitched motifs to the spiral at intervals. Keep them light so they do not pull the curl out of shape.
- Prepare the dangles. Crochet or gather miniature motifs such as a tree, snowflake, gift, or bell. Attach each to a short, secure yarn loop near the lower end of the spiral, spacing them so they hang freely.
- Join the sections. Center the Santa above the spiral and sew the join through several sturdy stitches. Add a reinforced hanging loop at the top, then suspend the ornament briefly to see whether the spiral hangs straight and the charms are balanced.
- Adjust the shape. Gently arrange the curl by hand. If it twists too tightly or collapses, revise the shaping or reduce the weight of the dangling decorations before final weaving-in.

Customization Ideas
- Use traditional red, white, and green for a classic Santa palette, or keep the navy and evergreen combination from the inspiration.
- Swap the snowflakes for stars, tiny trees, wrapped gifts, or simple embroidered dots.
- Make the spiral shorter for a tree ornament or longer for a doorway accent, adjusting the charm weight to suit.
- Add a contrasting belt, mitten tips, or a soft pom-pom to personalize the Santa topper.
- Replace metal bells and beads with crocheted details if you prefer a quieter, softer ornament.
Finishing
Weave in each tail on the wrong side and secure it through several stitches. Sew on the beard, hat trim, snowflakes, and miniature charms with matching yarn where possible. Check the hanging loop and every join with a gentle tug. Shape the spiral by hand and, if the yarn permits, lightly steam or block only after testing the fiber label and a small swatch. Do not press or flatten any stuffed part.

Care Instructions
Follow the care instructions for the yarn and any added components. For most handmade ornaments, gentle spot cleaning with a damp cloth is the safest first choice. If the fiber is washable, hand-wash carefully, support the piece while wet, and let it dry completely in its intended shape. Avoid high heat, vigorous wringing, and soaking metal or wooden findings.
Helpful Tips
- Keep the spiral and its dangles lightweight so the top loop does not stretch.
- Use a stitch marker at the start of shaping sections and check the curl every so often.
- Photograph your color sequence as you work if you plan to make a matching set.
- Sew small parts rather than relying on glue, and tuck every yarn end securely.
- For a child’s room or a gift for a young child, omit loose beads, bells, safety eyes, and other small detachable parts; decorative ornaments are not toys.
Frequently Asked Questions
Is this a complete stitch-by-stitch pattern?
No. It is an original visual guide based on the visible design elements. The reference does not include a written pattern, stitch counts, exact shaping, gauge, yarn amount, or sizing. You will need to choose and test those details for your own version.
What makes the body curl into a spiral?
The image shows a narrow striped section arranged in a spring-like curl, but it does not reveal how that shape was produced. A crocheter can test a ruffled edge, shaped strip, or another familiar spiral method with a short sample before making the full ornament.
Can I use a different color palette?
Yes. Choose a main shade, a contrasting stripe, and a light trim color. Keep the embellishments small and the yarn weight consistent so the spiral remains balanced.
Can I hang it outdoors as a wind spinner?
This design is best treated as indoor Christmas decor. Wind, moisture, and sun can distort yarn and damage the small details. If you display it near a draft, make sure the hanging point is secure and the dangles cannot catch on nearby objects.
Is it safe for small children?
It is a decorative ornament, not a toy. Small charms, bells, beads, and safety eyes can detach and create a choking hazard. Keep it out of reach of young children or replace small parts with securely sewn embroidery.
Final Thoughts
A crochet spiral Santa wind spinner can bring a little movement and handmade texture to seasonal decorating. Start with the Santa topper and striped curl, then add only the snowy details and charms that keep the finished piece light and balanced. Since the reference gives a visual idea rather than exact pattern specifications, use a small sample and your own measurements to shape a version that suits your yarn and display space.


1 thought on “Crochet Spiral Santa Wind Spinner Ornament Handmade Christmas Decor”