
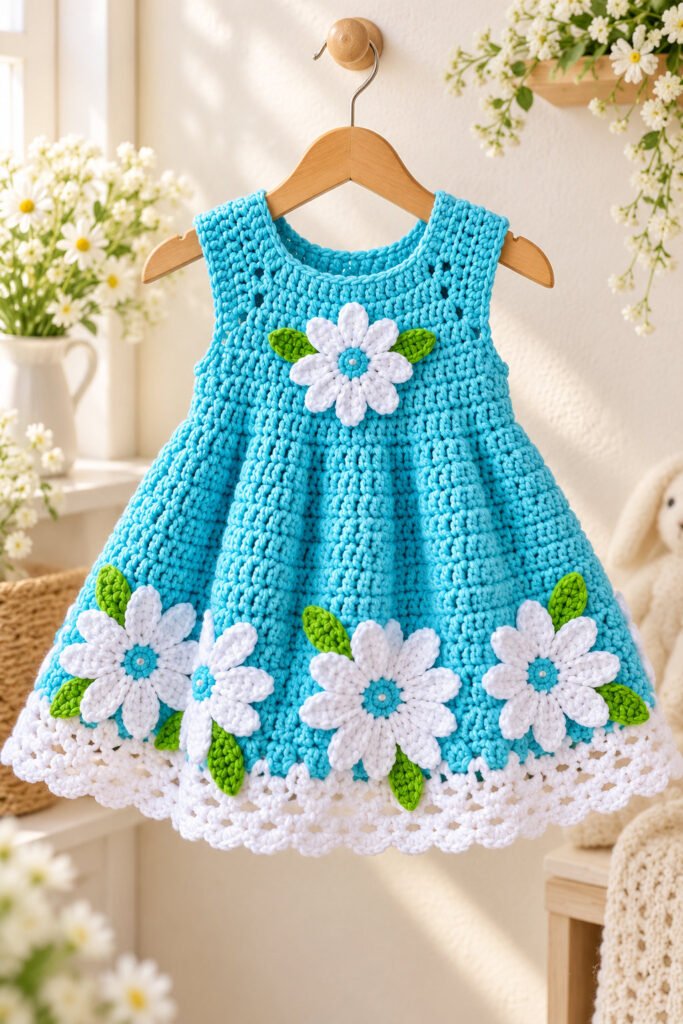
This cheerful crochet baby frock pairs a bright turquoise body with a flared skirt, a white openwork hem, and daisy appliques finished with fresh green leaves. The sleeveless shape and floral trim make it a sweet warm-weather keepsake, while the simple color palette keeps the details easy to coordinate.
Pattern note: The photograph shows the finished design but does not provide yarn weight, sizing, stitch counts, hook size, or gauge. This is an image-based construction guide, not a tested, counted pattern. Use a size-appropriate pattern draft, your own measurements, and a gauge swatch before making a garment for a baby.
Why You’ll Love This Frock
- A bright, playful palette: Turquoise, white, and leaf green give the dress a fresh garden look.
- Personal handmade details: Crocheted daisies and leaves turn a simple silhouette into a special occasion piece.
- A versatile shape: A sleeveless upper section and full skirt can be styled for warm days or layered over a soft cotton top.
- Room to make it yours: Change the colors, flower placement, or hem treatment to suit your project.
Skill Level
This design is best suited to an advanced beginner or intermediate crocheter. The basic fabric may use familiar stitches, but making a garment that fits involves measuring, shaping, joining, and checking the drape. The small flower and leaf motifs also require careful finishing and secure attachment.
Materials
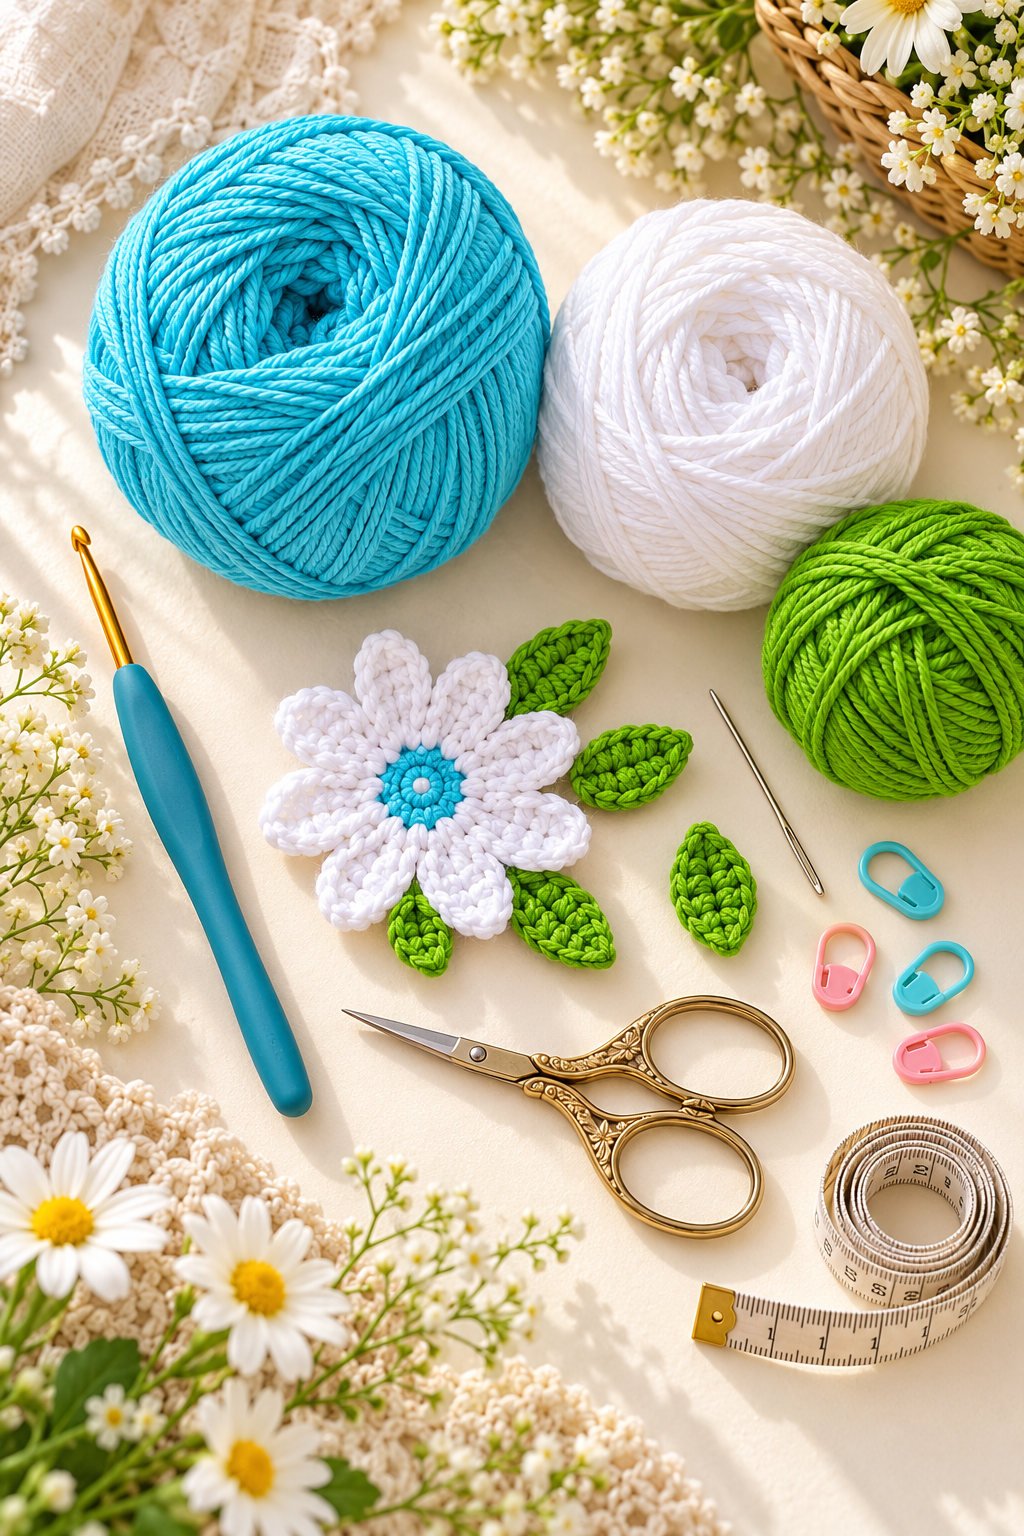
- Smooth, soft yarn in turquoise, white, and leaf green
- Crochet hook selected for the yarn and your swatch
- Tapestry needle for sewing seams and weaving in ends
- Stitch markers to mark shaping and joining points
- Scissors and a flexible tape measure
- Paper and pencil for recording the wearer’s measurements and your own stitch gauge
Yarn Recommendations
For a breathable baby garment, consider a smooth, washable cotton or cotton-blend yarn. A light DK-style yarn is one possible starting point, but the image cannot confirm the original fiber or yarn weight. Choose a yarn that feels gentle against skin, has clear stitch definition, and can be cared for easily. Check the yarn label for washing instructions and make a swatch before committing to the garment.
Keep the yarn consistent across the dress so the bodice, skirt, and edging behave similarly. If the white hem or appliques use a different yarn, test them together: a much heavier trim can pull or stiffen the skirt edge.
Hook Size
The photo does not reveal a hook size. Start with the hook recommended on your yarn label, then adjust after swatching. The fabric should feel comfortable and hold its shape without becoming rigid. A hook that is too large may make the bodice loose; one that is too small may produce a stiff skirt or tight neckline.
Gauge
No stitch pattern or gauge is visible in the image, so there is no reliable numeric gauge to report. Make a generous swatch in the stitch you plan to use for the main fabric, wash and dry it as you intend to care for the dress, then measure stitches and rows over a marked area. Record the result and use it with the wearer’s measurements to plan the fit.
Finished Measurements
The image does not establish a garment size or finished dimensions. Before drafting, measure the intended wearer and note:
- Chest circumference where the bodice will sit
- Shoulder-to-waist length
- Armhole depth and neckline width
- Waist or skirt join circumference
- Desired skirt length
- Desired finished hem circumference and ease for movement
Plan comfortable ease, and recheck the bodice and armholes as you work. For a baby garment, make sure openings allow easy dressing and do not restrict movement.
Crochet Abbreviations
Abbreviations below use standard US crochet terminology. The exact stitch pattern is not specified by the photograph.
- ch — chain
- sl st — slip stitch
- sc — single crochet
- hdc — half double crochet
- dc — double crochet
- st(s) — stitch(es)
- rep — repeat
- RS / WS — right side / wrong side
Construction Overview
The pictured frock appears to have a sleeveless bodice, a fuller skirt joined below it, a contrasting white hem, and separate flower-and-leaf appliques sewn onto the fabric. A small back closure is suggested in the image collage, but its exact style is not clear. Treat the sequence below as a planning guide and choose a construction method that matches your measurements and skill level.
Step-by-Step Construction Guide
1. Plan the fit and fabric
Take the wearer’s measurements and make a washed swatch in the yarn and stitch you intend to use. Sketch the bodice, armholes, neckline, waist join, and skirt length. Decide whether you will work the bodice in joined rounds, rows, or separate panels; the photograph does not show enough detail to determine the original method.
2. Make the bodice
Work the upper section to the planned chest and length, shaping the neckline and armholes so the edge sits smoothly. Try the piece on the intended wearer when practical, or compare it with a well-fitting garment. Keep the armhole and neckline comfortable, and reinforce any shoulder joins so the straps or upper edges do not stretch out.
3. Add the skirt
Join the skirt at the waist and build outward to create the gentle fullness visible in the reference. You can use a denser fabric for coverage and a more open stitch for the lower edging. Increase gradually and evenly according to your own pattern plan; the image does not provide stitch counts or a repeat to copy.

4. Finish the white hem
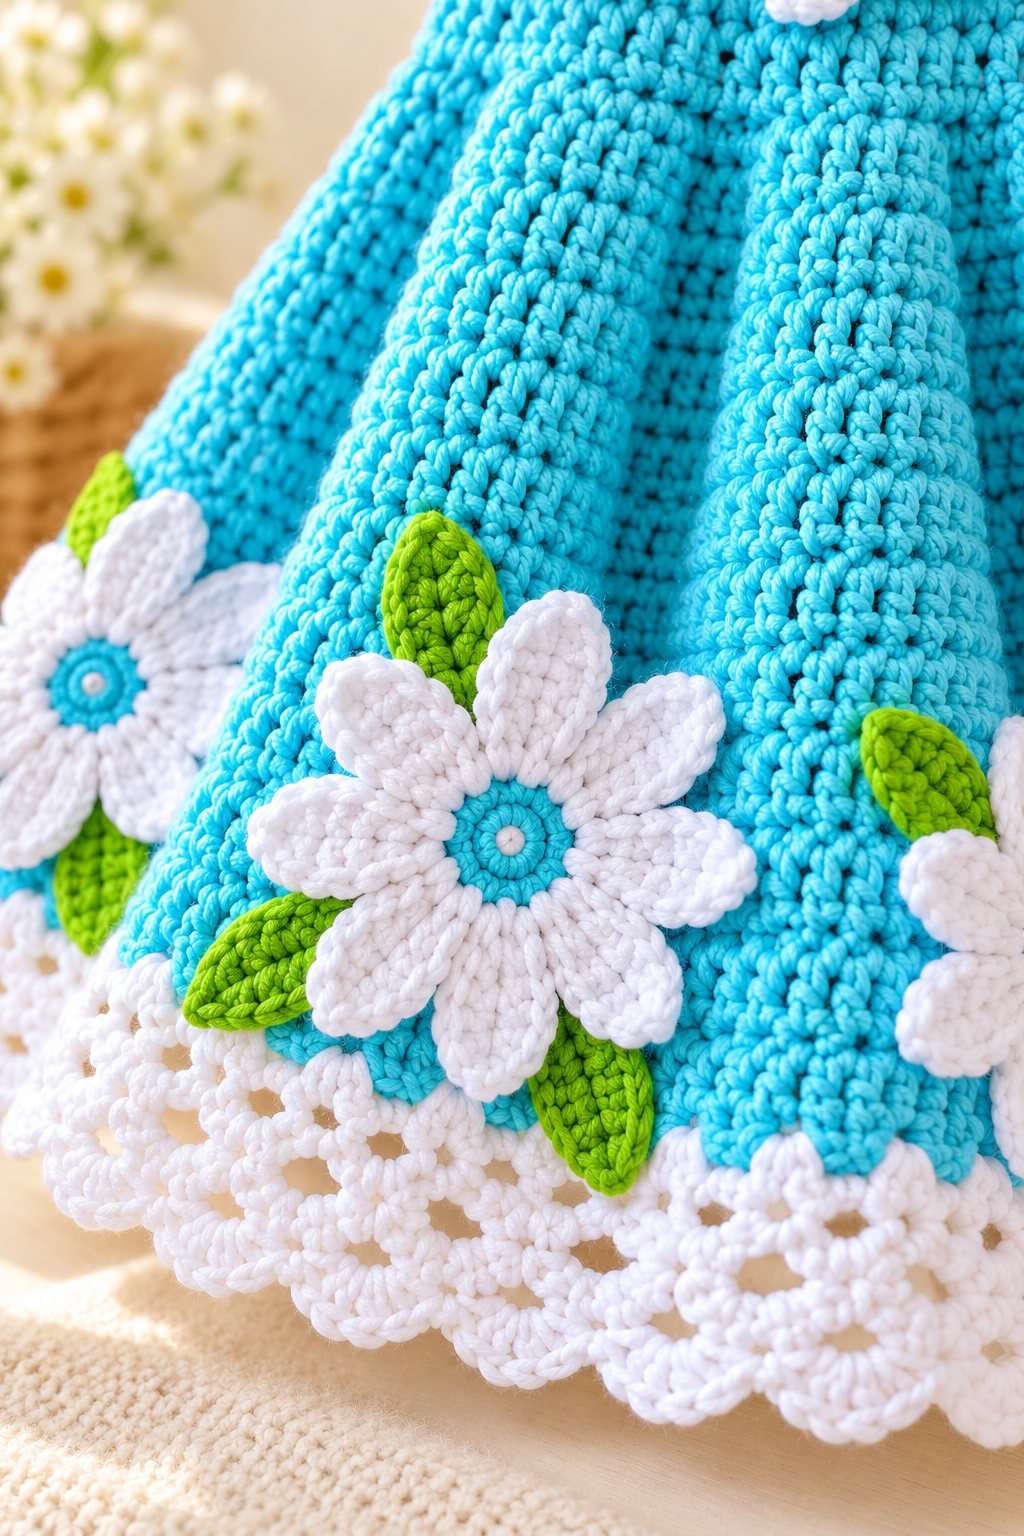
Work a contrasting white border around the skirt edge. An airy or scalloped finish suits the reference, but choose a border that lies flat and does not ruffle unless that is the effect you want. If the hem waves or cups, adjust the border tension or stitch spacing before continuing around the full edge.
5. Crochet the daisies and leaves
Make small white flower motifs and green leaves separately, then arrange them on the skirt and bodice before sewing. Pin or baste the motifs temporarily and check the spacing from a distance. Keep the arrangement balanced and avoid placing bulky motifs where they could rub against the wearer.
6. Attach motifs and any closure
Sew each flower and leaf down securely using matching yarn, catching the base of each petal and leaf rather than only one point. The picture appears to include a back closure detail; if your design needs one, choose a secure, age-appropriate closure and check it frequently. For baby clothing, avoid beads, loose buttons, or small detachable parts. Embroidered flower centers are a safer decorative option than hard embellishments.
Customization Ideas
- Swap turquoise for a favorite pastel, jewel tone, or neutral shade.
- Use a single statement flower on the bodice and a few smaller motifs around the skirt.
- Try a straight white border instead of a scallop, or add a narrow green accent round.
- Make the skirt shorter or longer by checking the desired length as you work.
- Add a soft lining if the main fabric is open, ensuring it is breathable and securely attached.
- Use embroidered centers and securely stitched leaves for a smoother, baby-friendly finish.
Finishing
Weave in every end securely and inspect the inside for scratchy tails or bulky joins. Gently shape the dress to the measurements you planned and block only if the yarn label allows it. Check that the hem lies evenly, the shoulder area is stable, and every applique is attached along its full base. Before dressing a baby, inspect all closures and decorative details for looseness.

Care Instructions
Follow the yarn label first. If the yarn is machine washable, place the garment in a mesh bag and use a gentle cycle; otherwise hand wash gently in cool water with a mild detergent. Support the wet garment while lifting it, press water out in a towel without wringing, and dry flat in shape. Avoid high heat, which can distort fibers and stretch the skirt. Recheck appliques and closures after washing.
Helpful Tips
- Swatch and wash before measuring; cotton can relax after laundering.
- Use stitch markers to keep shaping and joining points easy to find.
- Check the bodice fit before adding the skirt, when changes are simpler.
- Keep the skirt light enough to avoid pulling down on the bodice.
- Test the white trim against the turquoise fabric before working the entire hem.
- Secure appliques firmly and avoid hard, detachable decorations on baby clothing.
- Record your measurements, hook, yarn, and gauge so you can reproduce the fit later.
Frequently Asked Questions
Is this a complete counted crochet pattern?
No. The photograph does not show the stitch repeat, yarn details, sizing, or row and stitch counts. This article is an original visual construction guide; use a tested size-specific pattern or draft and verify fit with a swatch.
What age or size does the pictured frock fit?
The image does not provide a reliable age or size. Measure the intended wearer and plan the bodice, armholes, and skirt from those measurements rather than guessing from the photograph.
Which yarn should I choose?
A soft, washable cotton or cotton blend is a practical starting point for a warm-weather baby garment. Confirm the fiber and weight from the yarn label, then swatch to check drape and comfort.
Can a beginner make this dress?
A beginner who is comfortable with basic stitches may manage the fabric, but garment shaping and motif attachment add steps. Work a swatch, use a size-specific pattern plan, and ask an experienced crocheter to check fit if needed.
Are the flower centers beads?
The reference image suggests small decorative centers, but it does not establish their materials or safety. For a baby garment, embroider the centers with yarn and avoid beads or other small detachable pieces.
How do I keep the white hem from flaring unevenly?
Keep your tension steady and test the border on a swatch or short section first. If it puckers or waves, adjust the stitch spacing or edging method until the fabric lies as intended.
Final Thoughts
This turquoise baby frock gets its charm from the combination of a simple sleeveless silhouette, a bright flared skirt, a crisp white edge, and handmade daisy appliques. Use the image as inspiration, then build the fit from measurements, yarn-label guidance, and a washed swatch. Secure, soft finishing will help make the finished dress comfortable and lovely to wear.

