Introduction
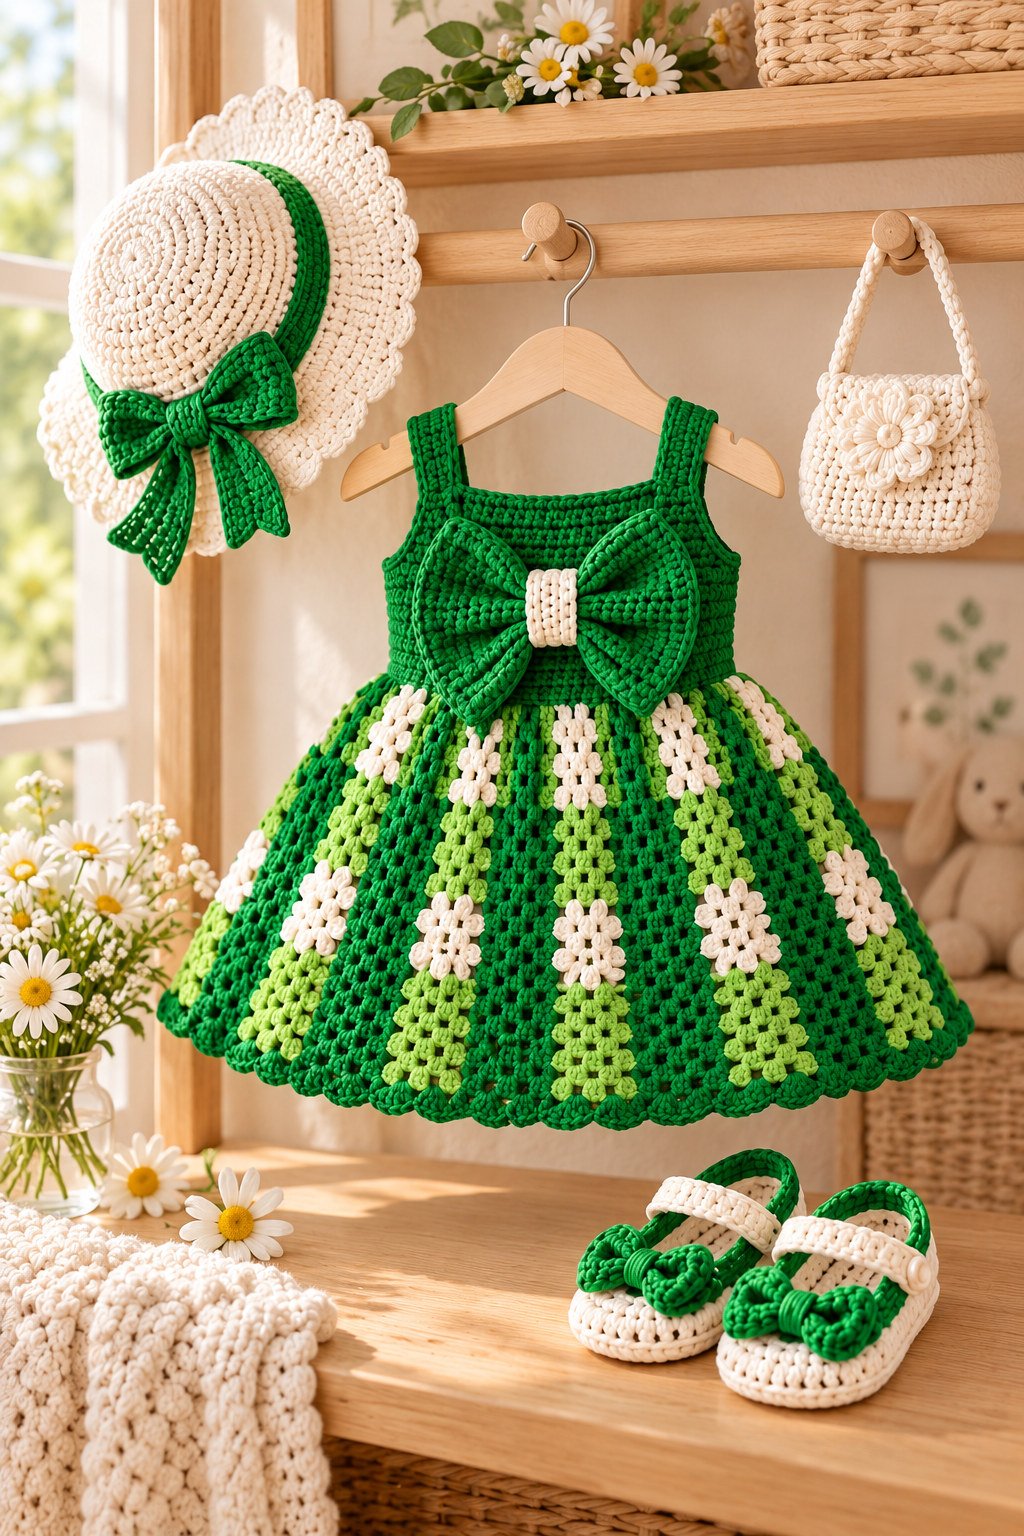
This sweet crochet baby dress set brings a garden palette to a special handmade outfit. The visual inspiration pairs an emerald bodice and oversized bow with a full skirt worked in emerald, leafy green, and cream. Small daisy motifs brighten the skirt, while a matching sunhat, flower handbag, and little sandals complete the look.
This guide is based on the image rather than a complete counted pattern for a specific size. The reference does not reveal a yarn label, hook size, gauge, stitch sequence, or intended age, so exact stitch counts and finished dimensions cannot be verified. Use the steps below to plan and construct a similar set, making a swatch and fitting each piece as you go.
Why You’ll Love This Crochet Baby Dress Set
- A coordinated handmade outfit: The dress, sunhat, handbag, and sandals share the same green and cream palette.
- Room for creative colorwork: Vertical color bands and small floral motifs make a simple silhouette feel special.
- A decorative focal point: The large bow gives the bodice a clear center detail without needing complicated shaping.
- Easy to personalize: Adjust the palette, skirt fullness, motif placement, and accessory choices to suit the recipient.
- A useful planning project: Makers can work through the garment pieces separately and practice swatching, fitting, color changes, and neat finishing.
Skill Level
Plan on an adventurous beginner to intermediate skill level. The set involves garment fitting and several separate pieces, so comfort with basic stitches is helpful. You should be able to make a consistent swatch, work flat and in joined rounds, change colors neatly, increase evenly, sew pieces together, and weave in ends. Small motifs and the bow can be made as separate embellishments.
If this is your first wearable, make the dress by itself before adding the accessories. Try it on over the intended underlayer while the bodice is still easy to adjust.
Finished Measurements and Fit
The photo does not provide a scale or age label, so it cannot support reliable finished measurements. Choose the intended wearer first and take body measurements over the clothing the dress will be worn with. Record the chest, shoulder to waist length, desired skirt length, head circumference, and foot length. For the small bag, decide on a practical width and height for its intended decorative use.
Compare the garment measurements with the wearer’s measurements and allow comfortable ease. The bodice should sit securely without pulling, the straps should stay on the shoulders, and the skirt should move freely. Recheck the hat and sandal fit independently; accessories do not automatically match the dress size.
Materials
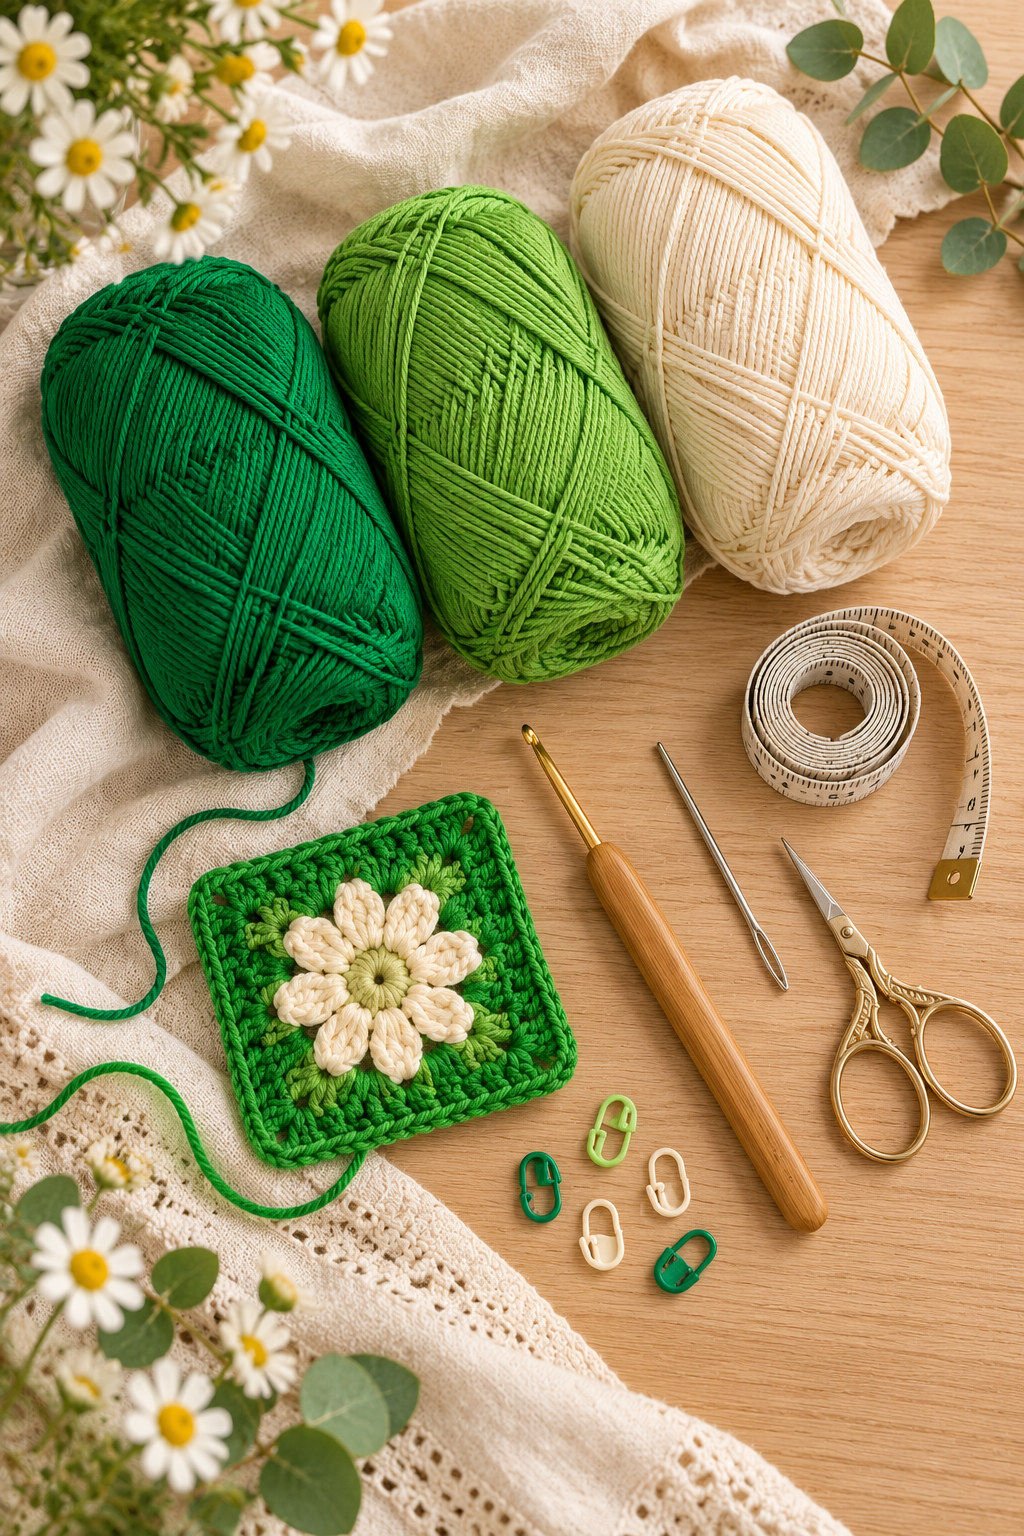
- Smooth, soft yarn in emerald green, a lighter leaf green, and warm cream
- A crochet hook selected from the yarn label and your gauge swatch
- Locking stitch markers for marking the center front, side points, and strap placement
- Tapestry needle for joining pieces and weaving in ends
- Scissors
- Flexible measuring tape
- Scrap yarn for a gauge swatch and temporary fitting ties
- Optional: a small amount of yarn for additional daisy motifs and the bow
Choose yarn that feels comfortable against sensitive skin and is easy to launder. Avoid rough, loosely spun, or heavily textured yarn for the parts that touch the body. The photo does not establish yardage, so estimate from your swatch and garment plan, then allow extra for the skirt, motifs, and accessories.
Yarn Recommendations
A smooth cotton or cotton blend is a practical choice for a warm weather baby outfit because it shows stitch definition and is commonly available in washable options. A soft acrylic blend can also work if you prefer a lighter feel or simpler care. Check the yarn label for washing instructions and confirm that all colors have similar weight and drape.
The picture alone cannot confirm the yarn category. As a starting point, compare a CYC #3 light/DK yarn with a light worsted yarn and choose the fabric that gives the skirt enough body without feeling stiff or heavy. Use one consistent yarn line when possible so the color sections behave similarly. The emerald, leaf green, and cream should be close in thickness; noticeable differences can make stripes ripple or pull.
Crochet Hook Size
No exact hook size can be read from the image. Begin with the size suggested on your yarn label, then crochet a swatch and adjust. A smaller hook creates a firmer fabric; a larger hook creates more drape and may make the fabric more open. For the bodice, hat, and sandals, prioritize a stable fabric that holds its shape. For the skirt, check that the fabric moves comfortably and does not feel too dense.
Gauge
There is no confirmed gauge for this design. Make a generous swatch in the stitch pattern and yarn you plan to use, wash and dry it as the finished garment will be cared for, then measure the stitches and rows across the center. Record your own gauge and use it when calculating the pieces to match your measurements.
Gauge matters for fit, especially around the chest, waist, head, and foot. If the swatch is too loose, try a smaller hook; if it is too firm, try a larger hook. Make a new swatch after changing yarn or stitch pattern. Do not rely on a gauge number from a different yarn or an unverified pattern.
Abbreviations
The terms below use US crochet terminology.
- ch: chain
- dc: double crochet
- hdc: half double crochet
- inc: increase
- rep: repeat
- sc: single crochet
- sl st: slip stitch
- st(s): stitch(es)
- BLO: back loop only
- FLO: front loop only
These abbreviations are a planning glossary, not a complete stitch sequence. Choose the stitch texture you prefer and keep it consistent within each piece.
Construction Overview
The visual design has four parts: a fitted sleeveless bodice with shoulder straps and a bow, a flared skirt with vertical color sections and daisy motifs, a brimmed sunhat with a green band or bow, and optional small accessories. A handbag and sandals can use the same colors and simple surface details.
The photo does not show whether the dress is worked seamlessly or assembled from panels. Either approach can be adapted to your skills: make a shaped bodice in the round, or work separate front and back sections and seam them. Join the skirt to the bodice only after checking the fit. This guide does not assign stitch counts, increase spacing, or a motif chart with directions for each row.
Construction Guide: Step by Step
1. Plan the palette and take measurements
Choose the intended wearer and write down the fit measurements listed above. Decide which color will form the bodice, how wide the skirt stripes should appear, and where the cream daisies will sit. Sketch the layout so the colors and motifs are balanced from the center front to the sides.
2. Make and wash a swatch
Swatch the fabric planned for the bodice and skirt. If you intend to use different stitches, swatch each one separately. Measure after washing and drying, since the fabric can relax or change in width. Keep the swatch as a reference for the hat and other accessories.
3. Work the bodice
Use emerald green for the upper section. Shape or join the front and back to fit the chest, leaving openings for the armholes and neckline. Try the piece on frequently over the intended underlayer. Add shoulder straps in a width that feels secure and comfortable; position them evenly and check that they do not slip or dig in.
4. Build the skirt
Join the skirt to the lower edge of the bodice, or make it separately and sew it on after a fitting check. Work downward, changing between emerald, leaf green, and cream to create the vertical bands shown in the inspiration. Increase gradually and evenly to create a gentle flare. The exact increase rhythm depends on the stitch, fabric, and wearer, so check the drape as the skirt grows instead of following an invented count.

5. Add the daisy motifs
Make small cream flower motifs and place them across selected skirt bands. Lay them out before sewing so the spacing looks balanced. Attach each flower with matching yarn and secure its center and petals so no edge lifts during wear or washing. For a simpler finish, embroider small flower shapes directly onto the skirt instead of attaching separate motifs.
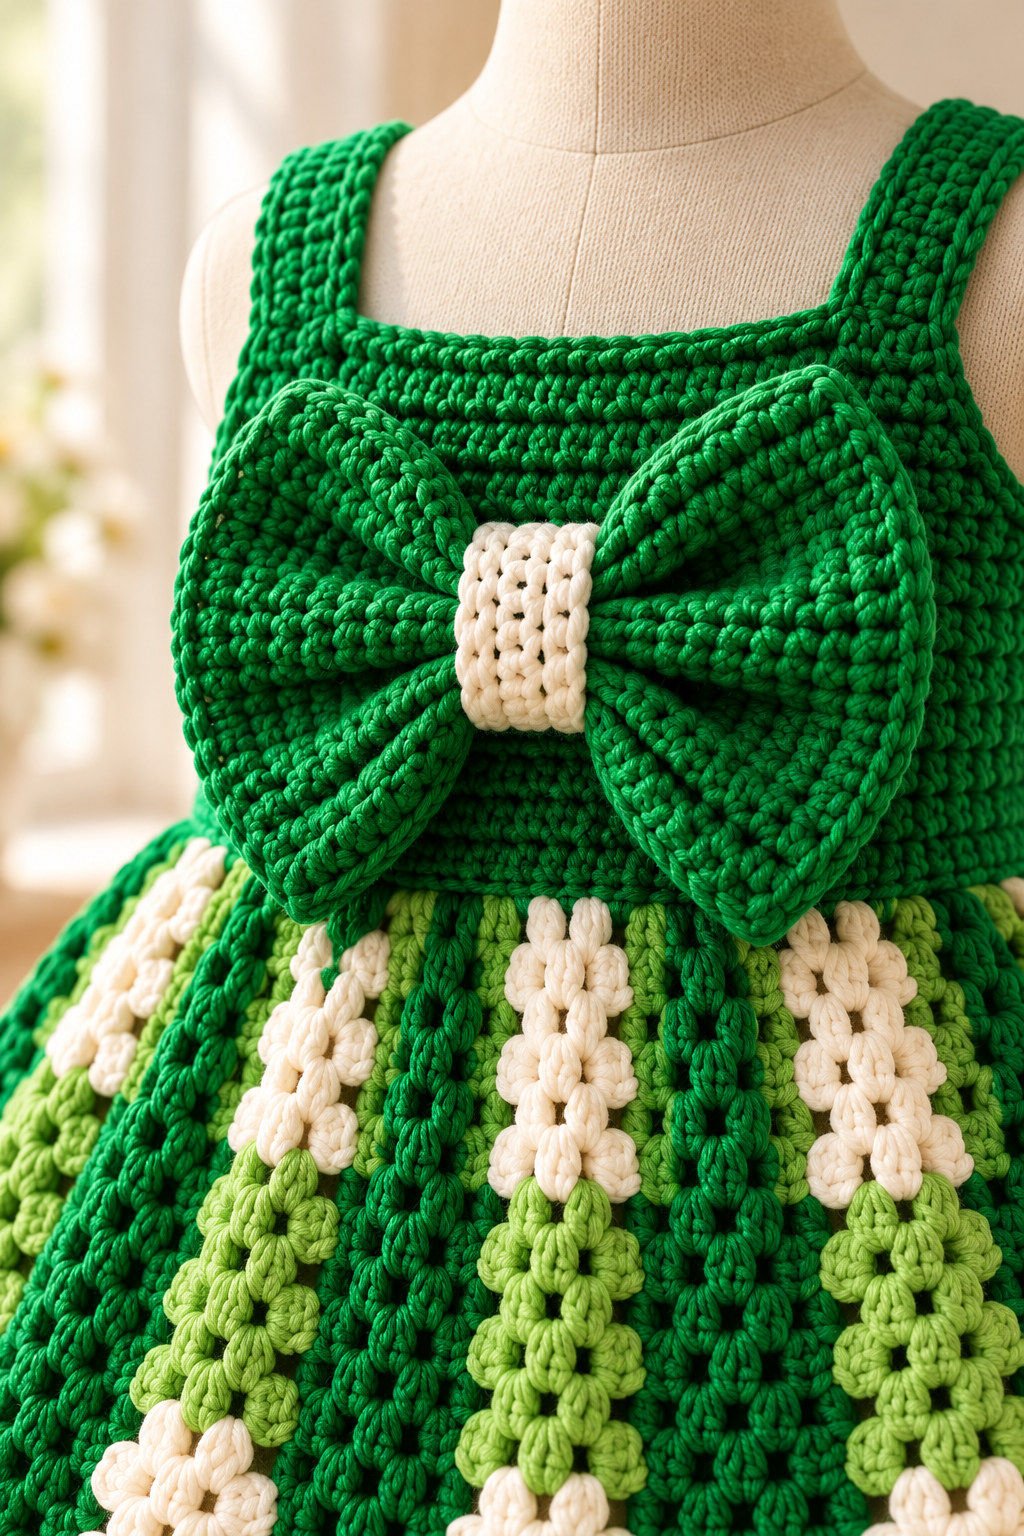
6. Make and attach the bow
Create a wide bow from emerald yarn, shape the loops, and wrap the center with a narrow cream band. Sew the back of the bow firmly to the bodice so it lies flat and does not swing freely. Keep the embellishment lightweight and inspect the attachment before each wear.
7. Crochet the matching accessories
For the hat, work a crown and brim sized from the wearer’s head measurement, then add a green band or bow. For the handbag, crochet a small firm pouch and secure its handle at both sides; keep the bag decorative and do not load it with heavy items. If you make sandals, measure each foot and make a flexible upper that stays on without tight ties. These accessories need their own fit checks and are optional.
8. Finish and check the fit
Weave in ends on the wrong side, seam any panels neatly, and block gently according to the yarn label. Try on the dress and check that the chest, straps, waist join, skirt length, and hem feel comfortable. Confirm that the motifs and bow are firmly attached. If the fit is off, adjust the affected piece before gifting or wearing.
Customization Ideas
- Swap the greens for soft pinks, lavender, blue, or a neutral garden palette.
- Make the skirt mostly one color and use the other shades for narrow accent bands.
- Use embroidered daisies for a flatter, lighter finish.
- Replace the large bow with a small flower or omit it for a simpler bodice.
- Make only the dress and hat if you want a smaller project.
- Add a matching blanket or cardigan using the same color arrangement, while making a separate swatch for the new fabric.
Keep decorative details soft and secure. For a baby garment, avoid beads, bells, loose buttons, long cords, or any small embellishments that could detach. If a detail cannot be firmly attached and checked, leave it off.
Finishing
Before joining, pin or mark the bodice and skirt at the center front, center back, and sides. Match these points first, then distribute the fabric evenly between them. This helps prevent a twisted waist seam or a skirt that hangs unevenly. Secure seams with yarn in a matching color and make the inside smooth so it does not rub.
Block the dress lightly rather than stretching it to force a fit. Shape the brim, straps, and skirt hem while damp if the yarn label permits. Let all pieces dry completely before assembling the full set. Check the finished outfit in daylight for loose ends, uneven joins, scratchy sections, or decorations that need additional stitching.
Care Instructions
Follow the care label for the yarn you choose. If the yarn allows machine washing, place the dress and accessories in a mesh laundry bag and use a gentle cycle with cool water. Otherwise, hand wash gently and avoid twisting the fabric. Press out excess water in a towel, reshape the pieces, and dry flat away from direct heat.
Store the set clean and dry. Keep the hat and bag lightly stuffed with tissue or clean fabric to help them hold their shape. Inspect seams, straps, motifs, and decorative attachments after laundering and before each wear.
Helpful Tips and Troubleshooting
- The bodice feels tight: Recheck your washed swatch and chest measurement. Adjust the bodice width or hook before adding the skirt.
- The skirt waves or ruffles unexpectedly: The increases may be too frequent for your chosen stitch, or the fabric may be stretched. Reassess the spacing on a short section before continuing.
- The skirt feels stiff: Try a slightly larger hook or a softer yarn, then compare a new swatch.
- The color bands look uneven: Mark the transition points and keep the same work direction and tension at each change.
- The straps slide: Reposition them closer to the shoulders or make them wider, then test the fit again.
- A daisy edge lifts: Sew through every petal base with matching yarn and secure the tail on the inside.
- The hat brim curls: Check the edge tension and add enough shaping for the brim to lie comfortably; block only as the yarn allows.
Work in small sections and pause for a fit check before repeating a change across the whole garment. This saves time and makes it easier to correct tension or placement early.
Frequently Asked Questions
Is this a complete counted crochet pattern?
No. It is a construction guide based on the image. The reference image does not provide the stitch sequence, size, yarn details, hook, or gauge needed to write a reliable counted pattern. Use your measurements and swatches to develop the size and stitch counts for your chosen yarn.
What age does the dress fit?
The image has no scale or age information, so a specific age range cannot be confirmed. Select the intended wearer, measure over the planned underlayer, and check the dress during construction.
Can I make the set with acrylic yarn?
Yes, if the yarn is soft, washable, and comfortable against the wearer’s skin. Swatch first and follow the care label. Make sure all colors have similar thickness and drape.
Do I need to crochet all the accessories?
No. The dress is the main project. The sunhat, handbag, and sandals are optional additions and can be made later from the same palette.
Are the sandals suitable for walking?
The pictured sandals are decorative baby accessories. Do not assume a crocheted sole provides grip or protection for standing or walking. Check the finished fit and intended use, and leave them off when they could slip or restrict movement.
How can I make the set more suitable for babies?
Use soft washable yarn, embroider details where practical, and securely sew every motif and bow. Avoid small detachable items and long loose cords. Check the garment regularly for wear or loose parts.
Final Thoughts
This crochet baby dress set is a charming project for makers who enjoy color planning, floral details, and coordinated accessories. Use the photograph as visual inspiration, then let your own swatch and fit checks determine the stitch choice, dimensions, and shaping. A carefully fitted dress with securely finished details will make a thoughtful handmade keepsake.