
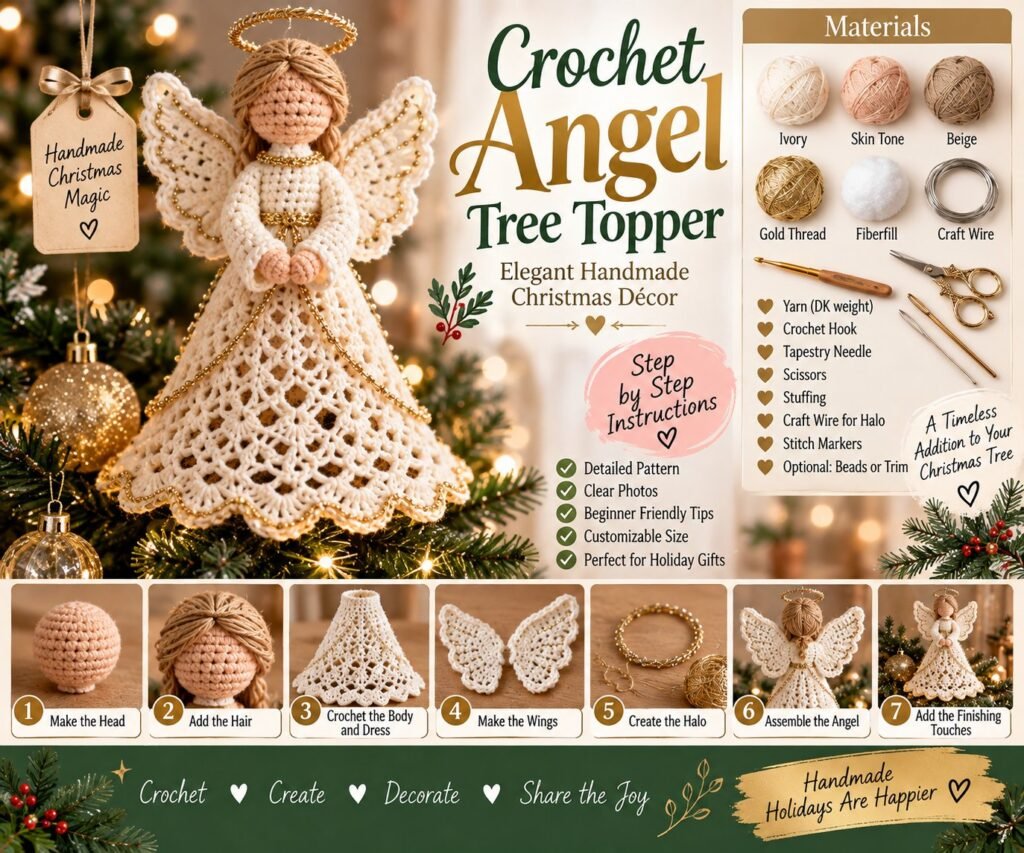
Create a beautiful handmade centerpiece for your Christmas tree with this Crochet Angel Tree Topper. Designed in soft ivory yarn with delicate lace-style stitches, golden accents, graceful wings, and a sweet halo, this crochet angel adds a warm traditional touch to holiday decorating.
This project is also a wonderful way to use crochet skills to create a meaningful Christmas keepsake that can be brought out year after year.
The instructions below are written as an original, adaptable pattern based on the style shown in the reference image. Exact size can vary depending on yarn weight, hook size, tension, and the amount of decorative trim used.
Crochet Angel Tree Topper Pattern
This elegant Christmas angel is made from several simple components: the head, body and dress, arms, wings, halo, and decorative details.
The skirt is designed with a slightly open lace effect so the finished angel has a delicate, flowing appearance. A structured opening underneath the skirt can also be added so the angel sits securely over the top branch of a Christmas tree. Tree-topper designs commonly use an internal tube or cone to improve stability.
Materials Needed
Cream or ivory DK yarn: approximately 100–150 g
Small amount of skin-tone yarn
Small amount of beige or light-brown yarn for the hair
Gold metallic crochet thread or thin gold yarn
2.5 mm crochet hook
3.0 mm crochet hook
Yarn needle
Scissors
Fiberfill stuffing
Stitch marker
Thin craft wire for the halo
Gold ribbon or metallic trim
Optional small beads or pearls
Fabric stiffener or diluted craft glue for the wings, optional
Finished Size
Using DK-weight yarn and a 2.5–3 mm crochet hook, the finished angel will generally measure approximately 20–25 cm tall.
For a smaller tree, use finer crochet thread and a smaller hook.
For a larger Christmas tree topper, use thicker yarn and a larger hook.
Always make a small sample first because crochet tension can significantly change the finished size.
Crochet Abbreviations
ch — chain
sl st — slip stitch
sc — single crochet
hdc — half double crochet
dc — double crochet
tr — treble crochet
inc — increase
dec — decrease
st — stitch
sts — stitches
BLO — back loop only
FO — fasten off
Skill Level
Intermediate
The individual stitches are relatively simple, but shaping the angel, creating the lace skirt, assembling the wings, and attaching the decorative elements require patience and careful sewing.
How to Crochet the Angel Head
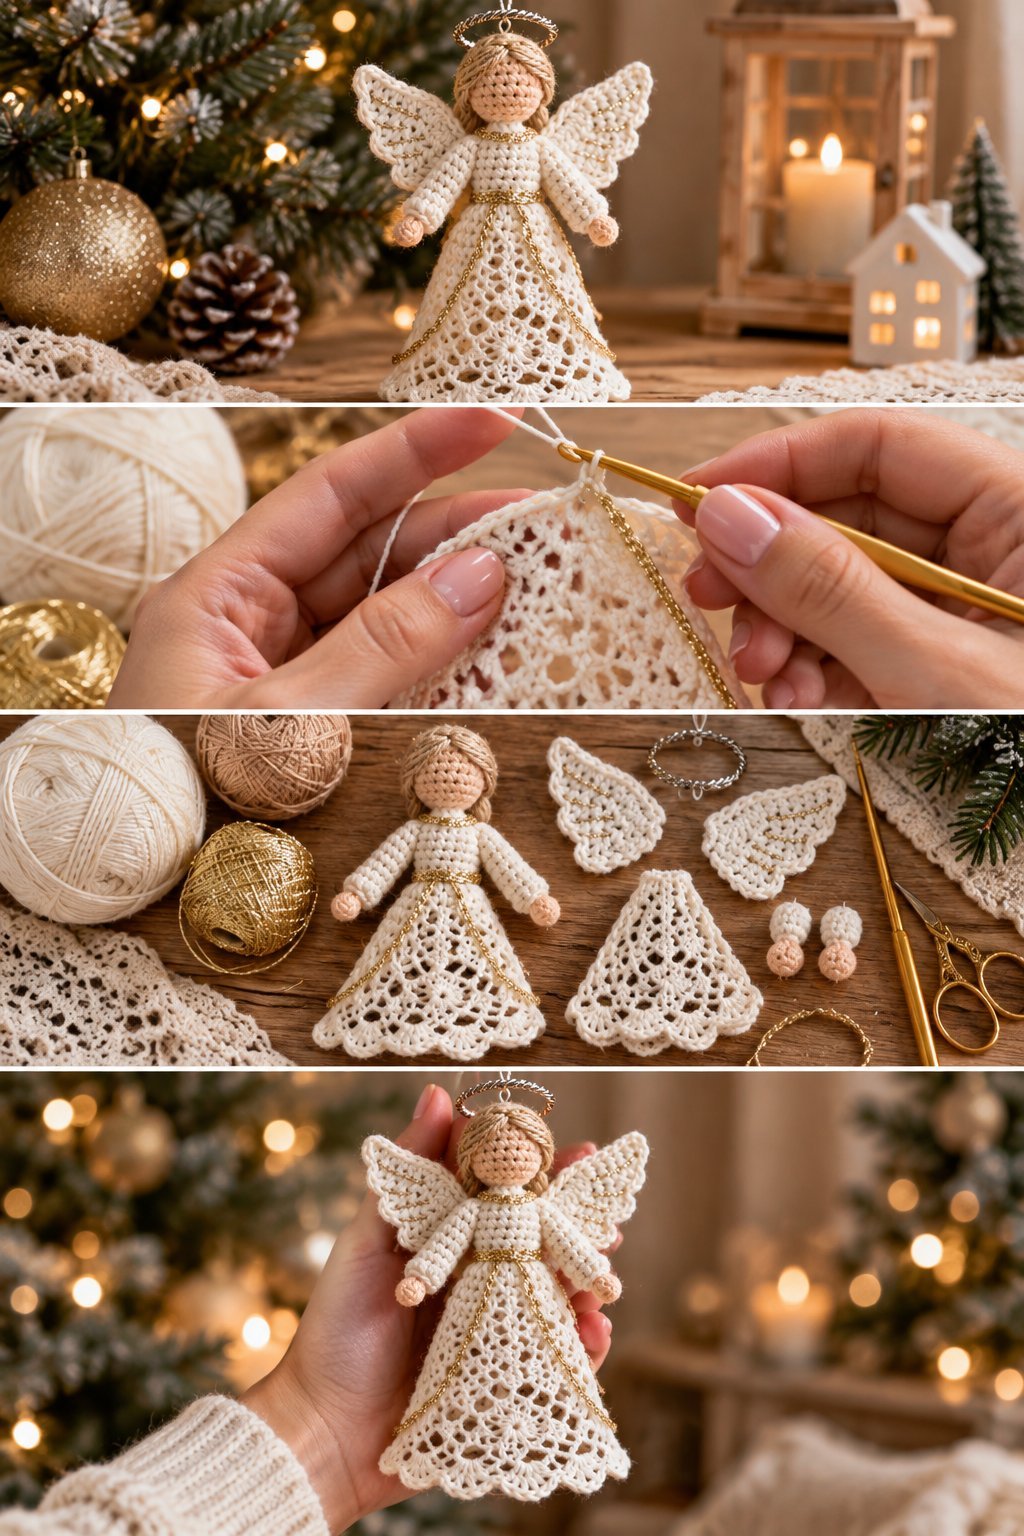
Begin with the skin-tone yarn.
Round 1
Make a magic ring.
Work 6 sc into the ring.
Pull the ring closed.
Place a stitch marker.
6 sts
Round 2
Work 2 sc into every stitch around.
12 sts
Round 3
Repeat:
1 sc in the next stitch, 2 sc in the next stitch.
Repeat around.
18 sts
Round 4
Repeat:
1 sc in each of the next 2 stitches, 2 sc in the next stitch.
24 sts
Rounds 5–8
Work 1 sc in every stitch around.
24 sts
Begin lightly stuffing the head.
Round 9
Repeat:
2 sc, sc2tog.
18 sts
Round 10
Repeat:
1 sc, sc2tog.
12 sts
Add a little more stuffing.
Round 11
Work sc2tog around.
6 sts
Fasten off and close the opening.
Set the head aside.
How to Make the Hair
Use beige, tan, or light-brown yarn.
Cut several small lengths of yarn and attach them around the top and sides of the head.
For a simple angel hairstyle, keep the strands short and softly arranged around the face.
You can also crochet a small cap and sew it onto the head if you want a more polished hairstyle.
Secure all strands firmly because the finished piece will be handled when placed on the Christmas tree.
How to Crochet the Angel Body
Switch to ivory yarn.
The body begins at the waist and gradually expands into the angel’s flowing skirt.
Foundation
Chain 24.
Join with a slip stitch to form a ring.
Make sure the chain is not twisted.
Round 1
Ch 1.
Work 1 sc in each chain around.
Join with a sl st.
24 sts
Round 2
Ch 2.
Work 1 dc in every stitch around.
Join with a sl st.
Round 3
Ch 2.
Work 1 dc in the same stitch.
Then work 2 dc in each stitch around.
Join with a sl st.
Round 4
Ch 2.
Work 1 dc in the next stitch.
Work 2 dc in the following stitch.
Repeat around.
Join with a sl st.
Continue increasing gradually so the skirt begins to flare.
Creating the Lace Skirt
The decorative skirt is what gives this Christmas angel its elegant handmade appearance.
Lace Round 1
Ch 3.
Skip 1 stitch.
Work 1 dc in the next stitch.
Ch 1.
Skip 1 stitch.
Repeat this sequence around.
Join with a sl st.
Lace Round 2
Ch 3.
Work 1 dc around the next chain space.
Ch 2.
Work 2 dc into the next chain space.
Repeat around.
Join with a sl st.
Lace Round 3
Ch 3.
Work 2 dc into the next chain space.
Ch 2.
Work 3 dc into the following chain space.
Repeat around.
Join with a sl st.
Lace Round 4
Repeat the same general shell pattern while adding chain spaces between the groups.
This creates the openwork effect visible throughout the skirt.
Continue until the skirt reaches your desired length.
For a fuller angel, add additional lace rounds.
For a smaller tree topper, stop earlier.
Adding the Decorative Skirt Border
For the final round, work a scalloped edging.
Ch 1.
Sl st into the next stitch.
Work 1 sc into the next stitch.
Work 5 dc into the following stitch.
Work 1 sc into the next stitch.
Repeat around the entire bottom edge.
Join with a sl st.
Fasten off and weave in the ends.
This creates a soft decorative edge that helps the dress maintain its elegant shape.
Creating the Tree Topper Opening
If you want the angel to sit directly on top of your Christmas tree, create a narrow tube inside the bottom of the skirt.
Using ivory yarn, attach the yarn around the inside center of the skirt.
Work several rounds of sc without increasing.
Continue until the tube is long enough to slide over the upper branch of your tree.
The opening should be snug enough to hold the angel securely without stretching the crochet fabric.
This is especially useful for a tree-topper design because it prevents the angel from sliding sideways.
How to Crochet the Arms
Make two arms.
Using skin-tone yarn:
Round 1
Magic ring.
Work 6 sc.
Rounds 2–5
Work 1 sc in each stitch around.
6 sts
Switch to ivory yarn.
Rounds 6–10
Work 1 sc in each stitch around.
Fasten off.
Lightly stuff each arm.
Do not overstuff because the arms should remain soft and flexible.
Sew the top of each arm closed.
Attach the arms to the sides of the angel’s body just below the shoulders.
How to Crochet the Wings
The wings are made separately and attached to the back of the angel.
Make two matching wings.
Using ivory yarn:
Row 1
Chain 10.
Work 1 sc into the second chain from the hook.
Work sc across.
Row 2
Ch 1 and turn.
Work 2 sc into the first stitch.
Work 1 sc across.
Row 3
Ch 1 and turn.
Increase at the beginning and end of the row.
Rows 4–8
Continue increasing gradually until the wing reaches the desired width.
To create a decorative lace effect, replace selected sc stitches with dc and chain spaces.
For example:
Ch 3.
Skip 1 stitch.
Work 1 dc into the next stitch.
Repeat across.
Wing Edging
Work sc around the outside edge.
For a more decorative finish, add small picots around the outer edge.
Fasten off.
Repeat for the second wing.
Shaping the Wings
Place the wings on a flat surface.
Gently shape each wing into a curved form.
If you want the wings to remain more open and structured, lightly apply fabric stiffener and allow them to dry completely.
Do not saturate the yarn.
Once dry, sew the wings securely onto the upper back of the angel.
Position them slightly upward so they look as though the angel is ready to fly.
How to Make the Halo
The halo is one of the simplest parts of the project.
Cut a piece of thin craft wire long enough to form a small circle.
Shape the wire into a ring.
Twist the ends together securely.
Cover the wire with gold crochet thread or metallic yarn.
Alternatively, crochet a small chain long enough to form a circle.
Join the chain with a slip stitch.
Work one round of sc around the chain.
Attach the completed halo to the top of the angel’s head using gold thread.
Make sure it is firmly secured before placing the angel on the tree.
Adding Gold Details
For the elegant look shown in the reference, use gold thread sparingly.
Good areas for gold decoration include:
The halo
The neckline
The waist
The skirt border
The edges of the wings
A narrow gold line running down the skirt
Avoid adding too much metallic trim because the delicate ivory crochet should remain the main feature.
Attaching the Head
Position the head directly above the body.
Use the yarn needle and matching ivory or skin-tone yarn to sew the head securely to the neckline.
Work several stitches around the connection point.
Check that the head is centered before tightening the stitches.
Hide all yarn tails inside the body.
Creating the Angel’s Face
For a simple traditional Christmas angel, keep the face delicate.
You can embroider two small eyes using dark brown or black thread.
Add a tiny embroidered mouth if desired.
A small amount of blush-colored yarn or fabric paint can be used for the cheeks.
Keep facial details subtle to maintain the elegant handmade appearance.
Finishing the Angel
Before placing the angel on the Christmas tree, inspect the entire project.
Secure loose yarn ends.
Check that the wings are firmly attached.
Make sure the halo is secure.
Check the arms and head.
Shape the skirt evenly.
Adjust the gold trim.
If necessary, lightly block the lace skirt so the openwork pattern becomes more defined.
Allow the piece to dry completely before decorating your tree.
How to Block the Crochet Angel
Blocking can make a major difference in the appearance of delicate crochet lace.
Place the skirt gently on a clean towel.
Shape the bottom edge into an even circle.
Open the lace sections carefully with your fingers.
Allow the piece to dry naturally.
For cotton yarn, light wet blocking can help the lace pattern become more defined.
Always check the yarn label before applying water or heat.
Crochet Angel Tree Topper Tips
Use cotton or cotton-blend yarn if you want crisp lace stitches.
Choose ivory instead of bright white for a softer vintage appearance.
Use metallic gold thread for subtle sparkle.
Keep the angel lightweight so the tree branch does not bend.
Make the inner tree opening snug enough to hold the angel securely.
Use a stitch marker when working continuous rounds.
Stuff the head lightly rather than making it overly firm.
Block the wings and skirt separately for a cleaner shape.
Color Ideas for Your Crochet Christmas Angel
Classic Ivory and Gold
Ivory yarn with gold metallic trim creates a traditional Christmas appearance.
White and Silver
Use bright white yarn with silver thread for a cool winter-inspired angel.
Cream and Champagne
Cream yarn combined with champagne-colored metallic thread creates a soft vintage look.
White and Red
Add small red details around the waist or skirt for a traditional Christmas palette.
Blush and Gold
A soft blush dress with ivory wings creates a more modern decorative style.
Where to Use Your Crochet Angel
This handmade angel works beautifully as a Christmas tree topper, but there are several other ways to display it.
Place it on top of a smaller tabletop Christmas tree.
Display it on a holiday mantel.
Use it as a centerpiece.
Attach a hanging loop and use it as a Christmas ornament.
Place it beside a nativity display.
Give it as a handmade Christmas gift.
Create several smaller angels for a coordinated Christmas tree.
How to Make a Smaller Crochet Angel
To make a miniature version, switch to crochet thread and a smaller hook.
Reduce the number of body rounds and create smaller wings.
A simple angel ornament can also be constructed from basic crochet shapes, making it easier to adjust the finished size.
How to Make a Larger Tree Topper
For a larger Christmas tree, use worsted-weight yarn and a 3.5–4 mm hook.
Increase the number of skirt rounds.
Make larger wings.
Use a larger halo.
Most importantly, enlarge the inner support opening so it fits securely over the top of the tree.
Some dedicated angel tree-topper patterns use DK/light-worsted yarn and hooks around 4 mm, showing how yarn and hook choices can be adjusted for a larger decorative angel.
Frequently Asked Questions
Can beginners make this crochet angel?
Yes. The project uses familiar crochet stitches, but the lace skirt and assembly require some patience. Beginners who are comfortable with single crochet, double crochet, increases, decreases, and sewing crochet pieces together should be able to work through the project.
What yarn is best for a crochet angel?
DK-weight cotton or cotton-blend yarn is a good choice because it produces defined stitches and holds its shape well.
Can I use acrylic yarn?
Yes. Acrylic can be used, especially if you want a softer and lighter angel. Cotton tends to give lace stitches a crisper appearance.
How do I keep the angel standing on the tree?
Create a narrow crocheted tube inside the skirt that fits over the top branch. This gives the angel additional stability.
Can I make the wings stiffer?
Yes. Light fabric stiffener can help lace wings maintain their shape.
Can I sell finished crochet angels?
If you are using an original pattern, you can generally decide how to use your finished items, but always check the specific pattern designer’s terms when working from someone else’s pattern.
Final Thoughts
A Crochet Angel Tree Topper is a beautiful Christmas project for anyone who loves handmade holiday decorations. The combination of delicate ivory crochet, lace-style stitches, graceful wings, golden details, and a handmade halo creates a timeless decoration that can become part of your Christmas tradition for years to come.
Whether you place it on a full-size Christmas tree, a small tabletop tree, or display it as part of your holiday décor, this handmade angel brings a beautiful personal touch to the season.

