
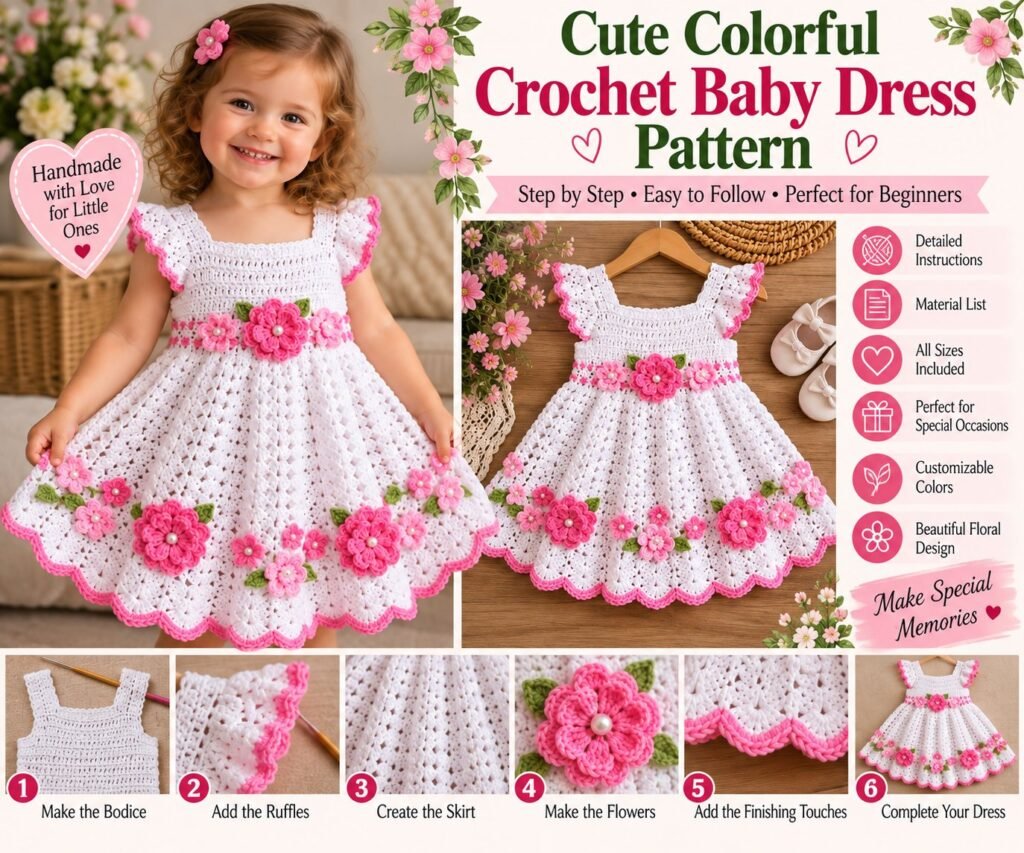
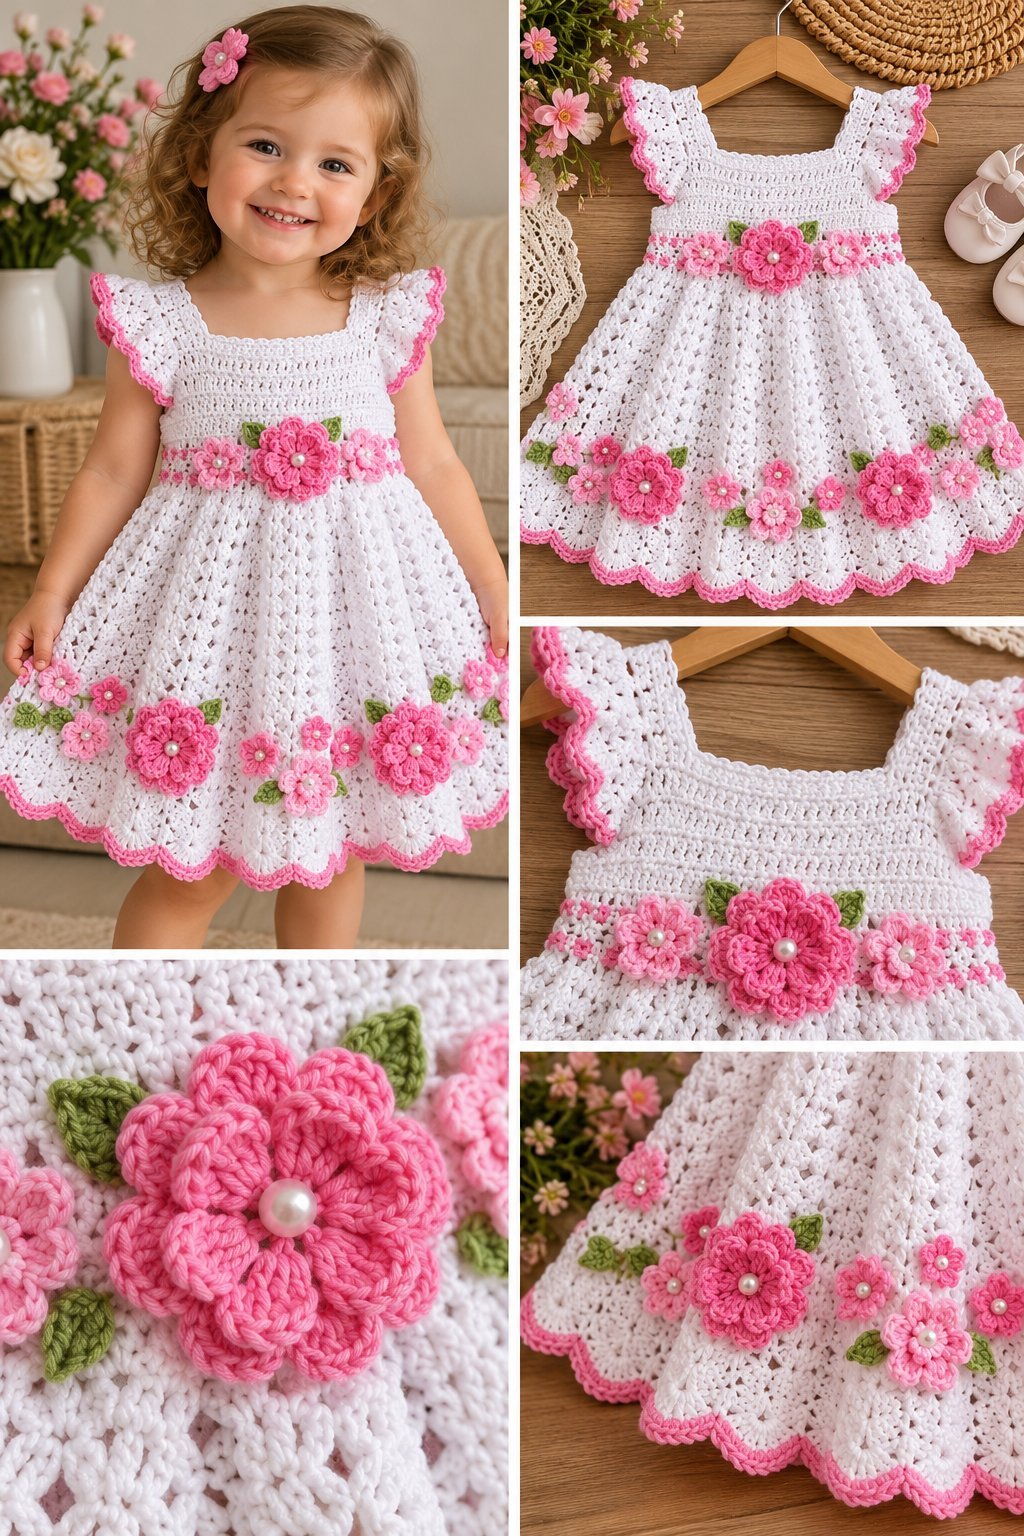
Create a beautiful handmade dress with this Cute Colorful Crochet Baby Dress Pattern. Inspired by the soft white crochet dress with pink floral details shown in the reference, this design features a fitted crochet bodice, pretty ruffled straps, a flowing lace-style skirt, scalloped edging, and colorful handmade flowers.
The combination of white yarn, pink flowers, green leaves, and delicate pink edging gives this baby dress a sweet garden-inspired look. It is perfect for birthdays, baby photos, special occasions, baby showers, or as a handmade gift.
This tutorial is written as an original, adaptable pattern inspired by the reference image. The exact original pattern used to create the photographed garment was not provided, so stitch counts and measurements should be adjusted according to your yarn, crochet tension, and the baby’s measurements.
PROJECT DETAILS
Project Type: Crochet Baby Dress
Style: Floral and Vintage-Inspired
Suggested Base Size: 6–12 Months
Skill Level: Beginner to Intermediate
Construction: Bodice worked first, followed by the skirt
Main Color: White
Accent Color: Pink
Flower Color: Pink
Leaf Color: Green
Crochet Terminology: US Terms
The construction follows a common approach for baby crochet dresses: create the upper section first, then work the skirt with additional stitches to create fullness. Gauge should always be checked because hook size and yarn tension can significantly change the finished measurements. thelazyhobbyhopper.blogspot.com
MATERIALS NEEDED
White DK or light worsted weight yarn: approximately 200–300 g
Pink DK or light worsted weight yarn: approximately 30–60 g
Green yarn: small amount for leaves
3.5 mm crochet hook
4.0 mm crochet hook for the skirt, optional
Tapestry needle
Scissors
Stitch markers
Measuring tape
Small sewing needle and matching thread
Small buttons, optional, for the back closure
Blocking mat and pins, optional
For baby garments, choose a soft, washable yarn that is comfortable against delicate skin.
SUGGESTED SIZE
The base instructions are designed around approximately 6–12 months.
The dress can be adapted for:
Newborn
0–3 months
3–6 months
6–12 months
12–18 months
18–24 months
Rather than relying only on age, measure the baby’s chest and desired dress length. Published baby dress patterns use different finished measurements and gauges, so checking the actual measurements is important when adapting a design. thelazyhobbyhopper.blogspot.com
GAUGE
Make a gauge swatch before beginning.
Suggested starting gauge:
18–20 stitches = 10 cm
10–12 rows = 10 cm
For the lace section, the gauge may be different depending on the stitch pattern.
If your swatch is too small, use a larger hook.
If your swatch is too large, use a smaller hook.
Matching gauge helps prevent the finished bodice from becoming too tight or too loose. Lovable Loops
CROCHET ABBREVIATIONS
ch — chain
sc — single crochet
hdc — half double crochet
dc — double crochet
tr — treble crochet
sl st — slip stitch
st — stitch
sts — stitches
sk — skip
inc — increase
dec — decrease
rep — repeat
rnd — round
BLO — back loop only
FLO — front loop only
STITCHES USED
Single Crochet
Insert hook into the stitch.
Yarn over and pull up a loop.
Yarn over and pull through both loops.
Half Double Crochet
Yarn over.
Insert hook into the stitch.
Yarn over and pull up a loop.
Yarn over and pull through all three loops.
Double Crochet
Yarn over.
Insert hook into the stitch.
Yarn over and pull up a loop.
Yarn over and pull through two loops.
Yarn over and pull through the remaining two loops.
Shell Stitch
A simple shell can be made by working 5 dc into the same stitch.
This creates the decorative fullness used for the skirt and edging.
PATTERN NOTES
The dress is worked from the upper bodice downward.
The skirt is worked with gradual increases to create an A-line shape.
The ruffled straps are added after the bodice is completed.
The flowers are made separately and sewn onto the finished dress.
The pink edging is added after the main dress is complete.
Try the bodice against the baby or compare it with a well-fitting garment before continuing with the skirt.
PART 1: CROCHET THE BABY DRESS BODICE
STEP 1: MAKE THE FOUNDATION CHAIN
Using white yarn, chain approximately 54–60 stitches for the base 6–12 month size.
Do not rely on this number alone. Measure the chain around the baby’s chest and adjust as necessary.
The foundation should fit comfortably around the chest without stretching tightly.
Add 1 chain for turning if you are working in rows.
STEP 2: WORK THE FIRST ROW
Work sc into the second chain from the hook.
Continue working sc across the foundation chain.
Ch 1 and turn.
The first row establishes the lower edge of the bodice.
STEP 3: BUILD THE BODICE
Continue working rows of hdc.
Row 2
Ch 2.
Hdc across.
Ch 2 and turn.
Row 3
Hdc across.
Ch 2 and turn.
Continue working approximately 10–16 rows, depending on the desired bodice length.
Keep checking the fit.
The finished bodice should reach comfortably from the neckline to slightly below the chest.
STEP 4: SHAPE THE NECKLINE
To create the neckline, divide the upper section into three areas:
Left shoulder
Front neckline
Right shoulder
Work across the first shoulder section.
Skip the required center stitches for the neckline.
Continue across the second shoulder section.
Work a few additional rows until both shoulders have the same height.
For a softer neckline, work one round of sc around the entire opening after the shoulder shaping is complete.
STEP 5: SHAPE THE BACK
The back can be made as one piece or separated slightly to create an opening.
For an easy baby-friendly closure, leave a small opening at the upper back.
Work the back section in rows.
Add one or two small button loops at the top.
This makes the dress easier to put on and remove.
PART 2: CREATE THE RUFFLED SHOULDERS
The ruffled shoulder straps are one of the main decorative features of the dress.
STEP 6: MAKE THE STRAPS
Attach white yarn to the top of one shoulder.
Chain approximately 18–22 stitches.
Work 2–4 rows of sc or hdc.
Fasten off.
Repeat on the other shoulder.
Check that both straps are the same length.
STEP 7: ADD THE PINK RUFFLE
Attach pink yarn to one edge of the shoulder strap.
Work sc evenly along the edge.
For the decorative ruffle:
Sc in the first stitch.
Skip 1 stitch.
Work 3 dc into the next stitch.
Skip 1 stitch.
Repeat across the strap.
Finish with a sl st.
Fasten off.
Repeat on the remaining straps.
This creates the delicate pink ruffled effect shown in the reference.
PART 3: CROCHET THE FLARED SKIRT
The skirt is designed to become gradually wider as it moves toward the hem.
STEP 8: JOIN THE SKIRT
Attach white yarn around the bottom edge of the bodice.
Work hdc evenly around.
Join with a sl st.
Make sure the number of stitches is appropriate for your chosen stitch repeat.
STEP 9: BEGIN THE LACE TEXTURE
Round 1
Ch 2.
Hdc in each stitch around.
Join with a sl st.
Round 2
Ch 3.
Skip 1 stitch.
Work 2 dc into the next stitch.
Ch 1.
Skip 1 stitch.
Repeat around.
Join with a sl st.
This creates small open spaces throughout the fabric.
STEP 10: CREATE THE SKIRT PATTERN
For the next round:
Ch 3.
Work 2 dc into the next chain space.
Ch 1.
Work 3 dc into the next chain space.
Ch 1.
Continue repeating this sequence around the dress.
Join with a sl st.
Continue working the same pattern for several rounds.
The fabric should begin to form a soft, flowing skirt.
STEP 11: ADD SKIRT INCREASES
To create the full shape shown in the reference, add additional stitches gradually.
Every few rounds, work extra dc groups into selected chain spaces.
For example:
Work 3 dc in one space.
Work 3 dc in the next space.
Then work 5 dc in the following space.
Continue the established pattern around the skirt.
Do not add too many increases at once.
Too many increases can make the skirt excessively wavy.
STEP 12: CONTINUE TO THE DESIRED LENGTH
Continue crocheting the skirt until it reaches the desired length.
For a shorter baby dress, stop earlier.
For a longer occasion dress, add additional lace rounds.
As a general guide, published baby dress patterns often use finished lengths around the low-to-mid 30 cm range for younger babies, increasing with size. Use the baby’s actual measurement rather than relying solely on an age chart. thelazyhobbyhopper.blogspot.com
PART 4: CREATE THE SCALLOPED HEM
STEP 13: ADD THE WHITE SCALLOP
Work one final round of sc around the bottom of the skirt.
Join with a sl st.
This creates a stable foundation for the decorative border.
STEP 14: ADD THE PINK EDGING
Attach pink yarn.
Work:
Sc in the first stitch.
Skip 2 stitches.
Work 5 dc into the next stitch.
Skip 2 stitches.
Sc in the next stitch.
Repeat around the entire hem.
Join with a sl st.
Fasten off.
The pink border should create a soft scalloped edge similar to the reference dress.
PART 5: CROCHET THE FLOWERS
The colorful flowers are the main decorative element of this baby dress.
Make a mixture of large and small flowers.
Suggested amount:
3–5 large flowers
8–12 small flowers
6–10 leaves
You can make more or fewer depending on the desired look.
STEP 15: MAKE THE LARGE FLOWER CENTER
Using pink yarn:
Make a magic ring.
Work 8 sc into the ring.
Pull the center closed.
Join with a sl st.
Fasten off.
STEP 16: CREATE THE FLOWER PETALS
Attach pink yarn around the center.
Ch 3.
Work 3 dc into the same space.
Ch 3.
Sl st into the next stitch.
Repeat around.
Continue until you have approximately 5–6 petals.
Fasten off.
Shape each petal gently with your fingers.
STEP 17: ADD A PEARL CENTER
For an optional decorative finish, sew a small pearl-style bead into the center of each flower.
For baby clothing, make sure any embellishment is extremely secure and consider omitting beads entirely for younger babies.
A simple crocheted center is the safer decorative option.
STEP 18: MAKE SMALLER FLOWERS
Using a smaller hook or thinner pink yarn:
Make a magic ring.
Work 6 sc into the ring.
Join with a sl st.
For each petal:
Ch 2.
Work 2 hdc.
Ch 2.
Sl st into the next stitch.
Repeat around.
Fasten off.
These smaller flowers can be scattered between the larger flowers.
PART 6: CROCHET THE GREEN LEAVES
STEP 19: MAKE THE LEAVES
Using green yarn:
Chain 7.
Sl st into the second chain.
Sc into the next stitch.
Hdc into the next stitch.
Dc into the next stitch.
Hdc into the next stitch.
Sc into the next stitch.
Sl st into the final stitch.
Continue working along the opposite side of the chain.
Fasten off.
Shape the leaf gently.
Make several leaves in different sizes.
PART 7: ATTACH THE FLORAL DECORATIONS
STEP 20: ARRANGE THE FLOWERS
Before sewing the flowers onto the dress, place them on the skirt.
A beautiful arrangement is:
Large flowers around the lower skirt
Small flowers between the larger flowers
A few flowers around the waist
Small leaves between selected flowers
This creates the garden-inspired floral border shown in the reference.
STEP 21: SEW THE FLOWERS TO THE DRESS
Use a tapestry needle and matching yarn.
Sew through the center of each flower several times.
Secure the back of the flower firmly.
Sew the leaves beside the flowers.
Check every flower before allowing the dress to be worn.
PART 8: CREATE THE FLORAL WAISTBAND
STEP 22: ADD THE PINK WAIST DETAIL
Attach pink yarn around the waistline.
Work one round of sc.
For a more decorative waistband, work:
Sc.
Ch 1.
Skip 1 stitch.
Sc in the next stitch.
Repeat around.
Add small flowers directly over the waistband.
This creates the floral belt effect shown in the reference image.
PART 9: FINISH THE NECKLINE
STEP 23: ADD THE NECKLINE BORDER
Attach pink yarn around the neckline.
Work one round of sc.
For the decorative edge:
Sc.
Skip 1 stitch.
3 dc in the next stitch.
Skip 1 stitch.
Repeat around.
Finish with a sl st.
Fasten off.
Weave in the ends.
PART 10: FINISHING THE DRESS
STEP 24: WEAVE IN ALL YARN ENDS
Turn the dress inside out.
Use a tapestry needle to weave every loose yarn end through several stitches.
Trim the excess.
Check the flowers, straps, waistband, and hem.
STEP 25: BLOCK THE DRESS
Lightly dampen the finished dress.
Lay it flat on a clean towel or blocking mat.
Gently shape:
The shoulder ruffles
The neckline
The skirt
The scalloped hem
The floral border
Allow the dress to dry completely.
Blocking helps the lace stitches open and gives the skirt a more polished shape.
STEP 26: ADD THE BACK CLOSURE
If you created a back opening, sew one or two small buttons securely onto one side.
Create corresponding crochet loops on the opposite side.
Test the closure before the baby wears the dress.
Make sure the buttons are firmly attached.
STEP 27: FINAL FIT CHECK
Before wearing the finished dress, check:
The neckline is comfortable.
The armholes are not tight.
The shoulder straps sit correctly.
The bodice fits comfortably.
The skirt hangs evenly.
The hem is not pulling.
The flowers are firmly attached.
All yarn ends are secured.
The back closure works properly.
HOW TO CUSTOMIZE THE DRESS
MAKE THE DRESS LONGER
Continue working additional skirt rounds before adding the final edging.
MAKE THE DRESS SHORTER
Reduce the number of skirt rounds.
MAKE THE SKIRT FULLER
Add more increase stitches during the skirt rounds.
MAKE THE SKIRT LESS FULL
Use fewer increases.
CHANGE THE FLOWER COLORS
Try:
Pink and white
Lavender and white
Peach and cream
Yellow and white
Coral and pink
Pastel rainbow
CHANGE THE MAIN COLOR
The white base can be replaced with:
Cream
Soft pink
Mint green
Lavender
Baby blue
Butter yellow
TIPS FOR A BETTER FINISH
Always make a gauge swatch before beginning the dress.
Measure the baby whenever possible.
Check the bodice fit before starting the skirt.
Use stitch markers to keep track of repeated rounds.
Count your stitches regularly.
Do not add too many skirt increases at once.
Block the finished dress to improve the lace definition.
Sew flowers securely.
Use soft yarn appropriate for baby clothing.
COMMON CROCHET PROBLEMS
THE BODICE IS TOO TIGHT
Your gauge may be tighter than expected.
Try using a larger hook or increase the foundation chain.
THE BODICE IS TOO LOOSE
Use a smaller hook or reduce the number of foundation stitches.
THE SKIRT IS CURLING
You may need additional increase stitches.
Check that you are not accidentally decreasing during the lace pattern.
THE SKIRT IS TOO WAVY
Too many increases may have been added.
Reduce the number of increases in the next round.
THE FLOWERS LOOK TOO LARGE
Use thinner yarn or a smaller crochet hook.
THE FLOWERS DO NOT STAY FLAT
Block them lightly and secure the centers carefully when sewing them to the dress.
BABY SAFETY NOTES
Inspect the finished dress carefully before every use.
Make sure flowers and other decorations are securely attached.
Avoid loose beads, buttons, or other detachable embellishments for babies who may pull or mouth the decorations.
Keep long ties and cords away from the baby’s neck.
Check the dress regularly for loose stitches or damaged seams.
Never leave a baby unattended while wearing an item with potentially detachable decorations.
CARE INSTRUCTIONS
Follow the washing instructions on your yarn label.
For most handmade baby garments:
Wash gently.
Use mild detergent.
Avoid harsh bleach.
Do not wring aggressively.
Reshape while damp.
Lay flat to dry.
Keep away from high heat unless specifically recommended for the yarn.
FREQUENTLY ASKED QUESTIONS
WHAT YARN IS BEST FOR A CROCHET BABY DRESS?
Soft DK cotton, cotton blends, and washable baby yarn are good choices. The yarn should feel comfortable against the skin and maintain its shape after washing.
WHAT CROCHET HOOK SHOULD I USE?
A 3.5 mm hook is a good starting point for DK yarn. Some dress designs use different hook sizes for the bodice and skirt to create the desired fit and drape. Crochet Dreamz
CAN I MAKE THIS DRESS FOR A NEWBORN?
Yes. Reduce the bodice measurements and skirt length according to the baby’s measurements.
CAN I MAKE THIS DRESS FOR A TODDLER?
Yes. Increase the bodice circumference and adjust the skirt length. Always check your gauge before beginning.
CAN I USE A DIFFERENT COLOR?
Yes. This pattern is ideal for experimenting with different color combinations.
CAN I REMOVE THE FLOWERS?
Yes. The floral decorations are optional. The dress can also look beautiful with only the pink edging.
IS THIS A GOOD BEGINNER CROCHET PROJECT?
The individual stitches are beginner-friendly, but the complete project involves shaping, lace stitches, increases, ruffles, and appliqués. A confident beginner or intermediate crocheter may find it easier to manage.

