
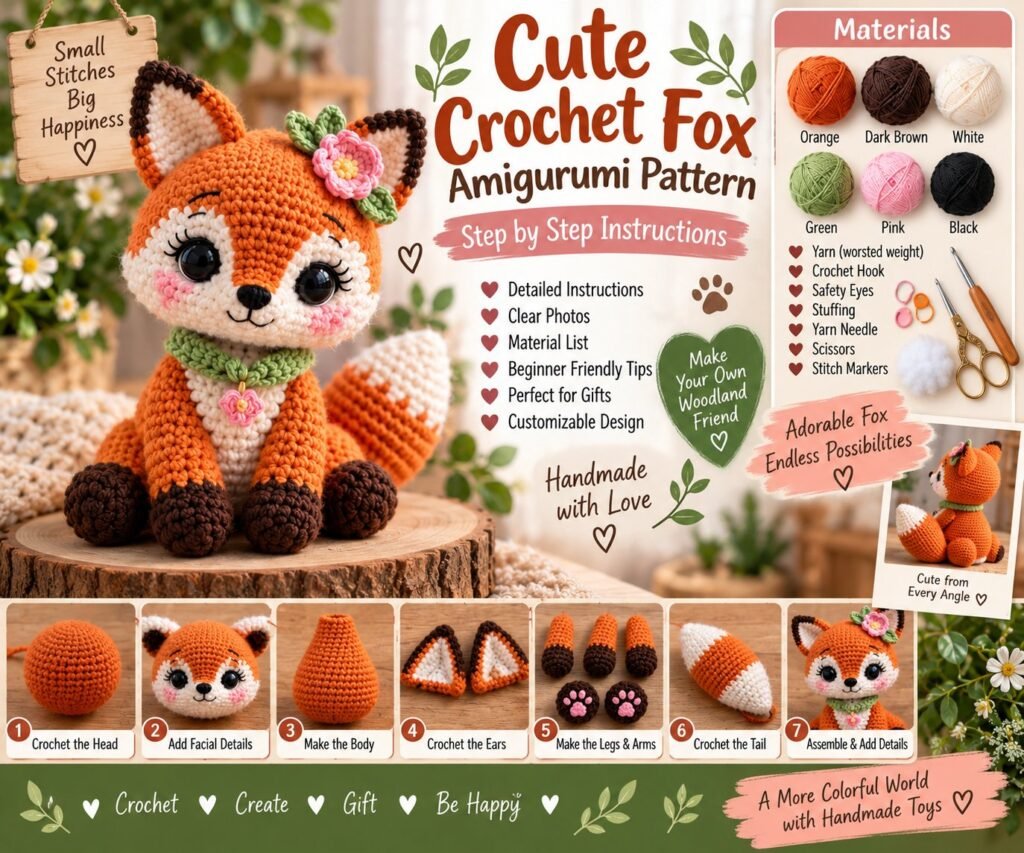
Create an adorable handmade woodland friend with this Cute Crochet Fox Amigurumi Pattern. This beginner-friendly project combines simple amigurumi techniques with colorful yarn to create a charming little fox with a fluffy-looking tail, sweet face, pointed ears, and tiny paws.
The finished crochet fox makes a wonderful handmade gift, nursery decoration, shelf companion, or cute addition to an amigurumi collection. The pattern can also be customized with different yarn colors and decorative details.
Cute Crochet Fox Amigurumi Pattern Details
Skill Level: Beginner to Intermediate
Project Type: Amigurumi
Finished Size: Approximately 7–9 inches tall, depending on yarn and hook size
Crochet Method: Worked mainly in continuous rounds
Main Colors: Orange, white, dark brown, green and pink
Uses: Handmade gift, nursery decoration, woodland-themed decor
Materials
You will need:
- Orange worsted-weight yarn
- Dark brown worsted-weight yarn
- White or cream yarn
- Small amount of green yarn
- Small amount of pink yarn
- Crochet hook suitable for your yarn
- Polyester fiberfill stuffing
- Safety eyes
- Safety nose or black embroidery thread
- Yarn needle
- Stitch marker
- Scissors
- Pins for positioning pieces
- Optional: small amount of embroidery thread for facial details
Recommended Crochet Hook
For a firm amigurumi fabric, choose a hook slightly smaller than the size normally recommended for your yarn. This helps prevent stuffing from showing through the stitches.
Crochet Abbreviations
US crochet terminology:
- MR: Magic ring
- ch: Chain
- sc: Single crochet
- inc: Increase
- dec: Invisible decrease
- sl st: Slip stitch
- st: Stitch
- FO: Fasten off
- BLO: Back loop only
Before You Begin
This fox is crocheted tightly so the stuffing stays inside. Work in continuous rounds unless otherwise indicated and use a stitch marker to identify the beginning of each round.
When changing colors, make the final pull-through of the previous stitch with the new color. This creates a cleaner color transition.
Stuff each piece gradually rather than waiting until the end. The body should be firm but still soft enough to shape.
Step-by-Step Crochet Fox Pattern
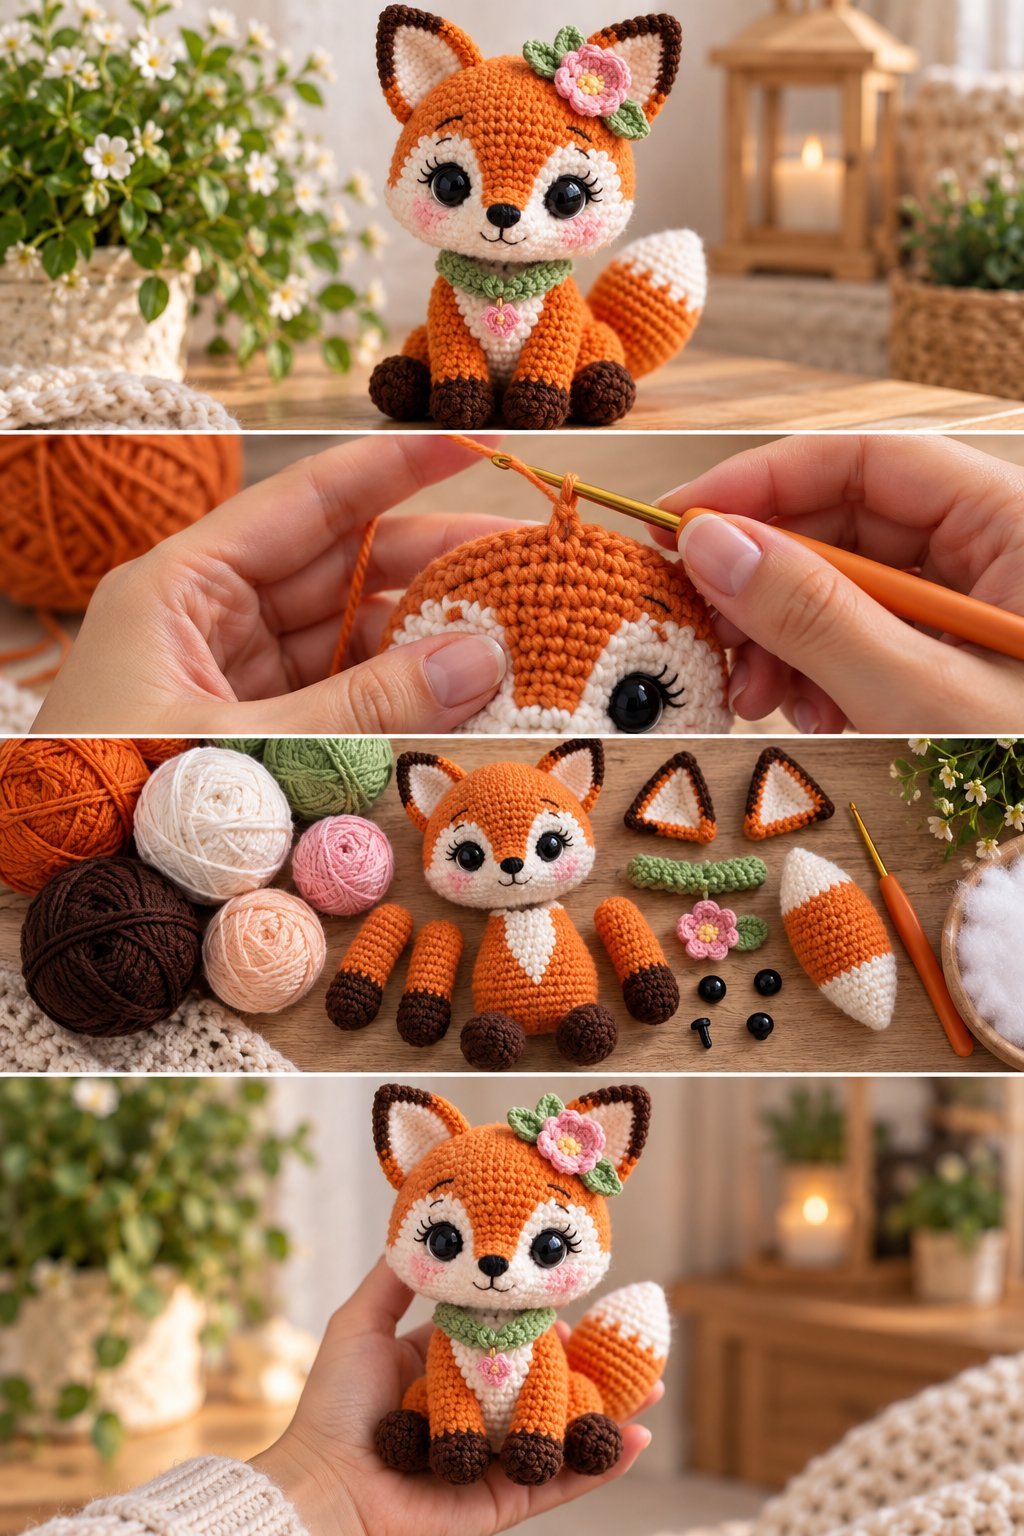
Step 1: Crochet the Head
Begin with orange yarn.
Round 1: Make a magic ring and crochet 6 sc into the ring.
Round 2: Increase in each stitch around. You should have 12 stitches.
Round 3: Repeat 1 sc, inc around.
Round 4: Repeat 2 sc, inc around.
Round 5: Repeat 3 sc, inc around.
Round 6: Repeat 4 sc, inc around.
Continue working even rounds of sc until the head reaches the desired height.
Begin decreasing:
Next Round: Repeat 4 sc, dec around.
Next Round: Repeat 3 sc, dec around.
Next Round: Repeat 2 sc, dec around.
Insert the safety eyes while the head is still accessible. Position them evenly on the front of the face.
Add a small amount of stuffing and continue decreasing until the opening becomes small.
Finish stuffing firmly, then close the remaining stitches and weave in the yarn tail.
Step 2: Create the White Face Markings
Use cream or white yarn to create the fox’s muzzle and facial markings.
For the muzzle, crochet a small oval or rounded piece using sc stitches.
Work several rounds of increases followed by even rounds until the piece is large enough to sit beneath the eyes.
Fasten off, leaving a long sewing tail.
Position the muzzle on the lower portion of the face and sew it securely to the head.
Add a small black nose at the center.
For a more expressive appearance, embroider a short curved line beneath the nose and add small white facial markings on either side of the eyes.
Step 3: Crochet the Fox Ears
Make two ears using orange and dark brown yarn.
Outer Ear
With orange yarn:
Round 1: 6 sc into a magic ring.
Round 2: Increase around.
Round 3: Work sc around.
Round 4: Increase several stitches evenly to slightly widen the ear.
Continue working sc while gradually reducing the width toward the tip.
Switch to dark brown near the upper portion if desired.
Do not stuff the ears heavily. A small amount of filling is enough to give them shape.
Fold the lower edges together and sew them to the top of the head.
Repeat for the second ear, making sure both ears are symmetrical.
Step 4: Crochet the Body
Use orange yarn.
Round 1: 6 sc into a magic ring.
Round 2: Increase around.
Round 3: Repeat 1 sc, inc around.
Round 4: Repeat 2 sc, inc around.
Round 5: Repeat 3 sc, inc around.
Continue crocheting sc rounds until the body reaches the desired length.
For the lower body, begin decreasing gradually:
Decrease Round: Repeat 3 sc, dec around.
Next Round: Repeat 2 sc, dec around.
Next Round: Repeat 1 sc, dec around.
Start adding polyester stuffing as you decrease.
Close the opening and weave in the yarn end.
Step 5: Make the White Chest
The fox looks especially cute with a cream-colored chest.
Attach cream yarn near the upper front of the body and work several rows of sc.
Increase slightly toward the lower section to create a soft triangular or oval chest marking.
Alternatively, crochet the chest separately and sew it onto the finished body.
Secure the edges carefully so the piece lies flat.
Step 6: Crochet the Arms
Make two arms using orange and dark brown yarn.
Start with orange yarn and crochet a small tube using sc stitches.
Work several rounds before changing to dark brown for the paws.
Continue for a few more rounds, then add a small amount of stuffing.
Flatten the top opening and sew it closed.
Attach the arms to both sides of the body using a yarn needle.
For movable-looking arms, sew through the body and arm several times before securing the yarn.
Step 7: Crochet the Legs and Paws
Begin each leg with dark brown yarn to create the paw.
Work several rounds of sc, then change to orange yarn for the upper portion.
Continue crocheting until the leg reaches the desired length.
Add a small amount of stuffing.
Close the opening and sew the legs securely to the lower part of the body.
Position both legs evenly so the fox can sit upright.
Step 8: Crochet the Bushy Tail
The tail is one of the most recognizable features of this crochet fox.
Begin with orange yarn.
Round 1: 6 sc into a magic ring.
Round 2: Increase around.
Rounds 3–8: Work sc around.
Gradually increase the circumference toward the middle of the tail.
Begin decreasing toward the tip.
Switch to cream or white yarn near the end to create the characteristic white tail tip.
Add a small amount of stuffing as you work.
Close the opening and leave a long yarn tail for sewing.
Attach the tail to the back of the body and angle it slightly to one side.
Step 9: Add the Green Collar
For an optional decorative detail, use green yarn to crochet a simple collar.
Chain enough stitches to comfortably fit around the fox’s neck.
Join the chain with a slip stitch, making sure it is not too tight.
Work one or two rounds of sc around the chain.
Fasten off and sew in the ends.
A tiny crochet flower can also be attached to the collar for an extra decorative touch.
Step 10: Add the Facial Details
The face brings the entire amigurumi together.
Check that the eyes are positioned evenly.
Attach the nose securely and embroider the mouth with black yarn.
Add small pink embroidered cheeks if desired.
For a softer handmade appearance, use only a small amount of embroidery rather than adding too many details.
Step 11: Assemble the Fox
Before permanently sewing everything together, place all pieces on the body and check their positioning.
Attach:
- Head to body
- Ears to the head
- Arms to the sides
- Legs to the lower body
- Tail to the back
- Muzzle to the face
- Collar around the neck
- Decorative flower, if desired
Use a yarn needle and matching yarn to make secure stitches.
Hide all yarn ends inside the amigurumi.
Finishing the Crochet Fox
Once all the pieces are attached, gently shape the head, body, ears and tail with your fingers.
Check that the stuffing is distributed evenly. Add additional stuffing through any remaining opening if necessary.
Trim loose yarn ends and weave them securely into the body.
Your Cute Crochet Fox Amigurumi is now ready to display or give as a handmade gift.
Tips for Making a Better Amigurumi Fox
Keep Your Stitches Tight
Loose stitches can create holes that allow the stuffing to show. If this happens, try using a smaller crochet hook.
Use Invisible Decreases
Invisible decreases create a smoother surface and make the amigurumi look more professional.
Stuff Gradually
Add stuffing a little at a time while crocheting. This prevents lumps and makes it easier to achieve a smooth shape.
Mark the Beginning of Each Round
A stitch marker makes it much easier to keep track of continuous rounds and maintain the correct stitch count.
Check Symmetry Before Sewing
Pin the ears, arms and legs in place before attaching them permanently. This makes correcting their position much easier.
Customization Ideas
You can easily change the appearance of this crochet fox by using different colors.
Try:
- Rust orange with cream and chocolate brown
- Soft peach with white
- Burnt orange with charcoal gray
- Light brown with cream
- Autumn orange with forest green
- Pastel orange with pink details
You can also make a larger fox by using bulky yarn and a larger hook, or a miniature version with fine yarn and a smaller hook.
Frequently Asked Questions
Is this crochet fox suitable for beginners?
Yes. The project uses basic amigurumi techniques such as single crochet, increases, decreases, sewing pieces together and simple embroidery.
Can I use a different type of yarn?
Yes. Different yarn weights can be used, but the finished size will change. Keep the stitches tight enough that stuffing cannot easily escape.
How do I make the fox larger?
Use thicker yarn with a larger crochet hook. You can also add extra rounds to the body and head while maintaining the basic increase and decrease structure.
Can I make this fox without safety eyes?
Yes. Embroidered eyes are a good alternative, especially when making the toy for a young child. If the finished item is intended for a baby or toddler, avoid small detachable parts.
Can I sell finished crochet foxes?
If you are using your own original version of this pattern, you can generally sell finished handmade items. Do not claim someone else’s written pattern or photographs as your own, and check the terms of any source pattern if you adapted one.
Final Thoughts
This Cute Crochet Fox Amigurumi Pattern is a fun project for anyone who enjoys making adorable handmade animals. With its orange body, cream markings, dark paws, pointed ears and fluffy-looking tail, the finished fox has plenty of personality.
Once you are comfortable with the basic construction, experiment with colors, collars, flowers and other small accessories to create your own unique woodland fox.

