
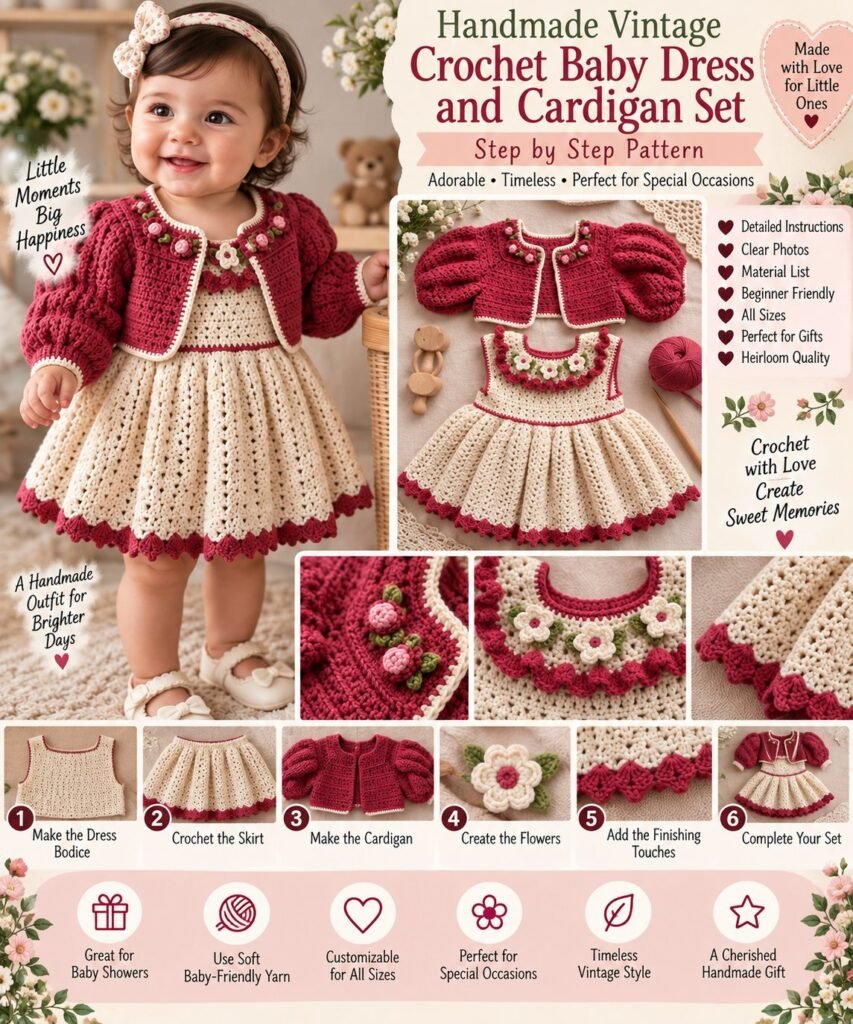
Create a beautiful Handmade Vintage Crochet Baby Dress and Cardigan Set with this detailed step-by-step tutorial. The design combines a soft cream crochet dress with a deep berry cardigan, delicate floral embellishments, puff sleeves, a gently flared skirt, and contrasting scalloped edging.
This timeless crochet baby outfit is perfect for baby showers, birthdays, family photos, special occasions, christenings, holidays, or as a thoughtful handmade gift.
The reference design has a classic vintage-inspired appearance, with the cardigan providing a warm contrast to the lighter dress.
This pattern uses US crochet terminology.
PROJECT OVERVIEW
The set includes two coordinated pieces:
A cream crochet baby dress
A berry-colored crochet cardigan
The dress features:
A simple fitted bodice
Decorative floral neckline
Sleeveless construction
A softly flared skirt
Vertical lace texture
Berry-colored hem edging
The cardigan features:
A rounded neckline
Button-front opening
Puff sleeves
Berry crochet texture
Cream contrasting trim
Small floral embellishments
Because the supplied reference image does not provide the original written pattern or exact stitch counts, the instructions below are an original adaptable construction inspired by the design shown. Measurements should be adjusted according to the baby’s actual chest, waist, arm, and length measurements.
MATERIALS NEEDED
Cream or ivory DK-weight baby yarn
Berry, burgundy, or deep red DK-weight yarn
Small amount of green yarn
Small amount of pink yarn
Small amount of white yarn
Small amount of yellow yarn
3.0–3.5 mm crochet hook
Tapestry needle
Sewing needle
Matching sewing thread
Small buttons
Stitch markers
Scissors
Measuring tape
RECOMMENDED YARN
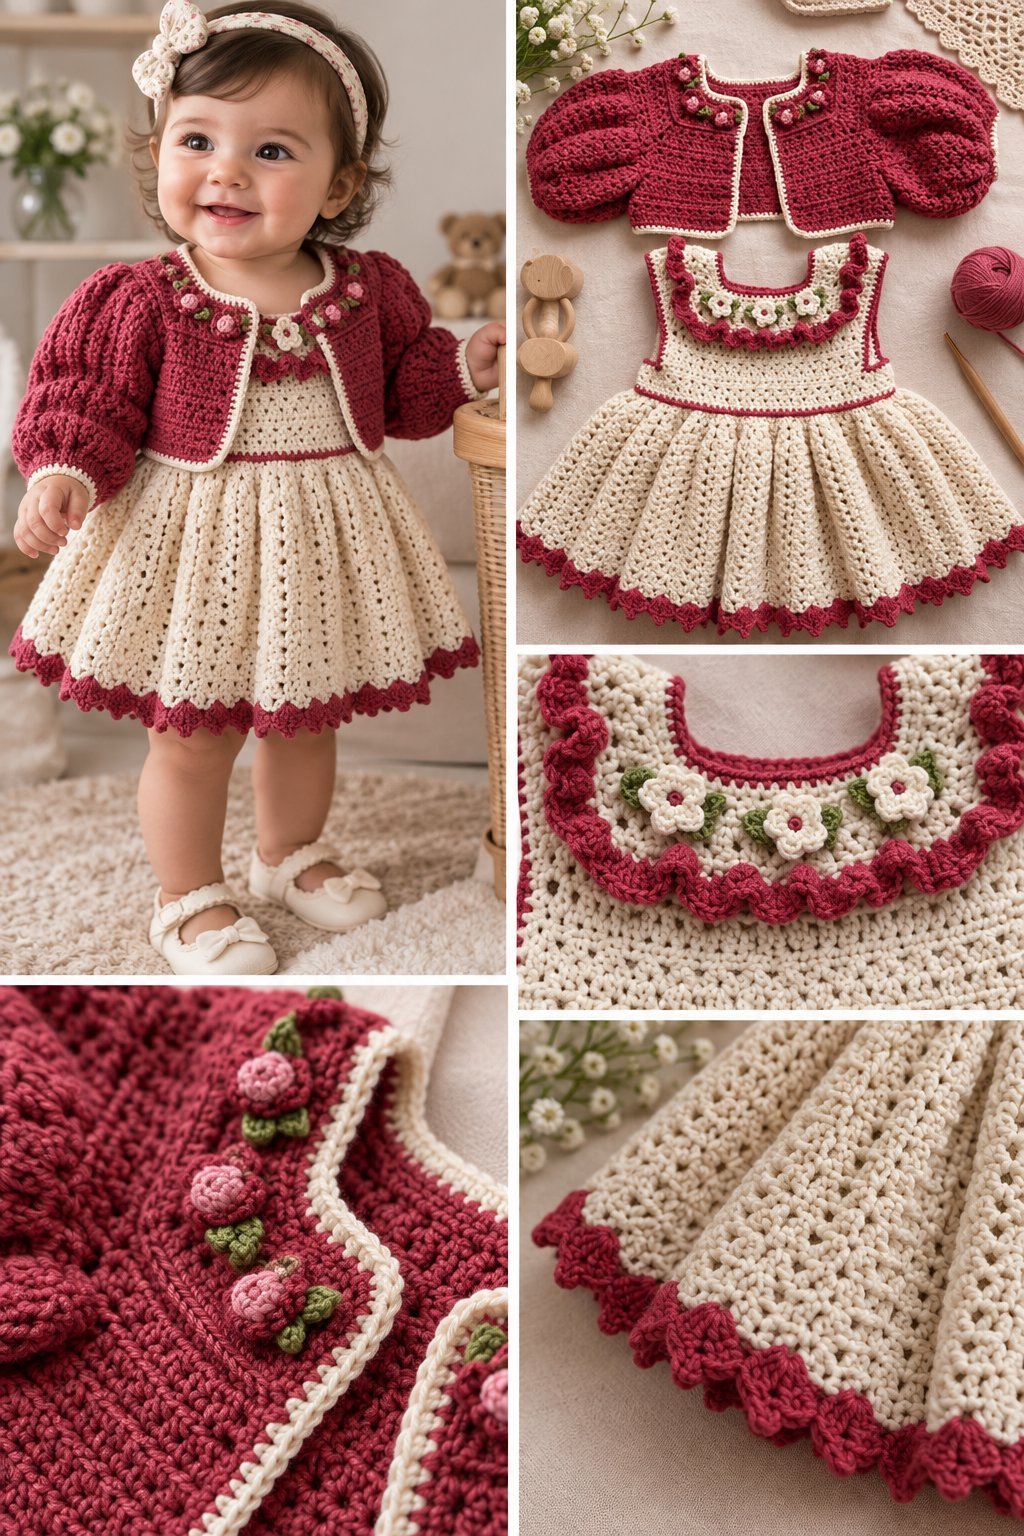
Choose a soft baby-friendly yarn that is comfortable against delicate skin.
Cotton, cotton-blend, or soft acrylic DK yarn can work well.
For a warmer winter set, a soft baby wool blend can also be used if appropriate for the wearer.
The yarn should have good stitch definition so the lace and floral details remain visible.
CROCHET ABBREVIATIONS
CH – Chain
SC – Single Crochet
HDC – Half Double Crochet
DC – Double Crochet
TR – Treble Crochet
SL ST – Slip Stitch
INC – Increase
DEC – Decrease
SK – Skip
ST – Stitch
STS – Stitches
SP – Space
BLO – Back Loop Only
FLO – Front Loop Only
SKILL LEVEL
Intermediate beginner to intermediate.
The dress is relatively straightforward, while the cardigan requires shaping, sleeves, button bands, and decorative finishing.
SUGGESTED BABY SIZE
The construction can be adapted for approximately 0–3, 3–6, 6–12, or 12–18 months.
Do not rely on age alone when making baby clothing.
Measure:
Chest circumference
Waist circumference
Shoulder width
Arm circumference
Shoulder-to-waist length
Desired dress length
Sleeve length
The finished garment should allow comfortable movement.
GAUGE
Make a small gauge swatch before beginning.
A useful starting point with DK yarn is approximately:
18–20 stitches = 10 cm
20–22 rows = 10 cm
Adjust your hook size if your gauge differs significantly.
IMPORTANT PATTERN NOTES
Keep the dress and cardigan measurements coordinated.
The dress bodice should fit comfortably beneath the cardigan.
Avoid making the neckline or sleeves too tight.
Make button attachments especially secure.
For babies, avoid small detachable embellishments that could become loose.
PART 1 — CROCHET THE BABY DRESS
STEP 1 — CREATE THE DRESS BODICE
Use cream yarn.
Begin with a foundation chain based on the baby’s chest measurement.
Join the chain carefully without twisting.
Work one round of SC around the entire chain.
Join with a SL ST.
This creates the foundation of the bodice.
STEP 2 — BUILD THE BODICE
Continue working SC rounds.
Work approximately 8–12 rounds depending on the desired bodice height.
Keep the fabric relatively firm.
Check the circumference against the baby’s measurements as you work.
The bodice should finish around the natural waist.
STEP 3 — CREATE THE OPENWORK TEXTURE
The reference dress has a delicate vertical lace texture.
Create a simple openwork repeat:
CH 1.
SC in the next stitch.
CH 1.
Skip 1 stitch.
DC in the next stitch.
Repeat around.
On the following round, work into the chain spaces.
Continue for several rounds.
This creates small vertical openings across the bodice.
STEP 4 — FINISH THE BODICE
Work one or two rounds of SC around the lower edge.
This creates a stable foundation for the skirt.
Fasten off if you are joining the skirt separately.
PART 2 — CREATE THE DRESS SKIRT
STEP 5 — ATTACH YARN TO THE WAIST
Attach cream yarn around the bottom of the bodice.
Work one round of SC.
Add evenly spaced increases around the waist.
The skirt should begin expanding gradually.
STEP 6 — BEGIN THE SKIRT STITCH
For a vintage lace texture, use a repeating shell-style pattern.
A simple repeat can be:
SC in the next stitch.
Skip 2 stitches.
5 DC in the next stitch.
Skip 2 stitches.
Repeat around.
The shell groups create a softly textured fabric.
STEP 7 — BUILD THE SKIRT
Continue repeating the lace pattern.
Every few rounds, add increases between selected shell groups.
This gradually creates the flared shape shown in the reference.
Keep the increases evenly distributed.
STEP 8 — CREATE THE VERTICAL PANELS
To create a more defined vintage appearance, work several rounds of alternating solid and openwork rows.
For example:
Round 1: SC
Round 2: Openwork
Round 3: SC
Round 4: Shell pattern
Repeat as desired.
This creates subtle vertical sections throughout the skirt.
STEP 9 — CONTINUE TO THE DESIRED LENGTH
Continue crocheting until the skirt reaches the desired length.
For a shorter baby dress, stop earlier.
For a more traditional heirloom-style dress, add additional lace rounds.
PART 3 — ADD THE BERRY HEM
STEP 10 — ATTACH BERRY YARN
Attach the berry-colored yarn to the bottom edge.
Work one round of SC.
This creates a clean contrast between the cream skirt and berry trim.
STEP 11 — CREATE THE SCALLOPED BORDER
For a decorative edge, work:
SL ST
Skip 1 stitch
5 DC in the next stitch
Skip 1 stitch
SL ST in the next stitch
Repeat around.
This creates the small scalloped border visible in the reference.
Fasten off.
Weave in the yarn tail.
PART 4 — MAKE THE DRESS NECKLINE
STEP 12 — FINISH THE NECKLINE
Work SC around the neckline.
Use cream yarn for a subtle finish.
Then add a narrow berry border.
Work SL ST around the neckline.
Keep the stitches even.
STEP 13 — CREATE THE DECORATIVE RUFFLE
Using berry yarn, work several stitches into selected spaces around the neckline.
A simple ruffle can be created by working:
SL ST
3 DC
SL ST
Repeat around.
Do not make the ruffle excessively full.
PART 5 — CROCHET THE FLOWER DECORATIONS
STEP 14 — MAKE A SMALL FLOWER
Use cream yarn.
Make a magic ring.
Work 5 SC into the ring.
Join with a SL ST.
For each petal:
CH 2
3 DC
CH 2
SL ST into the same stitch
Repeat around.
Fasten off.
STEP 15 — ADD THE FLOWER CENTER
Use pink or yellow yarn.
Embroider a small center into the flower.
Alternatively, crochet a tiny circle.
STEP 16 — MAKE SMALL GREEN LEAVES
Use green yarn.
Chain 6.
Starting in the second chain:
SL ST
SC
HDC
DC
SC
SL ST
Fasten off.
Shape the leaf gently.
STEP 17 — ATTACH THE FLOWERS
Arrange small flowers and leaves around the dress neckline.
Sew them securely.
Create small floral clusters rather than covering the entire neckline.
PART 6 — CROCHET THE CARDIGAN
STEP 18 — START THE CARDIGAN YOKE
Use berry-colored yarn.
Create a foundation chain based on the baby’s neckline measurement.
Work SC across.
Turn.
Continue working rows.
STEP 19 — SHAPE THE SHOULDERS
Divide the yoke into:
Left front
Back
Right front
Use stitch markers to identify each section.
Increase at the dividing points.
This gradually creates the cardigan shape.
STEP 20 — BUILD THE CARDIGAN BODY
Continue working rows of your chosen crochet texture.
A simple vintage texture can alternate:
SC rows
HDC rows
Openwork rows
Shell rows
Continue until the cardigan reaches approximately the waist.
PART 7 — CREATE THE PUFF SLEEVES
STEP 21 — ATTACH YARN TO THE ARMHOLE
Attach berry yarn around the armhole.
Work SC around.
Add several increases evenly around the sleeve.
This creates the fullness needed for a puff sleeve.
STEP 22 — BUILD THE PUFF
Continue working rounds of HDC or DC.
Add increases during the first few rounds.
After the sleeve reaches the desired fullness, stop increasing.
Continue straight for several rounds.
STEP 23 — SHAPE THE CUFF
Begin decreasing gradually.
Work a round of SC.
Reduce the stitch count evenly.
Continue until the cuff fits comfortably around the wrist.
STEP 24 — ADD THE CREAM CUFF
Attach cream yarn.
Work 2–4 rounds of SC.
Finish with a simple SL ST border.
Repeat the entire sleeve construction for the second sleeve.
PART 8 — CREATE THE CARDIGAN FRONT EDGES
STEP 25 — ADD THE CREAM TRIM
Attach cream yarn along one front edge.
Work SC evenly from the neckline to the bottom.
Repeat on the opposite side.
STEP 26 — ADD THE LOWER BORDER
Continue the cream trim around the bottom of the cardigan.
Work one or two rounds of SC.
For a decorative finish, add a small scalloped border.
PART 9 — MAKE THE CARDIGAN NECKLINE
STEP 27 — CREATE THE COLLAR
Attach cream yarn around the neckline.
Work SC evenly.
Add a second round if additional width is desired.
For a vintage appearance, create a small shell edging:
SL ST
Skip 1 stitch
5 DC
Skip 1 stitch
SL ST
Repeat around.
STEP 28 — ADD BERRY RUFFLES
Attach berry yarn to selected sections of the collar.
Work small groups of DC to create a subtle ruffled edge.
Keep the ruffle symmetrical.
PART 10 — ADD THE BUTTONS
STEP 29 — MARK BUTTON POSITIONS
Place approximately 3–5 buttons down the front of the cardigan.
For a baby-sized cardigan, keep the buttons relatively small and ensure they are securely sewn.
Mark the positions before sewing.
STEP 30 — CREATE BUTTON LOOPS
On the opposite front edge, create small crochet loops.
Chain approximately 4–6 stitches.
SL ST back into the edge.
Adjust the loop size to fit your buttons.
STEP 31 — SEW THE BUTTONS
Use strong matching thread.
Sew each button securely.
Reinforce the stitches several times.
Always inspect buttons and other small parts before giving the garment to a baby.
PART 11 — ADD FLORAL CARDIGAN DETAILS
STEP 32 — MAKE SMALL ROSES
Use pink or berry yarn.
Create a small chain.
Work SC or HDC along the chain.
Roll the crocheted strip gently into a spiral.
Sew the base securely.
This creates a small crochet rose.
STEP 33 — ADD GREEN LEAVES
Make small leaves using green yarn.
Place them beside the roses.
Sew the floral clusters onto the cardigan neckline and front edges.
STEP 34 — ADD SMALL CREAM FLOWERS
Make tiny cream flowers.
Add small colored centers.
Attach them between the berry roses.
This creates the mixed floral decoration shown in the reference.
PART 12 — FINISH THE CARDIGAN
STEP 35 — WEAVE IN ALL ENDS
Use a tapestry needle.
Weave every loose yarn end through several stitches.
Trim the excess.
STEP 36 — CHECK THE SLEEVES
Lay the cardigan flat.
Make sure both sleeves are approximately the same size.
Check that the cuffs are even.
STEP 37 — BLOCK THE CARDIGAN
Lightly dampen the cardigan.
Lay it flat.
Shape the neckline, front edges, sleeves, and bottom border.
Allow it to dry completely.
PART 13 — FINAL DRESS FINISHING
STEP 38 — BLOCK THE DRESS
Lightly dampen the dress.
Lay it flat.
Arrange the skirt evenly.
Open the lace sections gently.
Shape the scalloped border.
Allow the dress to dry completely.
STEP 39 — CHECK THE COMPLETE SET
Place the cardigan over the dress.
Check that the colors coordinate.
Make sure the cardigan sleeves allow comfortable movement.
Check the neckline and buttons.
Inspect all decorative flowers.
HOW TO CUSTOMIZE THE BABY DRESS
SMALLER SIZE
Reduce the bodice foundation chain.
Use fewer skirt repeats.
Make shorter sleeves on the cardigan.
Use fewer buttons.
LARGER SIZE
Increase the bodice circumference.
Add additional skirt repeats.
Increase sleeve circumference.
Add additional cardigan rows.
Adjust button spacing accordingly.
LONGER DRESS
Continue the skirt lace pattern for additional rounds.
Keep the increases gradual.
Finish with the same berry scalloped border.
FULLER SKIRT
Increase more frequently during the first skirt rounds.
Add additional shell groups.
Use a wider final border.
COLOR COMBINATIONS
Vintage Berry and Cream
Cream dress
Berry cardigan
Green leaves
Pink flowers
This combination closely follows the supplied reference.
Dusty Rose and Ivory
Use dusty pink instead of berry for a softer appearance.
Sage and Cream
Use sage green for the cardigan and cream for the dress.
Lavender and Cream
A delicate pastel combination suitable for spring.
Burgundy and Blush
Use deep burgundy with soft blush flowers for a richer vintage appearance.
TIPS FOR MAKING A BABY CROCHET SET
Measure the baby before beginning.
Make a gauge swatch.
Use soft baby-friendly yarn.
Keep the neckline comfortable.
Avoid excessively tight sleeves.
Reinforce button attachments.
Check all decorative elements regularly.
Keep small detachable components securely attached.
Block the finished garments for a professional appearance.
COMMON PROBLEMS AND SOLUTIONS
THE DRESS BODICE IS TOO TIGHT
Increase the foundation chain.
Use a larger hook.
Add additional stitches around the bodice.
THE SKIRT IS NOT FULL ENOUGH
Add more increases.
Increase the number of shell groups.
Add an additional lace section.
THE CARDIGAN SLEEVES ARE TOO TIGHT
Increase the number of stitches around the armhole.
Add additional increase rounds.
THE PUFF SLEEVES ARE TOO LARGE
Reduce the frequency of increases.
Use fewer sleeve rounds.
THE CARDIGAN FRONT DOES NOT MATCH
Count the stitches on both sides.
Use stitch markers to maintain symmetrical sections.
THE LACE LOOKS UNEVEN
Check your stitch counts after every repeat.
Keep your yarn tension consistent.
CARE INSTRUCTIONS
Hand wash gently in cool water.
Use a mild baby-safe detergent.
Do not wring or twist.
Press excess water out with a towel.
Lay flat to dry.
Reshape the skirt and sleeves while damp.
Avoid high heat.
Store the set folded.
SAFETY NOTES FOR BABY CLOTHING
Inspect the finished outfit carefully before use.
Make sure buttons are firmly secured.
Check all embroidered details.
Avoid loose decorative pieces.
Avoid long cords around the neck area.
For very young babies, embroidered details can be preferable to detachable safety eyes or other small components.
FREQUENTLY ASKED QUESTIONS
What yarn is best for a vintage crochet baby dress?
Soft cotton, cotton-blend, or baby-friendly DK yarn works well. Choose a yarn that is comfortable against sensitive skin.
Can I make the cardigan and dress separately?
Yes. Both pieces can be worn independently with other baby clothing.
Can I make the dress without the cardigan?
Absolutely. The cream dress works as a standalone summer outfit.
Can I make the cardigan in another color?
Yes. Berry can be replaced with burgundy, pink, lavender, sage, blue, or another color.
Can I make the skirt longer?
Yes. Continue the skirt pattern for additional rounds before adding the contrasting hem.
Can I add more flowers?
Yes. Additional flowers and leaves can be sewn around the neckline, cardigan edges, or waist.
How do I make the set fit a different baby size?
Take the baby’s actual measurements and adjust the foundation chain, bodice circumference, skirt width, sleeve circumference, and garment length.

