
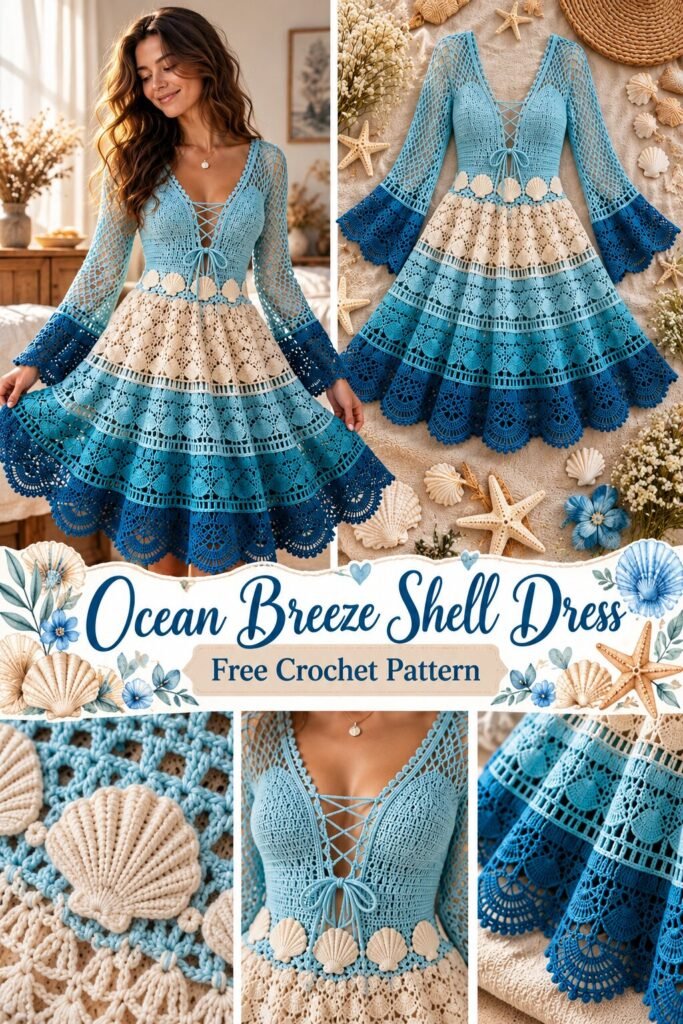
The bodice starts in a pale sky blue mesh, fitted and lace-up at the center front, with a row of cream shell appliques sitting right at the natural waist like a belt. From there the skirt drops in tiers, each one a slightly darker shade than the last, cream near the top fading down through two blues and ending in a deep teal ruffle at the hem. The sleeves are long and belled, made of the same open mesh as the bodice, finishing in that same dark blue at the cuff. It’s a dress built entirely around one idea: gradient as structure, not just decoration.
What’s worth noticing here is how much work the tiered construction is doing. A single-panel skirt with a printed ombre effect is one thing, but this skirt is built tier by tier, each one its own round of stitching, its own color, its own lace pattern variation. That’s a very different project than dyeing yarn to fade — the gradient here is achieved through piecing, not color-blending, which actually makes it more approachable for someone without dye experience.
This is the kind of dress that appeals to someone who already has some garment crochet under their belt and wants a genuinely ambitious next project — not a weekend make, but something built up over weeks in stages.
What’s Actually Going On in the Construction
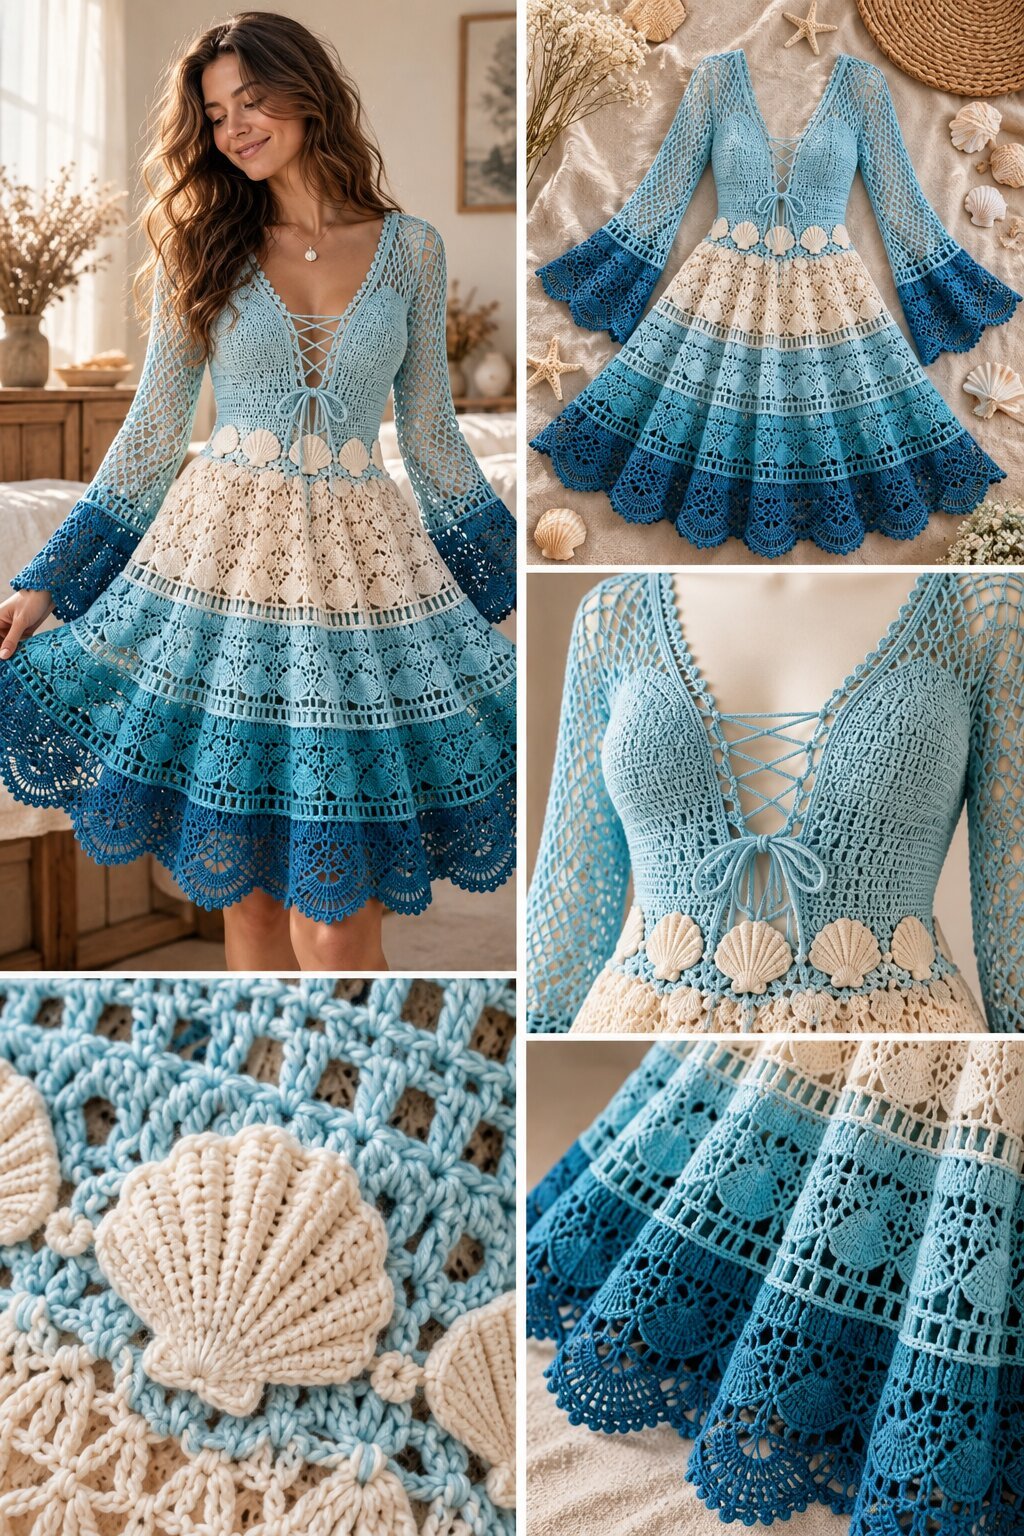
Look closely at the skirt and you’ll notice each tier isn’t just a solid color — there’s a different lace or fan-stitch motif in each band, layered like actual shell ridges rather than plain rows of single crochet. That’s a deliberate choice that ties the color gradient back to the ocean theme instead of just being blue for blue’s sake.
The shell appliques at the waist are the other standout detail. These look like separate motifs, likely worked flat in the round or in rows and then stitched onto the bodice rather than crocheted directly into it — which is good news, because it means you can perfect a shell shape on its own before committing it to the garment.
The lace-up front is doing double duty: it’s a closure, but it’s also the one place where the pale blue bodice mesh is visually broken up, giving the eye somewhere to rest before it moves down into the shell row and the tiered skirt.
Materials You’ll Need

- Yarn in four to five shades running from cream through light blue, mid blue, and deep teal (a cotton or cotton-blend yarn is a reasonable suggestion, since the stitch definition in the shells and mesh looks crisp rather than fuzzy)
- A crochet hook sized to your yarn (see notes below)
- Yarn needle, for attaching the shell appliques and seaming tiers
- Scissors
- Stitch markers, useful for keeping tier transitions even
- Cord or ribbon for the front lace-up, if you’d rather not crochet the ties yourself
- A tape measure, since the fit here depends on your own bust and waist measurements
Yarn and Hook Notes
Given how open the bodice mesh reads and how fine the shell ridging looks, a light DK or fingering weight cotton is a sensible starting point. Something with a bit of body will help the shell appliques hold their fan shape rather than going limp.
A hook somewhere around 3mm to 3.5mm is a reasonable range to start swatching in for that weight. Since a dress like this depends on the bodice actually fitting, swatch the mesh pattern first and check your gauge against your own measurements before committing to the full bodice — this is not a project where “close enough” on gauge works out well later.
Skill Level
This sits firmly in advanced territory. It’s not one difficult technique — it’s several: a fitted lace-up bodice that needs to actually fit a body, long sleeves with bell shaping, a multi-tier skirt where each tier has to join cleanly and evenly to the one above it, plus separate shell motifs to construct and attach. Someone comfortable with garment shaping and motif work, but who hasn’t combined all of it into one piece before, will find plenty to learn here.
Stitches Likely Involved
- Chain (ch) — the open mesh background running through the bodice, sleeves, and skirt
- Slip stitch (sl st) — joining rounds and tiers cleanly
- Single crochet (sc) and double crochet (dc) — likely alternating to build the filet-style mesh seen in the bodice and sleeves
- Shell stitch — the fanned, ridged texture visible in each skirt tier
- A separate shell-motif construction for the waist appliques — worked flat, probably in rounds building outward, then given raised ridge detail with surface stitches or a textured stitch like the crocodile stitch
- Increase (inc) — essential at each new tier join, since every tier needs to be wider than the one above it to keep the skirt’s flare
- A lace-up eyelet row at center front, created with evenly spaced chain spaces for the ties to pass through
Building It: A Practical Sequence
Bodice first, and fit it before moving on. Work the fitted mesh panel from the shoulders or underarm down to the waist, checking the fit against your own torso as you go rather than trusting a fixed stitch count. The eyelet row for lacing needs to sit at a natural point — too high and it gapes, too low and it won’t close properly.
Set the shell appliques at the waistline once the bodice fits. Make these as separate pieces, several of them, in the cream or lightest shade, and lay them out along the waist seam before stitching any down permanently. This is much easier to adjust than trying to place them as you crochet the bodice itself.
Build the skirt tier by tier, from the waist down. Each tier starts by increasing evenly around the previous tier’s edge, widening the circumference before working the shell or lace pattern for that band. Change color at the start of each new tier rather than partway through one, which is what keeps the transitions looking clean instead of muddy.
Work the sleeves as flat panels or in the round separately, using the same mesh as the bodice, then shape the bell flare near the cuff with steady increases over the last several rounds before finishing in the darkest blue.
Join sleeves to the bodice, then finish the hem. The final tier’s edge is the one place a scalloped or fan border makes sense, echoing the shell theme one last time at the very bottom.
Block everything before final assembly if possible, especially the mesh sections — filet-style mesh in particular tends to look tight and cramped until it’s blocked open.
Adjusting the Fit and Look
Bust and waist fit come entirely from your own gauge swatch and measurements here, since there’s no printed size chart backing this up. Work the bodice slightly looser than you think you need if you’re unsure — a lace-up front gives you some forgiveness that a solid bodice wouldn’t.
Skirt length is simply a matter of how many tiers you add. Three tiers instead of four gets you a shorter, flippier hemline; adding a fifth tier in an even deeper shade extends both the length and the gradient’s range.
If four separate yarn colors feels like too much to manage on a first attempt, two colors — a light and dark blue only, skipping the cream and mid-tone — still reads as ombre, just with less subtlety in the transition.
Where It’s Easy to Go Wrong
Uneven tier increases. If one side of a tier has more increases than the other, the skirt will hang crooked rather than falling in an even circle. Count stitches at the end of each tier before moving to the next color.
A bodice that doesn’t actually fit. Because there’s no chart to follow, skipping the fit-check step is the single most common way this project goes sideways. Try it on as you work, not just at the end.
Shell appliques that look flat instead of raised. If you skip the textured stitch detail and just crochet a plain fan shape, the shells will read as flat circles rather than the ridged, dimensional shells shown in the photo. The raised line detail is what sells the shape.
Color transitions that don’t line up with tier breaks. Changing shade mid-tier rather than at the tier seam creates a blurry, accidental-looking gradient instead of the clean banded effect in the reference photo.
Care
Hand washing in cool water and laying flat to dry is the safer approach, particularly given the weight a wet mesh skirt with this many tiers will carry — hanging it wet risks stretching the lower tiers out of shape. Avoid the dryer, since heat can distort both the open mesh sections and the raised shell texture. Check the specific yarn label for anything more particular to the fiber you chose.
Common Questions
Is this a realistic first garment project?
Not really. The fitted bodice alone is a significant undertaking on its own; combined with tiered skirt construction and separate appliques, this is better suited to someone who’s already made at least one fitted crochet garment.
Do I need exactly four colors to get the gradient effect?
No — three shades still reads clearly as ombre. More shades just make the transition feel smoother and more gradual.
Can I skip the shell appliques if that feels too advanced?
Yes, the dress would still work visually without them, though you’d lose the direct nod to the ocean theme at the waistline. A simple crochet flower or a plain trim row would be an easier substitute.
What if my gauge doesn’t match the photo’s stitch density?
That’s fine as long as your gauge swatch matches your own measurements — the finished look depends more on consistent tension across all the tiers than on matching an exact stitch count per inch.

