
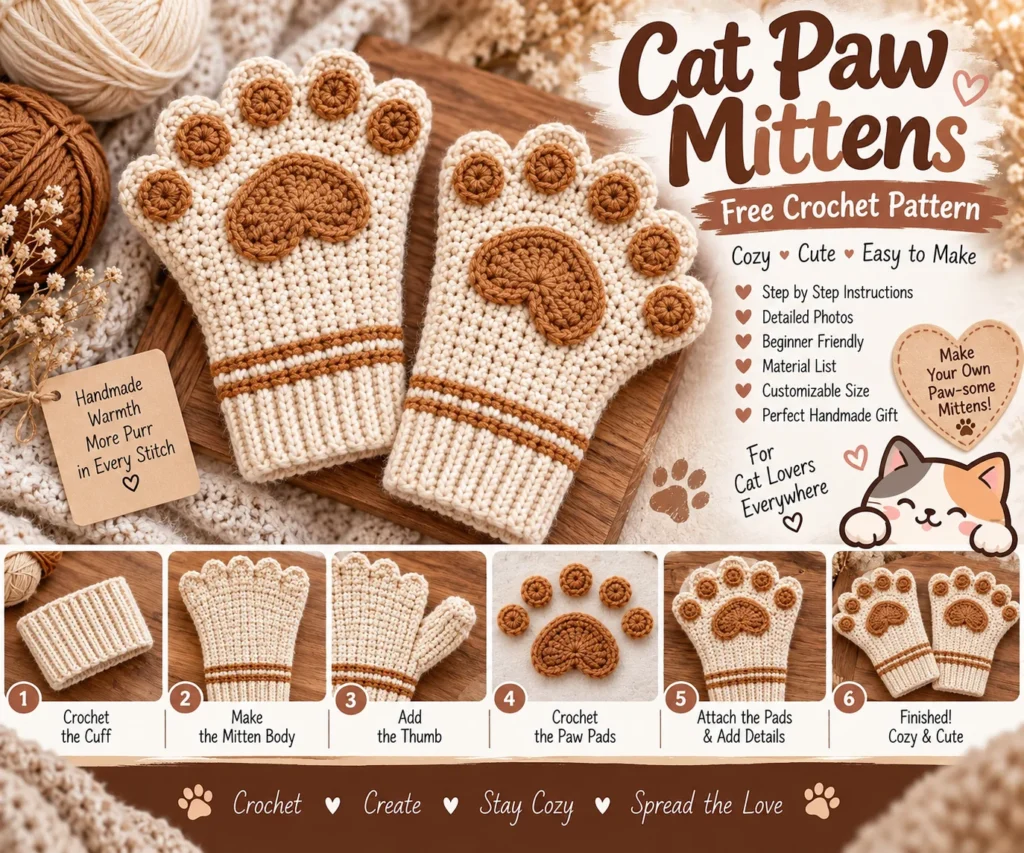
Keep your hands warm with a cute pair of handmade Cat Paw Mittens. This cozy crochet pattern features a soft cream-colored mitten, a ribbed cuff, a large crocheted paw pad, and small paw-print toe pads for an adorable cat-inspired finish.
These crochet cat mittens are perfect for winter outfits, handmade gifts, cozy accessories, and anyone who loves cute animal-inspired crochet projects. The pattern can also be customized with different yarn colors to create your own favorite cat-paw design.
The instructions below are an original, adaptable pattern based on the mitten design shown in the reference image. Exact sizing can vary according to yarn weight, hook size, and crochet tension.
Cat Paw Mittens Crochet Pattern
The mittens are worked primarily in cream yarn, with brown or caramel yarn used for the paw pads.
The main mitten is crocheted from the cuff upward. The top is shaped with a rounded scalloped edge, while the thumb is created separately and attached to the side.
The paw pads are crocheted as small appliqués and sewn onto the finished mitten.
Materials Needed
Cream or ivory worsted-weight yarn
Brown or caramel yarn for the paw pads
Small amount of darker brown yarn for paw details
Crochet hook suitable for your yarn
Yarn needle
Scissors
Stitch marker
Measuring tape
Fiberfill, optional for raised paw pads
Sewing needle
Finished Size
The pattern is designed as an adaptable adult mitten.
Approximate finished measurements:
Length: 20–22 cm
Palm circumference: 18–20 cm
Cuff length: 5–7 cm
For a smaller or larger mitten, adjust the foundation chain and number of rounds.
Always measure the mitten against the intended wearer because hand sizes vary considerably.
Crochet Abbreviations
ch — chain
sc — single crochet
hdc — half double crochet
dc — double crochet
sl st — slip stitch
inc — increase
dec — decrease
st — stitch
sts — stitches
BLO — back loop only
FO — fasten off
Skill Level
Beginner to intermediate
You should be comfortable with:
Working in rounds
Single crochet
Half double crochet
Basic increases and decreases
Working into the back loop
Crocheting small circles
Sewing crochet appliqués onto fabric
How to Crochet the Cat Paw Mittens
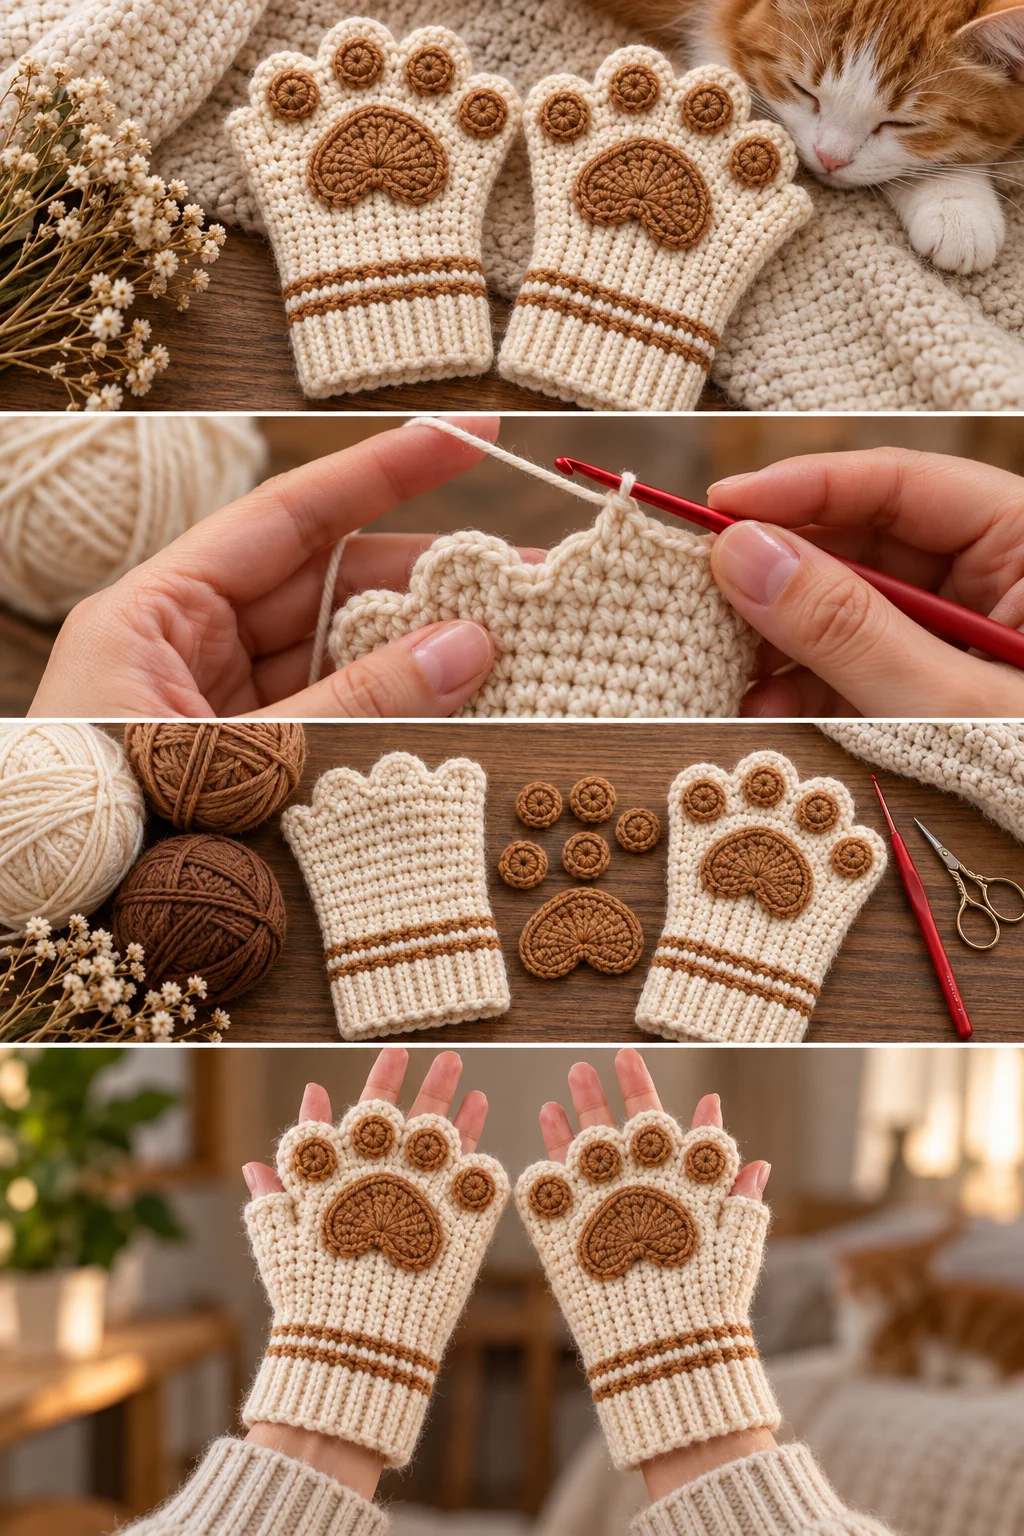
Make two matching mittens.
Because the design is symmetrical, the same basic pattern can be used for both hands, with the thumb positioned on the appropriate side.
Step 1: Crochet the Ribbed Cuff
Use cream yarn.
Start with a foundation chain of approximately 16 chains.
The exact number depends on the desired wrist circumference.
Row 1
Work 1 sc in the second chain from the hook.
Continue with 1 sc across.
Ch 1 and turn.
Rows 2–18
Work 1 sc in the BLO of every stitch.
Ch 1 and turn after each row.
The finished strip should comfortably fit around the wrist.
Adjust the number of rows if necessary.
Step 2: Join the Cuff
Fold the cuff so the short edges meet.
Slip stitch through both layers to join them.
Turn the cuff so the seam is on the inside.
You now have a ribbed wrist cuff.
Step 3: Crochet Around the Cuff
Attach cream yarn around the top edge of the cuff.
Work 1 sc into the edge of each rib section.
Join with a slip stitch.
The number of stitches will depend on how many cuff rows you made.
Try to distribute the stitches evenly around the opening.
Step 4: Crochet the Palm
Continue working in rounds.
Round 1
Work 1 sc in every stitch around.
Round 2
Repeat:
3 sc, inc.
Continue around.
Round 3
Work 1 sc in every stitch around.
Round 4
Repeat:
4 sc, inc.
Continue around.
The mitten should begin widening slightly above the wrist.
Step 5: Continue the Main Mitten
Work several rounds of sc without increasing.
Continue until the mitten reaches approximately the base of the fingers.
Try the mitten on occasionally if possible.
The fabric should fit comfortably around the palm without being excessively loose.
Step 6: Shape the Top
The reference design has a decorative rounded top rather than individual finger openings.
For the scalloped edge, use a simple shell pattern.
Decorative Round
Ch 1.
Work 1 sc in the first stitch.
Skip 1 stitch.
Work 5 dc into the next stitch.
Skip 1 stitch.
Work 1 sc into the next stitch.
Repeat around.
Join with a sl st.
This creates the rounded scalloped edge visible around the top of the mitten.
Fasten off and weave in the yarn end.
How to Crochet the Thumb
The thumb is created separately and attached to the side of the mitten.
Thumb Round 1
Attach cream yarn around the thumb opening area.
Work approximately 10–12 sc around.
Join with a slip stitch.
Rounds 2–7
Work 1 sc in each stitch around.
Continue until the thumb reaches the desired length.
For a more tapered thumb, decrease once or twice near the top.
Thumb Finishing
Work 1 sc2tog around the final round.
Fasten off.
Leave a long yarn tail.
Use the yarn needle to close the top.
Weave the remaining yarn inside the thumb.
How to Crochet the Large Paw Pad
Use brown or caramel yarn.
This large pad sits in the center of the palm.
Round 1
Make a magic ring.
Work 6 sc into the ring.
6 sts
Round 2
Work 2 sc in each stitch around.
12 sts
Round 3
Repeat:
1 sc, inc.
18 sts
Round 4
Repeat:
2 sc, inc.
24 sts
Fasten off.
Leave a long sewing tail.
For a raised paw pad, add a very small amount of fiberfill before closing.
Sew the paw pad onto the palm of the mitten.
Position it approximately in the center of the hand.
How to Crochet the Small Cat Toe Pads
Make four small toe pads for each mitten.
Use brown or caramel yarn.
Round 1
Make a magic ring.
Work 6 sc.
Round 2
Work 2 sc in each stitch around.
12 sts
Fasten off.
Leave a sewing tail.
Repeat until you have four small pads.
Arrange the four pads above the large central paw pad.
Sew each one securely to the mitten.
Creating Different Toe Pad Sizes
For a more natural paw shape, you can make the center toe pads slightly larger than the outer ones.
For example:
Center pads: 10–12 sts
Outer pads: 8–10 sts
This creates a slightly curved arrangement instead of four identical circles.
Adding Details to the Paw Pads
Use a darker shade of brown to add subtle stitching inside the paw pads.
Small curved stitches can be added to the large pad to give it additional definition.
Keep the embroidery simple so the paw design remains clean.
Step-by-Step Assembly
Step 1: Measure the Wrist
Measure around the wrist and determine the required cuff circumference.
Step 2: Crochet the Cuff
Create the ribbed cuff using single crochet through the back loops.
Step 3: Join the Cuff
Sew or slip stitch the ends together to form a tube.
Step 4: Crochet the Palm
Work upward in single crochet rounds, adding gradual increases for the hand.
Step 5: Shape the Top
Finish the mitten with a decorative scalloped edge.
Step 6: Create the Thumb
Attach yarn to the thumb opening and work several rounds of single crochet.
Step 7: Make the Paw Pad
Crochet one larger brown circle for the center of the paw.
Step 8: Make the Toe Pads
Crochet four smaller brown circles for each mitten.
Step 9: Arrange the Paw
Position the large pad in the palm and the four small pads above it.
Step 10: Sew Everything Securely
Use a yarn needle to attach all paw pieces.
Step 11: Finish the Mitten
Weave in all loose ends and gently shape the mitten.
Step 12: Make the Second Mitten
Repeat the pattern and position the thumb on the opposite side.
How to Make the Mittens More Comfortable
Choose a soft yarn that feels comfortable against the skin.
Avoid making the cuff excessively tight.
Keep the stitches relatively flexible around the wrist.
Do not overstuff the paw pads.
Try the mitten on during construction to check the fit.
If the mitten feels too narrow, increase the number of stitches in the palm.
If it feels too loose, reduce the hook size or decrease a few stitches.
Crochet Gauge
Gauge is particularly important when making wearable crochet accessories.
Create a small swatch using the yarn and hook you plan to use.
Measure the number of stitches across 10 cm.
If your stitches are larger than expected, use a smaller hook.
If your stitches are smaller, use a larger hook.
Because everyone’s crochet tension is different, matching measurements is more reliable than following stitch counts alone.
Cat Paw Mitten Color Ideas
Classic Cat Paw
Cream mitten
Caramel paw pads
Dark brown details
Black Cat
Black mitten
Pink paw pads
White embroidered details
Gray Cat
Light gray mitten
Dark gray paw pads
Pink accents
Calico-Inspired
Cream mitten
Orange and brown paw pads
Small black details
Winter White
White mitten
Light brown paw pads
Cream cuff
How to Make Fingerless Cat Paw Mittens
If you prefer fingerless gloves, simply stop the mitten before reaching the fingers.
Finish the opening with the scalloped edge.
The paw pad can still be placed on the palm.
This style is useful when you want to keep your fingers free while using a phone, keyboard, or other items.
How to Make Full-Finger Cat Paw Gloves
The same basic palm can be adapted into a full-finger glove.
Instead of finishing the mitten with a closed scalloped top, divide the stitches into separate finger sections.
Crochet each finger individually.
This requires more shaping and careful measuring, but it creates a complete cat-paw glove.
Tips for Sewing the Paw Pads
Place the large paw pad first.
Check the position before sewing.
Arrange the four smaller pads evenly.
Use matching brown yarn for nearly invisible seams.
Take small stitches around the edge of each appliqué.
Avoid pulling too tightly because this can distort the mitten.
For extra dimension, lightly stuff the paw pads before completely closing the seam.
How to Wash Crochet Cat Paw Mittens
Always check the yarn label before washing.
For many handmade mittens, gentle hand washing in cool water is a good option.
Avoid harsh detergents.
Gently squeeze out excess water rather than twisting the mittens.
Lay them flat to dry.
Reshape the cuffs and scalloped edges while damp.
Allow them to dry completely before wearing.
Gift Ideas
These Cat Paw Mittens make a charming handmade gift for:
Cat lovers
Teenagers
Crochet enthusiasts
Friends
Family members
Winter accessory lovers
Handmade gift exchanges
They can also be packaged with a matching crochet hat, scarf, or cat-inspired accessory for a coordinated winter gift set.
Frequently Asked Questions
Are these crochet cat paw mittens suitable for beginners?
Yes. The main mitten uses basic stitches, making it approachable for beginners who have some experience with crochet. The paw appliqués and thumb require additional basic construction skills.
What yarn should I use?
Soft worsted-weight acrylic, cotton-blend, or wool-blend yarn can work well. Choose a yarn that is comfortable against the skin and appropriate for the intended use.
Can I change the paw color?
Yes. Brown and caramel create a classic paw-pad appearance, but pink, gray, black, or other colors can be used.
How do I make smaller mittens?
Reduce the foundation chain for the cuff and use fewer stitches around the palm. A smaller hook can also help reduce the finished size.
How do I make larger mittens?
Increase the cuff circumference and add additional stitches around the palm. Measure against the wearer’s hand as you crochet.
Can I make the paw pads raised?
Yes. Add a small amount of fiberfill behind each paw pad before sewing it closed.
Can I use embroidered paw pads instead?
Yes. Instead of crocheting separate appliqués, you can embroider the paw design directly onto the mitten.
Can I sell finished Cat Paw Mittens?
If you make your own original finished pieces, you can decide how to use them. If you work from another designer’s pattern, check the designer’s terms regarding the sale of finished items.
Final Thoughts
These Cat Paw Mittens are a fun way to combine practical winter crochet with an adorable animal-inspired design. The ribbed cuff keeps the silhouette cozy, while the scalloped top and layered paw pads create the distinctive cat-paw appearance.
Experiment with different yarn colors, make the paw pads raised or flat, or turn the design into fingerless gloves for another wearable option. Once you have the basic mitten construction mastered, it is easy to customize the size and colors for your own handmade winter accessories.

