

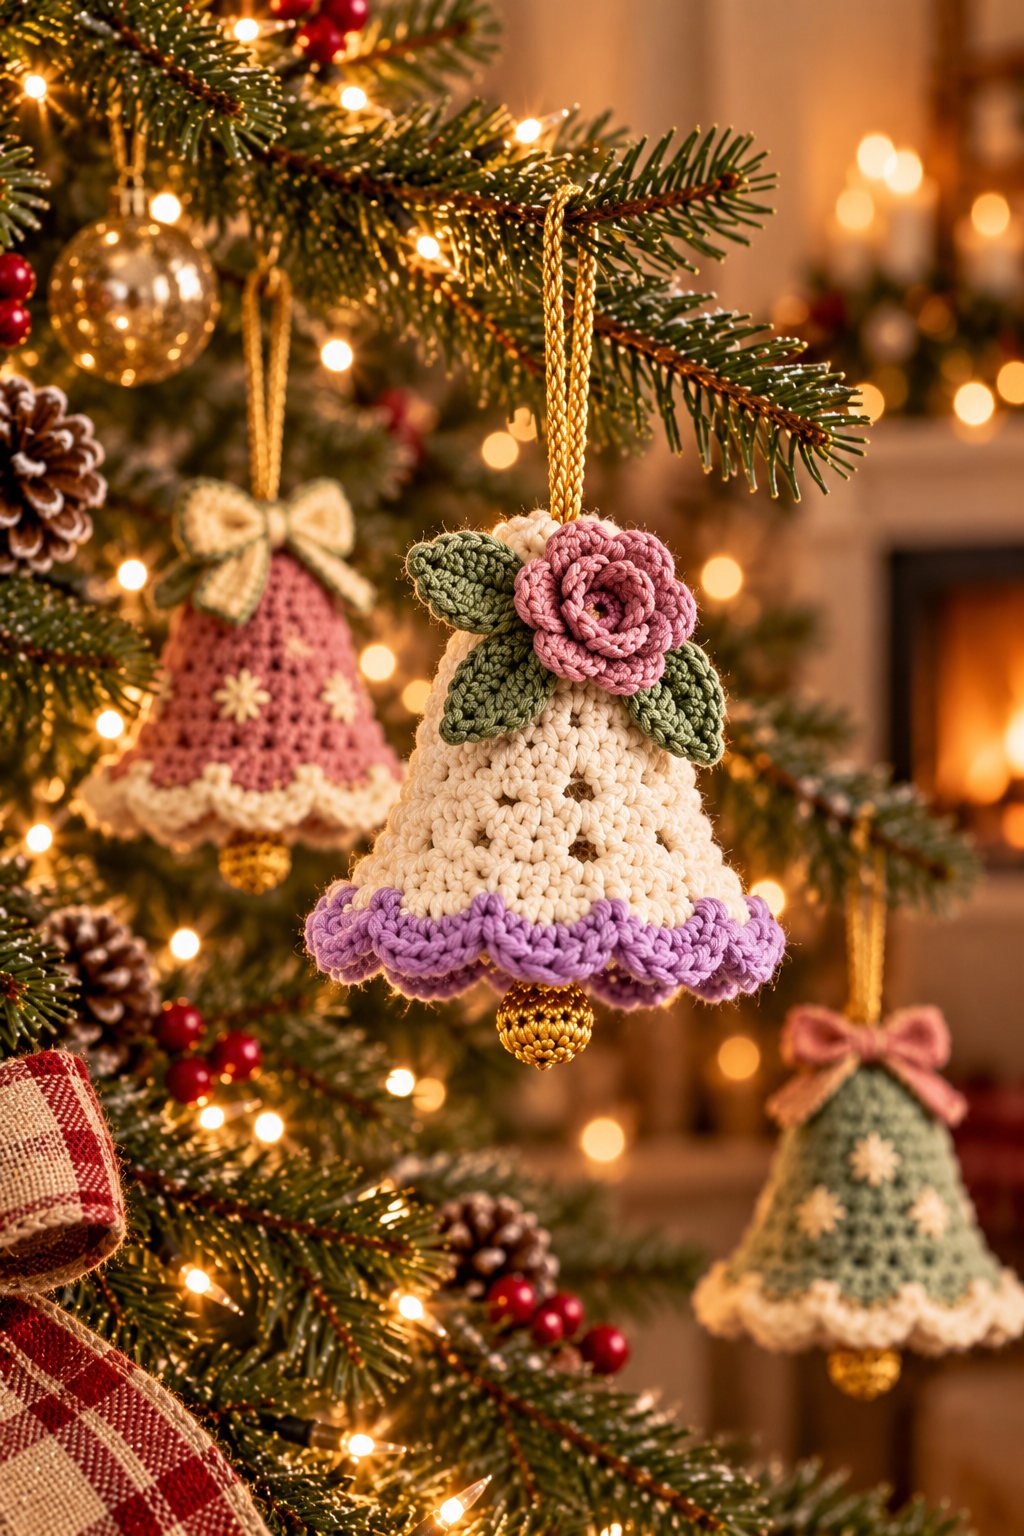
Crochet Christmas bell ornaments bring a soft, handmade touch to a holiday tree, garland, or gift package. The pictured bells use a bell-shaped body, contrasting scalloped edging, a decorative bow or flower, a hanging loop, and a small gold-toned clapper. A mix of rose, ivory, sage, and lavender makes the set feel festive while keeping it gentle and vintage-inspired.
This article is an original visual construction guide based on the reference image. The photo does not show a stitch sequence, yarn label, hook size, or finished dimensions, so no exact counts or measurements are claimed. Use a tested ornament pattern or your own swatch-based draft if you need a counted, repeatable pattern.
Why You’ll Love These Crochet Bell Ornaments
- A charming handmade finish: Crochet texture softens classic Christmas tree decor.
- Easy to personalize: Make a coordinated set in favorite colors or use leftover yarn for one-of-a-kind bells.
- Small, giftable projects: Ornaments are a lovely way to make a thoughtful handmade gift or decorate a wrapped present.
- Room for playful details: Bows, flowers, leaves, contrast trim, and hanging loops let you vary each bell without changing the overall shape.
- A flexible skill-building project: Practice shaping, edging, and motif attachment on a compact decoration.
Skill Level
This project is suitable for an advanced beginner who is comfortable crocheting an even fabric and following a simple shaping plan. The bell silhouette, scalloped edge, and separate embellishments involve some shaping and finishing. If you are new to crochet, make a small swatch first and work one plain bell before adding flowers or bows.
Materials
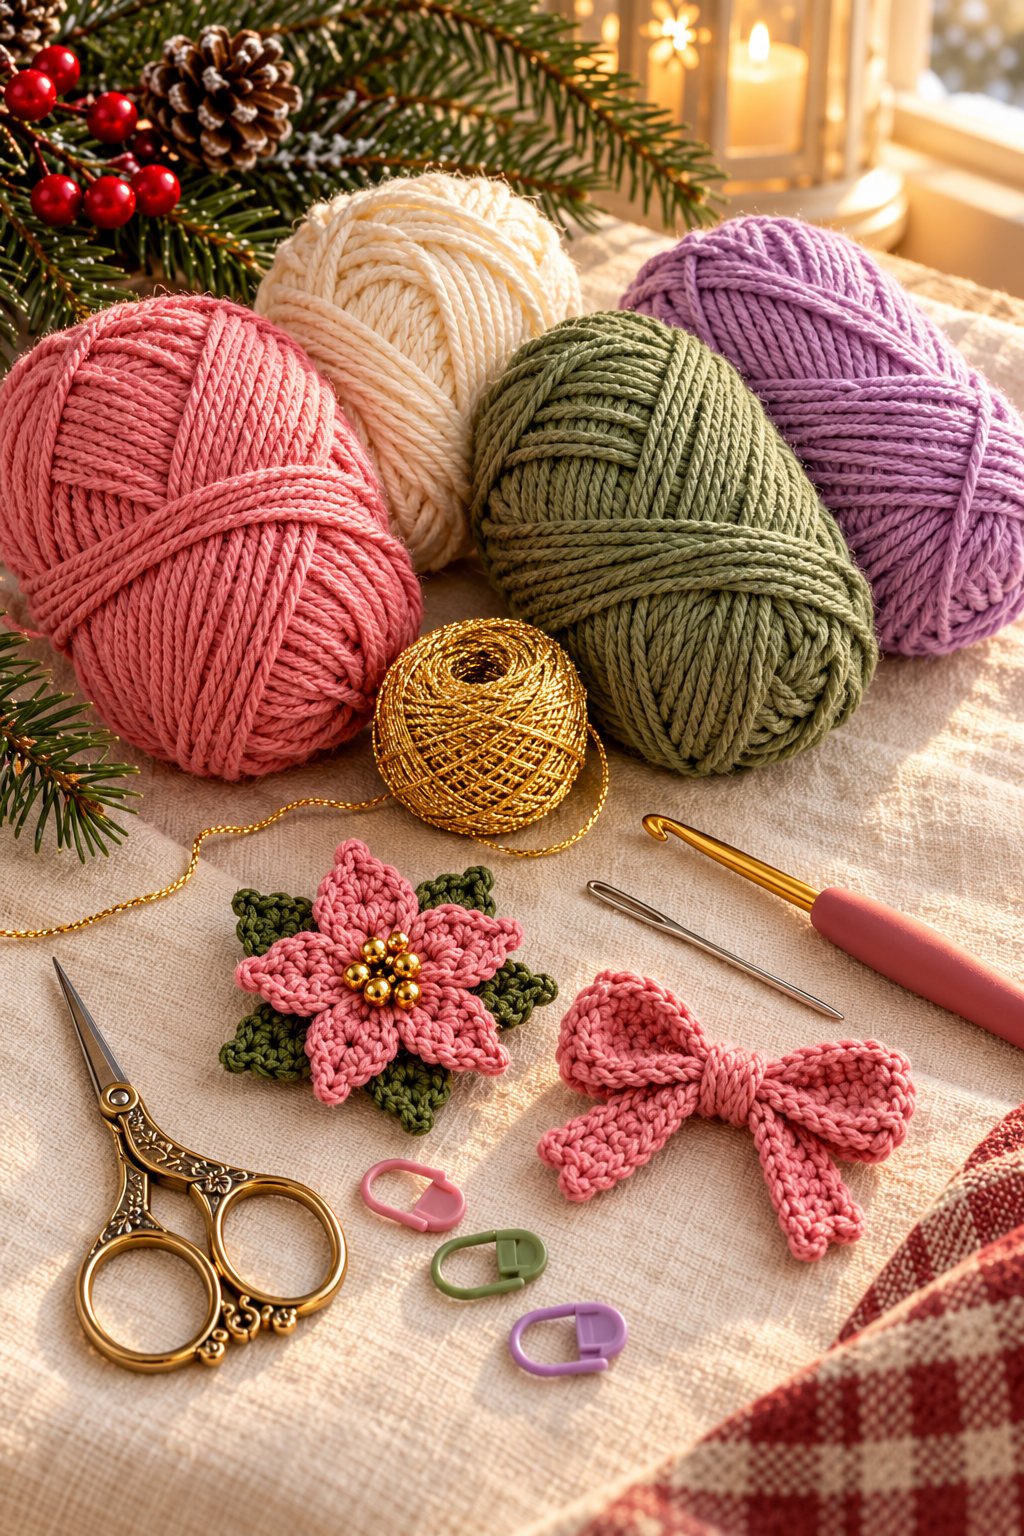
- Smooth yarn in a main shade such as rose, ivory, sage, or lavender
- Small amounts of contrasting yarn for the edging, bow, flower, leaves, and clapper detail
- Crochet hook chosen to suit your yarn and swatch
- Tapestry needle for joining motifs and weaving in ends
- Scissors
- Stitch marker, optional, if working in joined rounds
- Optional small bell or ornament hanger, only if it can be attached securely and safely
Yarn Recommendations
A smooth worsted or DK-weight yarn can both work for ornaments; the reference image does not identify the original yarn weight or fiber. Choose one weight for the bell body and trim so the edge does not become heavy. Cotton or acrylic yarn can show stitches clearly and comes in a broad range of holiday shades. If you use a metallic accent, keep it to a small detail so it does not overwhelm the crocheted texture.
Use a firm, even fabric that holds a bell shape without feeling board-like. A soft yarn may drape more, while a tightly spun yarn can make the scallops crisp. Check the yarn label for care instructions and make a small swatch before choosing a hook.
Hook Size
There is no visible hook size in the reference. Use the hook recommended on your yarn label as a starting point, then adjust until the stitches form a tidy fabric that holds its shape. A slightly firmer fabric can help a hollow ornament keep its bell outline. If you plan to add a bell insert, test the fit while crocheting rather than forcing the finished fabric around it.
Gauge
No numeric gauge can be read from the photograph, and the exact stitch pattern is not identifiable. For an ornament, gauge mainly affects the finished scale and whether the bell keeps its shape. Crochet and lightly block a swatch in your chosen yarn and hook; note its stitch and row density so you can make matching ornaments later.
Finished Measurements
The photo does not specify the size of the ornaments. Finished height and width will depend on yarn weight, hook, stitch choice, and shaping. If you want a coordinated set, choose a target size before starting and compare each bell against the first finished sample as you work. Keep hanging loops similar in length so the ornaments sit evenly on a tree.
Crochet Abbreviations
The abbreviations below use standard US crochet terminology. They explain terms used in this guide, not a hidden stitch-count pattern.
- ch — chain
- sl st — slip stitch
- sc — single crochet
- hdc — half double crochet
- dc — double crochet
- st(s) — stitch(es)
- rep — repeat
- RS / WS — right side / wrong side
Construction Overview
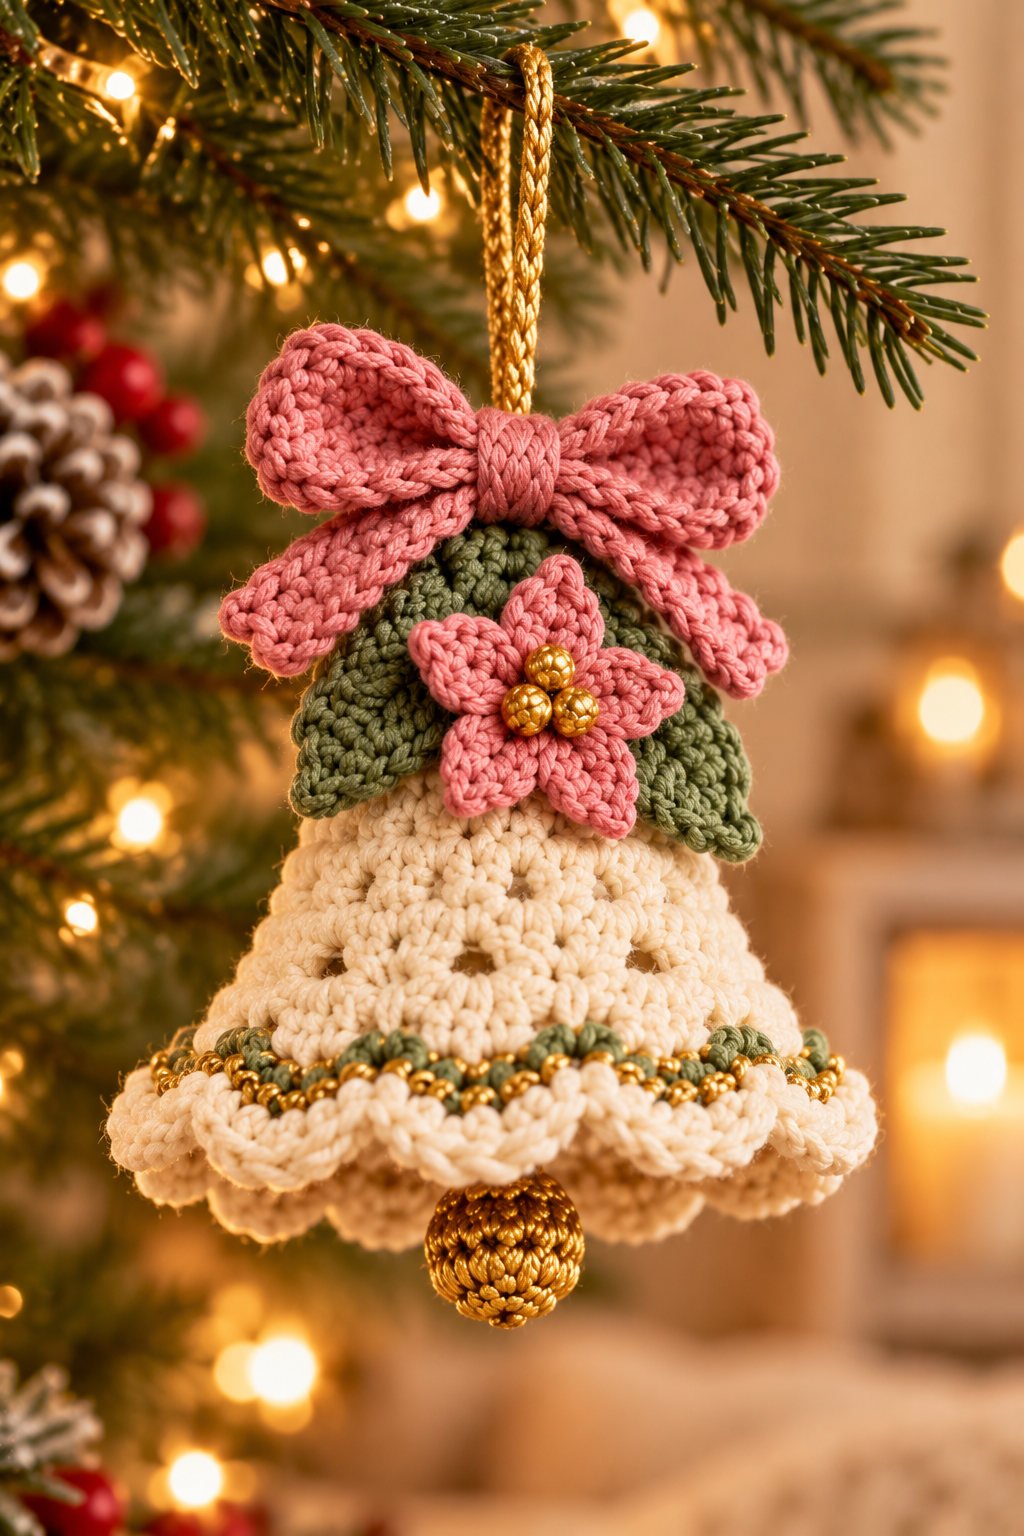
Each ornament appears to have a crocheted bell body that widens toward the lower edge, a contrasting scalloped trim, a small clapper or decorative drop, and a yarn loop for hanging. Some versions add a bow at the top; others feature a flower and leaves or a simple embroidered motif. The image does not reveal whether the bell is worked in rows or rounds, or whether it is stuffed or left hollow. The steps below describe a practical way to plan a similar look while leaving stitch counts and shaping decisions to your chosen pattern or sample.
Step-by-Step Visual Guide
1. Choose a palette and make a sample
Pick one main color and one or two accent colors for the trim and decoration. Make a small swatch with your chosen yarn and hook. Check that it is firm enough to support the bell outline and that your contrast yarn produces an edging that lies flat.
2. Shape the bell body
Work a small upper section and gradually widen the fabric toward the lower edge to create the flared bell silhouette shown in the image. You may work in rounds or make a flat piece and seam it; the photograph does not establish which construction was used. Follow a stitch plan that maintains a smooth, even shape, and try your first sample before repeating it in other colors.

3. Add the contrasting lower edge
Attach the trim color around the opening and work a decorative edge that forms soft scallops. Keep the edge relaxed and consistent. If it curls or puckers, adjust the spacing or tension on your sample before finishing the full ornament.
4. Make the bow, flower, or leaf accents
Crochet a small bow or flower separately, then add leaves if you want the botanical look from the reference. Arrange each motif on the bell before attaching it so you can compare placement and balance. A simple embroidered star or stripe is another tidy option when you want fewer pieces to sew on.
5. Add the clapper and hanging loop
The image shows a small gold-toned drop below each bell. You can crochet a tiny yarn-covered ball or use a small bell if you can secure it firmly. Make a sturdy yarn loop at the top and sew it into the fabric with several passes so it can support the ornament. Keep all small parts out of reach of young children and pets.
6. Finish and repeat
Weave in the ends, shape the bell gently, and check that the trim, motifs, clapper, and hanger are secure. Once the first ornament looks right, use it as a visual guide for the rest of the set. Change colors and motifs while keeping the overall scale consistent.
Customization Ideas
- Use traditional red, forest green, and cream, or keep the softer rose, sage, lavender, and ivory palette.
- Add a crocheted bow, a flower with leaves, embroidered stars, or a simple contrast stripe.
- Make a coordinated family set with one accent color changed on each bell.
- Add a narrow metallic yarn accent for a subtle festive glint.
- Use a longer hanging loop for garlands or a shorter loop for a tree branch.
- Leave off the clapper for a quieter, lightweight ornament.
Finishing
Weave in all yarn ends securely and smooth the bell into shape. If the body is meant to stay hollow, avoid over-stuffing it; if your selected construction uses a lining or light filling, keep it even so the lower edge still flares. Sew bows, flowers, and leaves along their bases rather than catching only one point. Check every attachment and hanging loop before putting the ornament on the tree.
Care Instructions
Check the yarn label before washing. For surface dust, gently brush the ornament with a clean, soft cloth or use a cool-air setting from a distance. If the yarn is washable, spot-clean with a damp cloth and mild detergent, then reshape and air-dry completely. Avoid heat, twisting, and soaking any ornament that contains a metal bell or other non-washable component. Store the bells in a dry box with tissue between delicate appliques.
Helpful Tips
- Make one sample first to check the bell shape and trim scale.
- Use a stitch marker to track the beginning of a round if you work in joined rounds.
- Keep tension consistent across the body so the flare looks even.
- Test the scallop edging on a short section before continuing around the entire rim.
- Sew the hanging loop through multiple stitches and tug gently to check it.
- For a tidy set, compare the finished ornaments side by side as you make them.
- Keep ornaments and detachable components away from small children and pets.
- Display crochet ornaments away from open flames, hot bulbs, and other heat sources.
Frequently Asked Questions
Is this a complete counted crochet pattern?
No. The reference image does not include stitch counts, a stitch repeat, yarn details, or measurements. This is a visual construction guide for making a similar bell ornament; use a size-specific pattern or your own tested sample for exact instructions.
What size will each bell be?
The image does not provide finished dimensions. The size will vary with your yarn, hook, stitch choice, and shaping. Make one sample and use it as the template for the remaining ornaments.
Which yarn weight should I use?
The original yarn weight cannot be determined from the photo. DK or worsted yarn can both be suitable for ornaments. Match the hook to your yarn and swatch until the fabric holds its shape.
Do I need a real bell for the clapper?
No. A small crocheted drop can create the same visual finish. If you choose a real bell, attach it securely and keep the ornament away from young children and pets.
Can I make the ornaments without bows or flowers?
Yes. The reference shows several decorative variations, so you can leave a bell plain, add a simple stripe, or embroider a small star instead of attaching a separate motif.
How can I make the scalloped edge lie flat?
Keep the edging tension steady and test the stitch spacing on a sample. If the trim cups or ripples, change the spacing or edge method until it rests evenly around the bell.
Final Thoughts
These crochet Christmas bell ornaments combine a simple flared silhouette with colorful edging and small handmade details. Make a sample to settle the scale, then use bows, flowers, leaves, or embroidery to give every bell its own character. With secure finishing and careful storage, the set can become a cheerful part of your holiday decorating year after year.

