
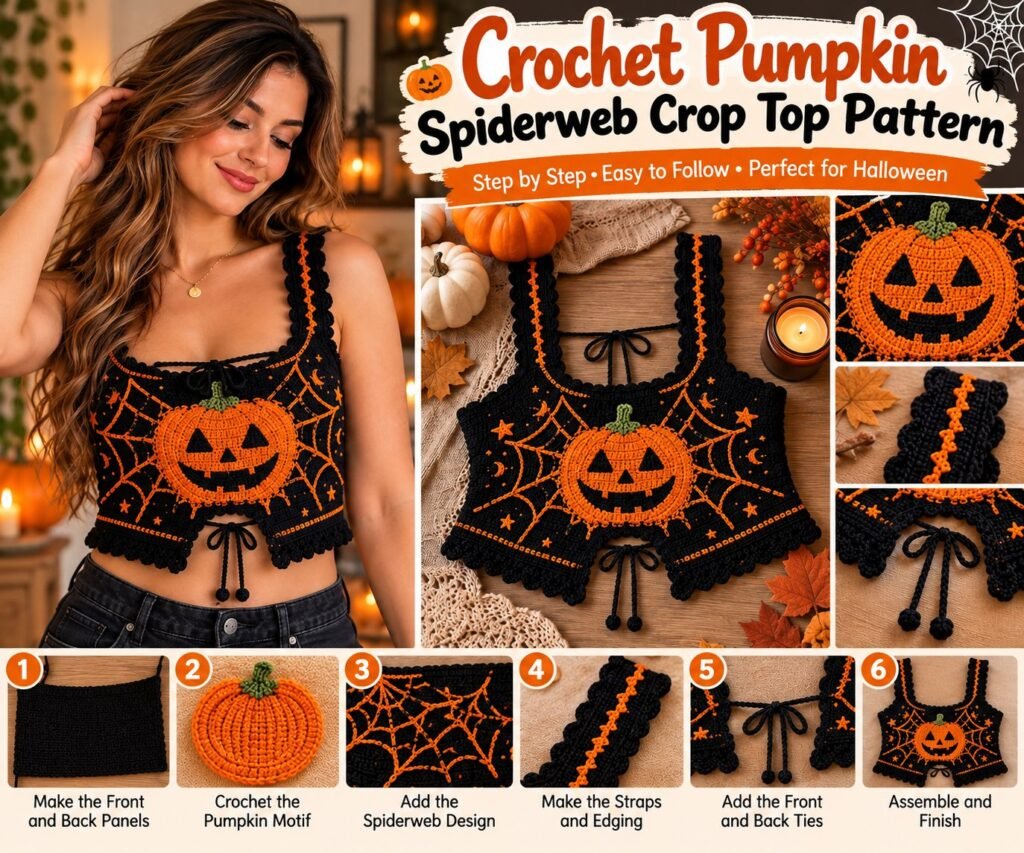
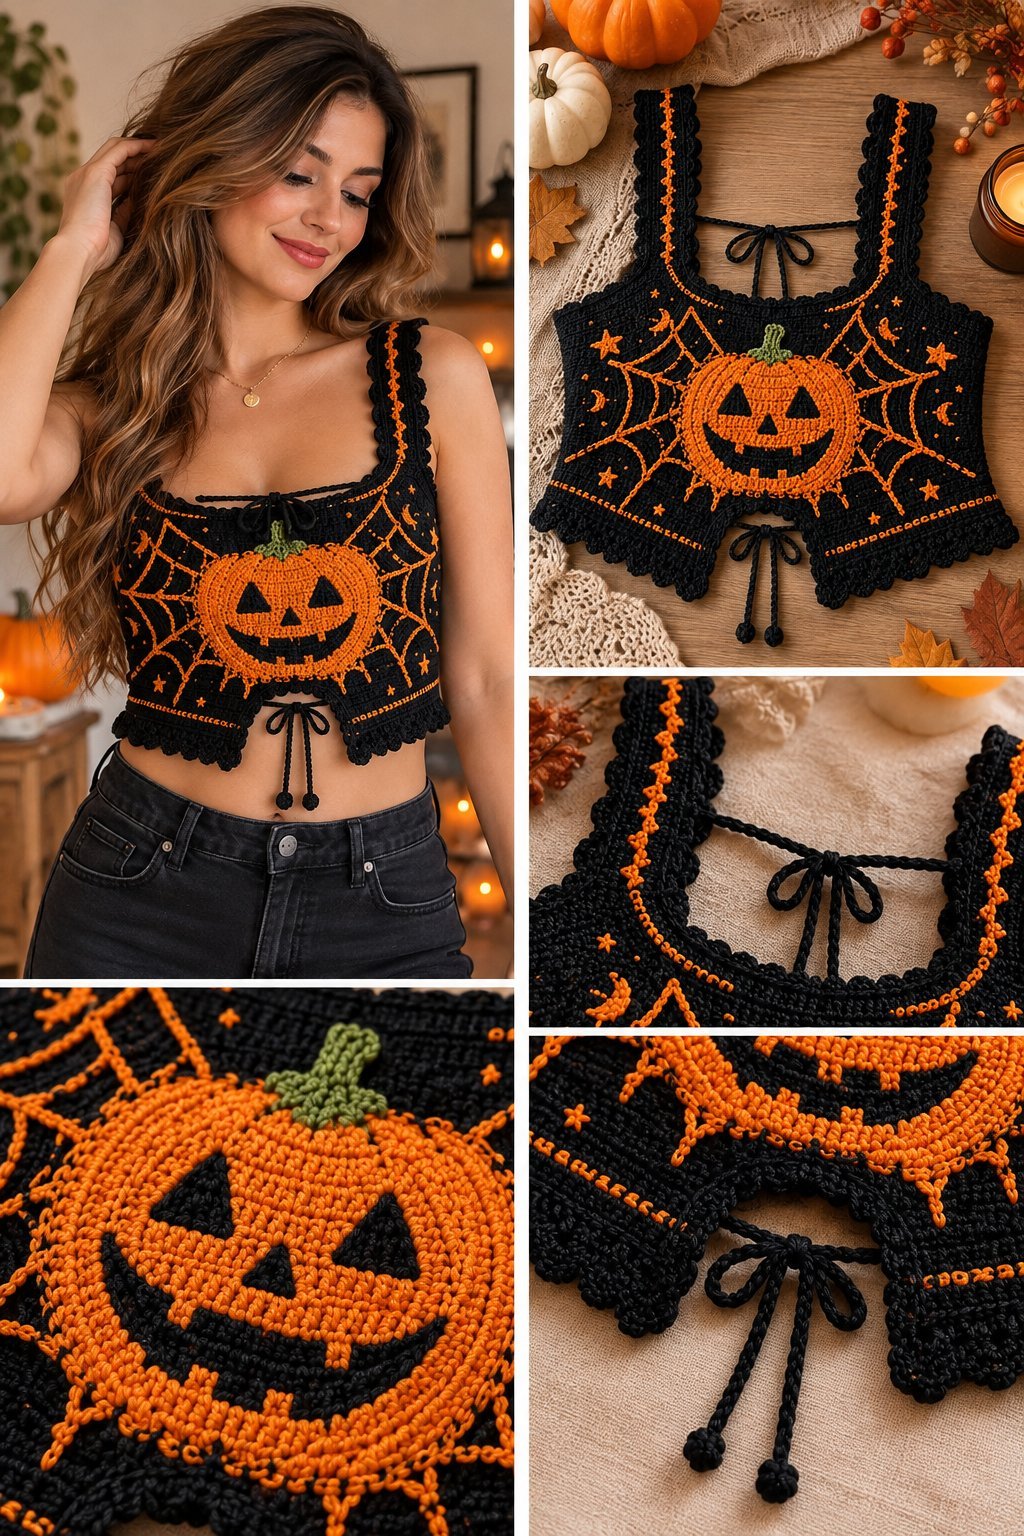
Create a spooky and stylish handmade crochet top with this Crochet Pumpkin Spiderweb Crop Top Pattern. This Halloween-inspired design combines a black crochet crop top with bright orange spiderweb details, a large pumpkin motif, scalloped edging, adjustable straps, and a front tie.
The design is perfect for Halloween parties, autumn festivals, costume-inspired outfits, seasonal photoshoots, and anyone who loves handmade gothic crochet fashion.
The instructions below are an original, adaptable construction inspired by the reference image. Since the original written pattern and exact stitch counts are not provided, measurements should be adjusted according to your body measurements, yarn, hook size, and crochet tension.
Project Details
Project Type: Crochet Crop Top
Style: Halloween / Gothic / Pumpkin
Skill Level: Intermediate
Crochet Terms: US Terms
Main Color: Black
Accent Color: Orange
Additional Color: Green
Main Features: Pumpkin motif, spiderweb design, scalloped edging, adjustable straps, front tie
Construction: Separate front and back panels joined together with decorative edging
Materials Needed
Black DK or light worsted weight yarn: approximately 200–300 g
Orange DK or light worsted weight yarn: approximately 50–100 g
Green yarn: small amount for the pumpkin stem
3.0–3.5 mm crochet hook
Tapestry needle
Embroidery needle
Scissors
Stitch markers
Measuring tape
Sewing pins
Optional: blocking mat and pins
Optional: small amount of elastic thread
Choose a comfortable yarn with enough structure to hold the shape of the crop top while remaining flexible.
Crochet Abbreviations
ch — chain
sc — single crochet
hdc — half double crochet
dc — double crochet
sl st — slip stitch
st — stitch
sts — stitches
inc — increase
dec — decrease
sk — skip
sp — space
rep — repeat
rnd — round
BLO — back loop only
FLO — front loop only
FO — fasten off
Skill Level
Intermediate.
You should be comfortable with:
Working in rows
Working in rounds
Increasing and decreasing
Changing colors
Working decorative borders
Basic crochet appliqué techniques
Sewing crochet pieces together
Finished Measurements
The crop top should be customized according to your own measurements.
Important measurements include:
Bust circumference
Underbust circumference
Top length
Shoulder strap length
Side opening height
Desired crop-top width
For the best fit, measure your body before beginning and compare the crochet piece with a well-fitting crop top.
Gauge
Make a gauge swatch before starting.
A useful starting point is approximately:
18–20 stitches = 10 cm
20–22 rows = 10 cm
Gauge will vary depending on yarn and tension.
For a firmer fabric, use a smaller hook.
For a softer fabric, use a slightly larger hook.
Pattern Notes
The front and back are worked separately.
The top is designed with a slightly fitted shape.
The spiderweb details can be embroidered onto the finished fabric or crocheted using surface slip stitches.
The pumpkin can be crocheted separately and sewn onto the front.
The straps are adjustable using crochet ties.
The scalloped edging is added at the end.
Part 1: Crochet the Front Panel
Step 1: Make the Foundation Chain
Using black yarn, chain enough stitches to reach from one side of your bust to the other.
For a medium starting size, approximately 60–70 chains may be suitable.
Do not use the chain count as an exact size.
Measure the foundation against your body and adjust it as necessary.
The foundation should cover the front of the bust comfortably without excessive stretching.
Step 2: Work the First Row
Sc in the second chain from the hook.
Sc across the entire foundation chain.
Ch 1 and turn.
Step 3: Build the Front Panel
Continue working rows of sc.
Rows 2–5
Sc across.
Ch 1 and turn.
Rows 6–10
Continue with sc.
At this stage, check the width against your body.
The panel should reach comfortably across the front without being too tight.
Step 4: Shape the Upper Section
To create a slightly fitted upper edge, begin decreasing at both sides.
At the beginning of the row:
Ch 1.
Skip the first stitch.
Sc across.
At the end of the row, work the final two stitches together.
Repeat every few rows until the upper section reaches the desired shape.
Do not decrease too quickly.
Try the piece against your body regularly.
Part 2: Crochet the Back Panel
Step 5: Make the Back Foundation
Using black yarn, chain the same number of stitches used for the front panel.
Work sc across.
Ch 1 and turn.
Step 6: Crochet the Back
Continue working sc rows until the back reaches approximately the same height as the front.
The back can be made slightly lower or more open depending on your preferred style.
For a more adjustable design, create two separate back sections and connect them using crochet ties.
Part 3: Create the Side Shape
Step 7: Shape the Sides
Place stitch markers where the side openings should begin.
Work decreases gradually toward the underarm area.
For example:
Sc across until 2 stitches remain.
Dec over the final 2 stitches.
Repeat on the opposite side.
Continue until the top has the desired side shape.
Part 4: Create the Straps
Step 8: Make the Shoulder Straps
Attach black yarn to the upper corner of the front panel.
Chain approximately 25–35 stitches.
Adjust the length according to your body.
Work sc across the chain.
Fasten off.
Repeat for the second strap.
Step 9: Add Decorative Orange Edging
Attach orange yarn around one strap.
Work sc along the edge.
For a decorative border:
Sc in the first stitch.
Skip 1 stitch.
Work 3 dc into the next stitch.
Skip 1 stitch.
Repeat along the strap.
Fasten off.
Repeat on the second strap.
Part 5: Crochet the Pumpkin Motif
The pumpkin is the main feature of the crop top.
Step 10: Make the Pumpkin Base
Using orange yarn, make a magic ring.
Round 1:
6 sc into the ring.
6 sts
Round 2:
Inc around.
12 sts
Round 3:
Sc, inc around.
18 sts
Round 4:
2 sc, inc around.
24 sts
Round 5:
3 sc, inc around.
30 sts
Round 6:
4 sc, inc around.
36 sts
Round 7:
5 sc, inc around.
42 sts
Step 11: Shape the Pumpkin
Rounds 8–11:
Sc around.
42 sts
The pumpkin should now have a rounded shape.
Step 12: Begin Decreasing
Round 12:
5 sc, dec around.
36 sts
Round 13:
4 sc, dec around.
30 sts
Round 14:
3 sc, dec around.
24 sts
Round 15:
2 sc, dec around.
18 sts
Round 16:
Sc, dec around.
12 sts
Round 17:
Dec around.
6 sts
Fasten off.
Use a tapestry needle to close the opening.
Part 6: Add the Pumpkin Face
Step 13: Make the Eyes
Using black yarn, create two small triangular eyes.
You can either:
Crochet them separately and sew them on
Cut small felt triangles
Embroider them directly onto the pumpkin
For a fully crochet-based design, embroidering the facial details is the simplest option.
Step 14: Add the Nose
Create a small black triangle in the center of the pumpkin.
Sew or embroider it securely.
Step 15: Create the Mouth
Using black yarn, embroider a curved smiling mouth.
Add a few small vertical lines to create the classic jack-o’-lantern appearance.
Part 7: Add the Pumpkin Stem
Step 16: Crochet the Stem
Using green yarn:
Ch 5.
Sc in the second chain from the hook.
Sc across.
Work 2–3 rows.
Fasten off.
Sew the stem to the top of the pumpkin.
Part 8: Attach the Pumpkin
Step 17: Position the Pumpkin
Place the pumpkin in the center of the black front panel.
Pin it securely.
Check the position before sewing.
Step 18: Sew the Pumpkin
Using orange yarn or matching sewing thread, sew around the pumpkin.
Make several small stitches around the edge.
Secure the pumpkin firmly to the crop top.
Part 9: Create the Spiderweb Design
The spiderweb is created using orange yarn over the black crochet fabric.
Step 19: Create the Main Web Lines
Thread orange yarn onto a tapestry needle.
Start from a point near the pumpkin.
Create several diagonal lines extending outward.
These lines should spread toward the corners of the front panel.
Do not pull the yarn too tightly.
The lines should sit naturally on top of the crochet stitches.
Step 20: Add the Curved Web Lines
Connect the main lines with curved horizontal sections.
Work several curved lines around the pumpkin.
Keep the spacing relatively even.
Continue the web toward both sides of the crop top.
Step 21: Add Small Spiderweb Details
Create small web sections near the straps and lower corners.
Add tiny orange stars or small decorative stitches between selected web sections.
Keep the details balanced on both sides.
Part 10: Add Orange Decorative Edging
Step 22: Finish the Neckline
Attach orange yarn around the neckline.
Work one round of sc.
For a decorative border:
Sc.
Skip 1 stitch.
3 dc in the next stitch.
Skip 1 stitch.
Repeat around the neckline.
Finish with a sl st.
Step 23: Finish the Bottom Edge
Attach black yarn around the bottom edge if necessary.
Work one round of sc.
Then use orange yarn for the decorative border.
Work:
Sc.
Skip 2 stitches.
5 dc in the next stitch.
Skip 2 stitches.
Sc.
Repeat around the bottom.
This creates the scalloped Halloween-style edge.
Part 11: Add the Front Tie
Step 24: Make the Crochet Tie
Using black yarn, chain approximately 60–90 cm.
Work sl sts across the chain.
Fasten off.
Make a second shorter tie if desired.
Step 25: Attach the Tie
Thread the tie through the center front or lower edge of the top.
Create a bow.
Adjust the length according to your preference.
Part 12: Add the Back Tie
Step 26: Make Adjustable Back Ties
Attach black yarn to the upper back corners.
Chain approximately 40–60 cm.
Work sc across the chain.
Fasten off.
Repeat on the opposite side.
These ties allow the crop top to be adjusted for a more comfortable fit.
Part 13: Add the Scalloped Armhole Edges
Step 27: Crochet the Armhole Border
Attach black yarn around one armhole.
Work sc evenly around.
Switch to orange yarn.
Work:
Sc.
Skip 2 stitches.
5 dc in the next stitch.
Skip 2 stitches.
Sc.
Repeat around the armhole.
Fasten off.
Repeat on the opposite side.
Part 14: Final Finishing
Step 28: Weave in Yarn Ends
Turn the garment inside out.
Use a tapestry needle to weave all loose ends through several stitches.
Trim the excess yarn.
Step 29: Block the Crop Top
Lightly dampen the finished garment.
Lay it flat.
Gently shape the neckline, straps, side edges, and bottom hem.
Pin the scalloped border into place.
Allow it to dry completely.
Blocking helps the decorative edges sit more evenly.
Step 30: Check the Fit
Try the top on before making any final adjustments.
Check:
Bust width
Underbust fit
Strap length
Side openings
Neckline
Crop length
Back ties
Front tie
Make adjustments if necessary.
How to Customize the Crochet Pumpkin Spiderweb Crop Top
Make It Smaller
Reduce the foundation chain.
Reduce the number of rows.
Shorten the straps.
Make a smaller pumpkin motif.
Make It Larger
Increase the foundation chain.
Add additional rows to the front and back.
Increase the pumpkin size.
Lengthen the straps.
Add additional stitches around the side edges.
Make It Longer
Continue working additional rows before adding the bottom border.
Make It More Cropped
Stop the body section earlier.
Use a shorter bottom border.
Change the Halloween Colors
Black and orange create the classic Halloween look.
Black and purple create a darker gothic appearance.
Black and lime green create a spooky neon style.
Black, orange, and cream create a vintage Halloween palette.
Black and burgundy create a more gothic autumn look.
Crochet Tips
Measure your body before beginning.
Make a gauge swatch.
Use stitch markers when working repeated sections.
Keep the spiderweb lines loose enough to prevent puckering.
Pin the pumpkin before sewing it permanently.
Count your stitches regularly.
Block the finished top for a cleaner shape.
Try the garment on before adding the final decorative details.
Common Problems and Solutions
The Crop Top Is Too Tight
Your foundation chain may be too short.
Add stitches or use a larger hook.
The Crop Top Is Too Loose
Reduce the foundation chain or use a smaller hook.
The Spiderweb Design Is Puckering
The orange embroidery may be pulled too tightly.
Loosen the surface stitches and allow them to rest naturally over the black fabric.
The Pumpkin Is Too Small
Add another increase round before beginning the straight rounds.
The Bottom Edge Is Too Wavy
Reduce the number of stitches worked into each scallop.
The Straps Are Uneven
Measure both straps before attaching them.
Pin them in place and compare their lengths.
Care Instructions
Follow the washing instructions recommended for your yarn.
Hand washing is usually the safest option for a highly decorated crochet garment.
Use mild detergent.
Avoid harsh bleach.
Do not wring aggressively.
Reshape while damp.
Lay flat to dry.
Avoid high heat unless recommended by the yarn manufacturer.
Frequently Asked Questions
Is this crochet pumpkin spiderweb crop top beginner-friendly?
The basic crochet stitches are straightforward, but creating the pumpkin appliqué, spiderweb embroidery, shaping, straps, and decorative borders makes the complete project more suitable for an intermediate crocheter or an adventurous beginner.
What yarn should I use?
DK or light worsted weight yarn works well for this design. Black cotton yarn gives the top a defined structure, while acrylic or cotton blends can also be used depending on the desired drape.
Can I make this top in a different size?
Yes. Measure the bust and underbust circumference first, then adjust the width of the front and back panels.
Can I make the spiderweb in a different color?
Yes. Orange is ideal for a Halloween look, but purple, white, green, silver, or red can also create interesting variations.
Can I remove the pumpkin?
Yes. The pumpkin can be replaced with another Halloween motif such as a ghost, spider, bat, moon, or skull.
Can I make the pumpkin larger?
Yes. Add another increase round before working the straight rounds, then add additional decrease rounds to maintain the rounded shape.
Can I wear this crochet crop top as an everyday garment?
The design can be adapted for everyday wear by removing the Halloween motifs and replacing the spiderweb details with floral, geometric, or simple decorative stitches.


1 thought on “Crochet Pumpkin Spiderweb Crop Top Pattern”