
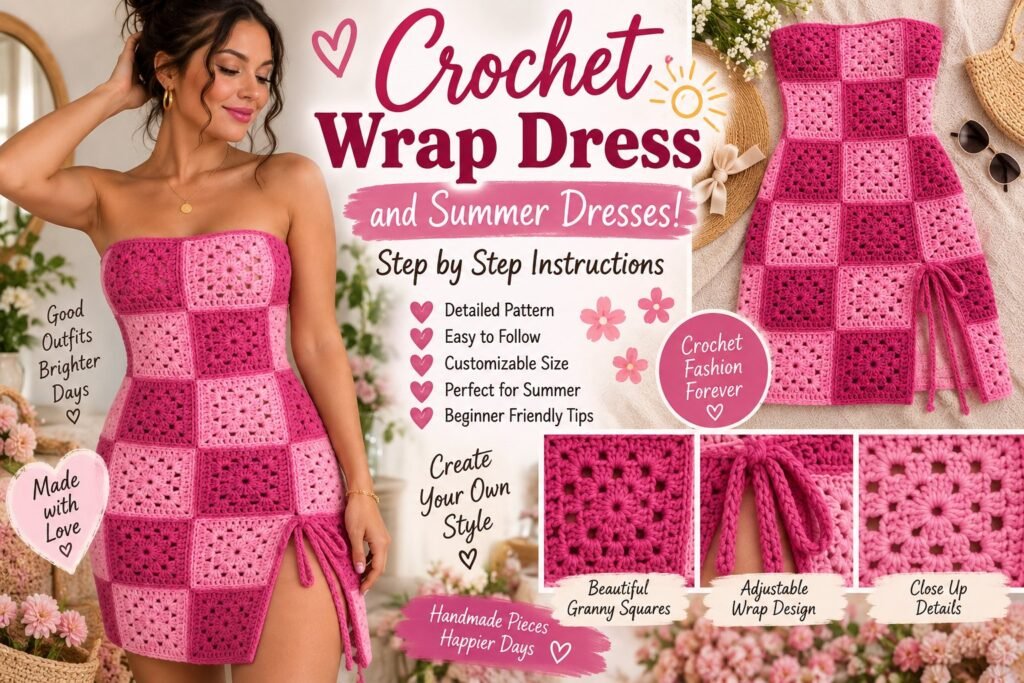
A crochet wrap dress is one of the prettiest handmade pieces for a warm-weather wardrobe. This Crochet Wrap Dress and Summer Dresses design combines classic granny squares with a flattering wrap silhouette, adjustable side ties, and beautiful shades of pink.
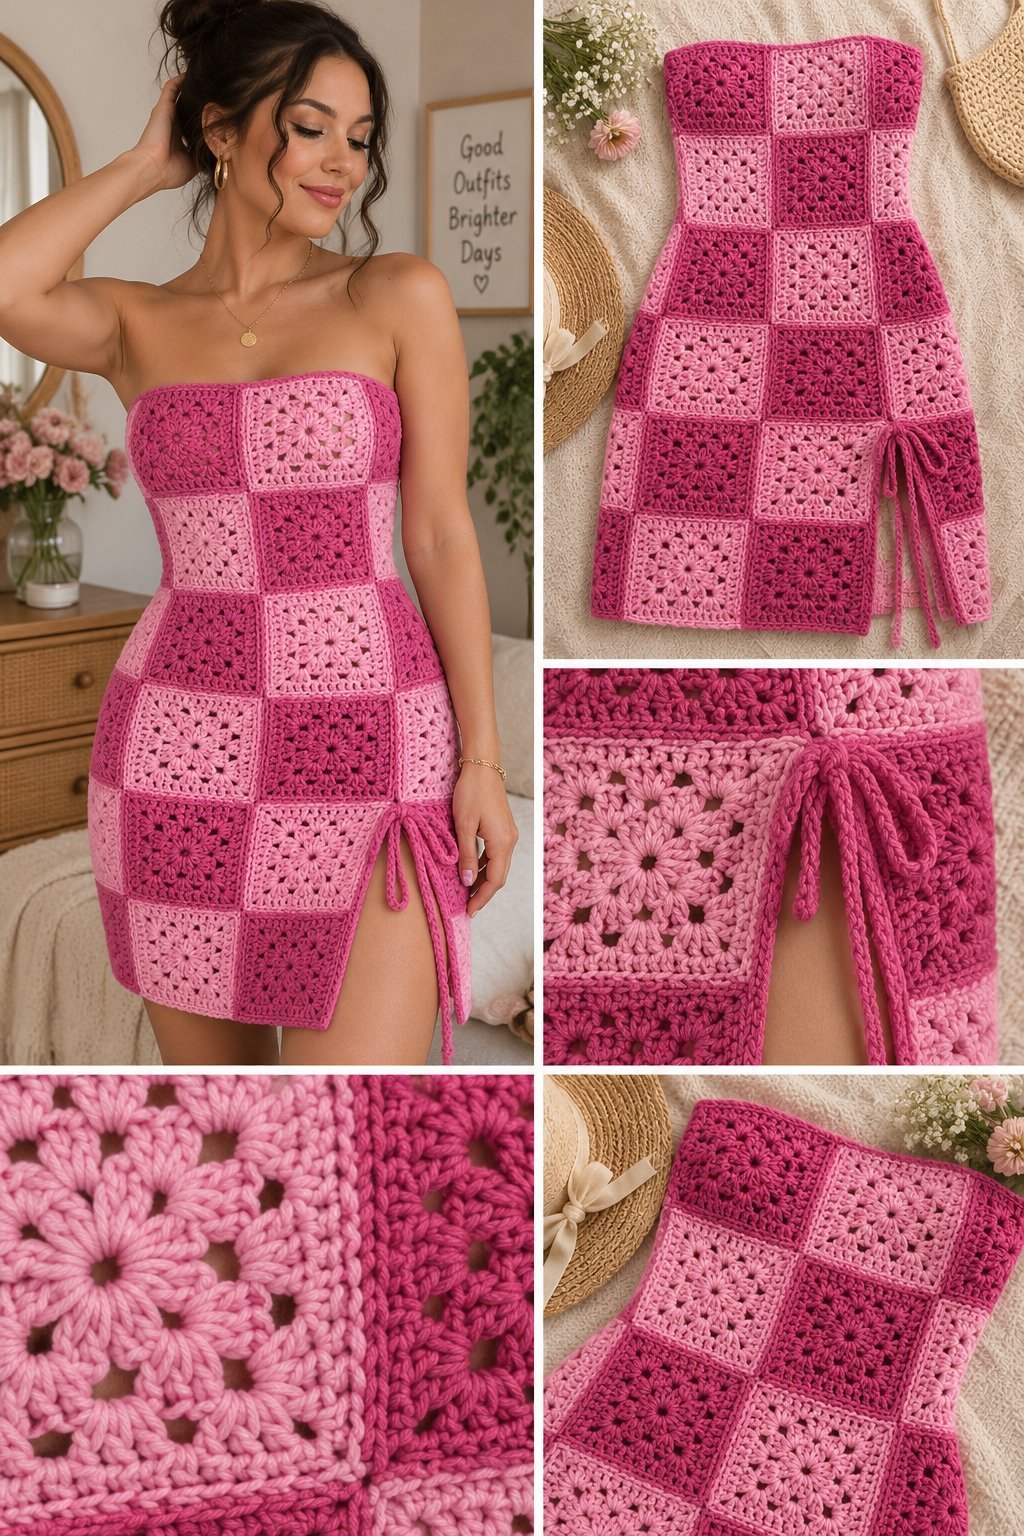
The dress shown in the inspiration image features alternating pink and raspberry granny squares arranged to follow the shape of the body. The wrap-style side opening makes the fit adjustable, while the sleeveless design keeps the dress light and comfortable for summer.
This tutorial explains how to make a similar crochet wrap dress from individual granny squares and assemble them into a wearable summer garment.
Pattern note: This is an original, adaptable tutorial inspired by the pictured design. Exact square counts will depend on your measurements, yarn weight, and gauge.
👗 Crochet Wrap Dress Details
- Project: Crochet wrap dress
- Style: Summer / Feminine / Handmade
- Skill Level: Intermediate
- Construction: Granny squares + side panels + waist ties
- Crochet Terms: US terminology
- Fit: Adjustable wrap style
- Main Colors: Pink, rose, raspberry
- Season: Spring and summer
🧶 Materials
Yarn
Choose lightweight cotton or cotton-blend yarn.
You will need approximately:
- Light pink yarn
- Medium pink yarn
- Dark pink or raspberry yarn
- Optional cream yarn for contrast
The exact amount depends on your size and desired dress length.
Crochet Supplies
- 3–3.5 mm crochet hook
- Yarn needle
- Scissors
- Stitch markers
- Measuring tape
- Blocking mats or clean towels
- Pins for blocking
✂️ Crochet Stitches Used
- ch – Chain
- sl st – Slip stitch
- sc – Single crochet
- hdc – Half double crochet
- dc – Double crochet
- tr – Treble crochet
Common Granny Square Terms
Cluster: A group of double crochet stitches worked into the same space.
Corner: Usually created with a chain-2 space between stitch clusters.
📏 Before You Start
Because this is a fitted garment, measurements are very important.
Measure:
- Bust circumference
- Underbust circumference
- Waist circumference
- Hip circumference
- Shoulder-to-waist length
- Waist-to-hem length
- Desired total dress length
Then make one granny square and measure it after blocking.
Your square size will determine how many squares you need.
For example, if your blocked square measures approximately 10 cm × 10 cm, you can use that measurement to calculate the number of squares required around the bust, waist, and hips.
STEP-BY-STEP CROCHET WRAP DRESS
Step 1 — Make Your Granny Square
Begin with your darkest or lightest pink yarn.
Make a magic ring.
Round 1
Chain 3.
Work 2 dc into the ring, then chain 2.
Repeat the cluster around the ring until you have four groups.
Join with a slip stitch.
You should have four corners.
Step 2 — Build the Square
Change colors if desired.
In each corner space, work:
3 dc, ch 2, 3 dc
Between corners, work:
3 dc
Continue around.
Join with a slip stitch.
Step 3 — Add Additional Granny-Square Rounds
Continue adding rounds until the square reaches your desired size.
Each new round increases the square at the four corners.
A typical sequence is:
3 dc in each side space
and
3 dc, ch 2, 3 dc in each corner space.
Change colors between rounds to create the beautiful multicolored appearance shown in the inspiration dress.
🌷 Step 4 — Make Multiple Squares
Repeat the granny-square pattern until you have enough pieces for the dress.
For a fitted mini dress, you may need approximately 30–50 squares, depending on square size and body measurements.
Instead of following a fixed number, arrange your completed squares around your body or a dress form to determine the correct quantity.
Create:
- Front squares
- Back squares
- Side squares
- Hip squares
You can use identical squares or alternate different pink combinations.
🎨 Step 5 — Plan Your Color Layout
Before joining the squares, lay them all flat.
Create a repeating color pattern.
For example:
Light Pink → Raspberry → Rose Pink → Light Pink
Repeat the arrangement.
For a more playful appearance, mix the colors randomly.
Take a photo of your layout before joining so you can remember the arrangement.
👗 Step 6 — Shape the Bodice
The bodice should be slightly narrower than the hips.
Arrange granny squares in rows across the upper body.
Join them horizontally first.
Then join the rows vertically.
For the bust area, keep the width close to your bust measurement.
You can leave a small opening at the top if you want a strapless or low neckline.
Step 7 — Create the Waistline
As you move from the bust toward the waist, slightly reduce the width of the garment.
You can do this by:
- Using fewer squares
- Joining squares at an angle
- Adding smaller half-square pieces
- Crocheting small connecting panels
The goal is to create a gently fitted waist.
Avoid making the waist too tight because granny-square fabric has less stretch than solid crochet fabric.
🌸 Step 8 — Build the Skirt
Continue adding granny-square rows below the waist.
For a flattering wrap silhouette, allow the skirt to become slightly wider toward the hips and hem.
Add additional squares around the lower section if necessary.
The skirt can finish:
- Above the knee
- At the knee
- Mid-calf
- Ankle length
The pictured design has a short summer-dress silhouette.
🎀 Step 9 — Create the Wrap Opening
One of the defining features of the dress is the side wrap opening.
Instead of fully joining both front edges, leave one side partially open.
This creates the overlapping wrap section.
The front panel should cross comfortably over the body.
You can adjust the amount of overlap according to your preferred coverage.
Step 10 — Make the Waist Ties
The waist ties keep the wrap dress securely closed.
Using your preferred pink yarn, chain approximately 80–120 stitches, depending on your size.
Work slip stitches or single crochet back along the chain.
Make a second tie of the same length.
Sew one tie securely to the inside of the dress.
Attach the other to the opposite side.
The ties should be positioned around your natural waist.
🎀 Step 11 — Add the Side Tie Opening
For the outer tie, create a longer crochet cord.
Attach it to the side seam.
The cord should be long enough to pass around the back and tie comfortably at the opposite side.
Tie the dress into a bow.
This makes the garment adjustable and gives it the characteristic wrap-dress appearance.
🌷 Step 12 — Shape the Neckline
Try the dress on before finishing the neckline.
You can create:
- Straight neckline
- V-neckline
- Slight sweetheart shape
- Rounded neckline
For a simple finish, work one round of single crochet around the neckline.
If you want a more decorative appearance, add a small scalloped border.
👗 Step 13 — Finish the Armholes
Even a sleeveless wrap dress needs clean armhole edges.
Work one or two rounds of single crochet around each armhole.
Keep the border flexible.
If you want a more feminine finish, add a small picot or shell edging.
🌸 Step 14 — Join and Reinforce the Side Seams
If you have left the wrap opening on one side, join only the sections that should remain closed.
Use a yarn needle and matching yarn.
Sew through the granny-square edges carefully.
For extra strength, reinforce the waist and hip areas with additional stitches.
🧵 Step 15 — Add a Decorative Hem
The granny squares already create an attractive geometric edge, but a crochet border can give the dress a more finished appearance.
Work one round of single crochet around the hem.
Then try a simple shell border:
Skip 2 stitches, 5 dc into the next stitch, skip 2 stitches, sc in the next stitch.
Repeat around the dress.
For a cleaner modern look, simply use a few rounds of single crochet.
💕 Step 16 — Secure the Granny-Square Joins
Inspect every joining seam.
If any section feels loose, reinforce it from the wrong side.
Pay special attention to:
- Bust
- Waist
- Side seam
- Wrap opening
- Waist ties
A dress experiences more movement than a decorative crochet project, so strong joins are important.
✂️ Step 17 — Weave in the Yarn Ends
Use a yarn needle to weave every loose yarn end through several stitches.
Secure each end carefully.
Trim the excess yarn.
Take your time with this step because granny-square projects can have many yarn tails.
💧 Step 18 — Block the Finished Dress
Blocking is particularly important for granny-square garments.
Lightly dampen the dress.
Lay it flat.
Gently shape each square into a consistent size.
Pay attention to:
- Neckline
- Waist
- Wrap opening
- Hem
- Side seams
Allow the dress to dry completely.
Blocking helps the individual squares line up neatly.
🎨 Crochet Summer Dress Color Ideas
🌸 Pink Romance
- Baby pink
- Rose pink
- Raspberry
- Cream
🍓 Strawberry Summer
- Light pink
- Red
- White
- Soft green
🌼 Cottagecore
- Cream
- Dusty pink
- Sage green
- Beige
💜 Pastel Dream
- Lavender
- Pink
- Cream
- Lilac
🖤 Gothic Granny Square
- Black
- Burgundy
- Dark pink
- Plum
👗 How to Customize Your Crochet Wrap Dress
Make It Longer
Add additional granny-square rows below the hips.
Continue until you reach your desired length.
Make It Shorter
Stop adding squares once the skirt reaches your preferred mini-dress length.
Make It Fuller
Add additional squares around the hip and lower skirt sections.
Make It More Fitted
Use smaller granny squares and carefully shape the waist.
Add Sleeves
You can attach short crochet sleeves around the armholes.
Simple puff sleeves or lightweight lace sleeves would complement the granny-square design beautifully.
🧶 Tips for Crocheting a Granny-Square Dress
Block every square
Consistent square dimensions make garment assembly much easier.
Use cotton yarn
Cotton gives granny squares excellent stitch definition and works well for summer clothing.
Check the fit frequently
Lay the squares against your body as you assemble them.
Reinforce the waist
The waist receives a lot of tension from the wrap ties.
Don’t make the wrap too narrow
Allow enough overlap for comfortable coverage.
Keep your color layout organized
Take a photo before joining all the squares.
❓ Frequently Asked Questions
Is this crochet wrap dress beginner-friendly?
Granny squares themselves are beginner-friendly, but assembling and shaping them into a fitted garment is more suitable for an intermediate crocheter.
What yarn is best for a crochet summer dress?
Lightweight cotton or cotton-blend yarn is an excellent choice. It is breathable and provides good stitch definition.
How many granny squares do I need?
There is no single number because it depends on your square size, body measurements, and dress length. Make a sample square first and calculate the number needed for each section.
Can I make this dress in one color?
Yes. A monochrome granny-square dress can look elegant and modern. You can also use several shades of the same color for a subtle gradient.
Can I make a longer summer dress?
Absolutely. Simply continue adding granny-square rows toward the hem.
Is a wrap dress adjustable?
Yes. The waist ties allow you to change the tightness and amount of overlap, making this style more forgiving than a fixed crochet dress.
🌺 Other Crochet Summer Dress Ideas
Once you’ve finished the wrap version, you can use the same techniques to create other summer styles:
Crochet Granny Square Mini Dress
Use smaller squares for a colorful fitted mini dress.
Crochet Beach Cover-Up
Use larger granny squares and a more open stitch pattern.
Crochet Maxi Dress
Continue the skirt to ankle length and add a decorative lace hem.
Crochet Sundress
Use lightweight yarn and floral granny squares for a romantic summer look.
Crochet Halter Dress
Replace the straight neckline with a halter-style top and adjustable neck ties.
❤️ Final Thoughts
This Crochet Wrap Dress and Summer Dress Pattern is a beautiful way to turn classic granny squares into a wearable handmade garment. The combination of pink shades, geometric floral squares, adjustable wrap ties, and a flattering skirt creates a fun statement piece for spring and summer.
The best part is how customizable the design can be. Change the colors, square size, dress length, neckline, or amount of wrap overlap to create a dress that fits your own style.
Whether you’re making a colorful mini dress for summer, a romantic cottagecore outfit, or a longer granny-square dress for vacation, this project is a wonderful way to bring traditional crochet techniques into modern handmade fashion.
SEO Keywords: Crochet Wrap Dress, free crochet wrap dress pattern, crochet summer dress, granny square dress, crochet granny square dress pattern, free crochet dress pattern, crochet mini dress, crochet beach dress, crochet sundress, crochet clothing pattern, crochet summer fashion, handmade crochet dress, granny square summer dress, crochet women’s clothing, easy crochet dress pattern.

