
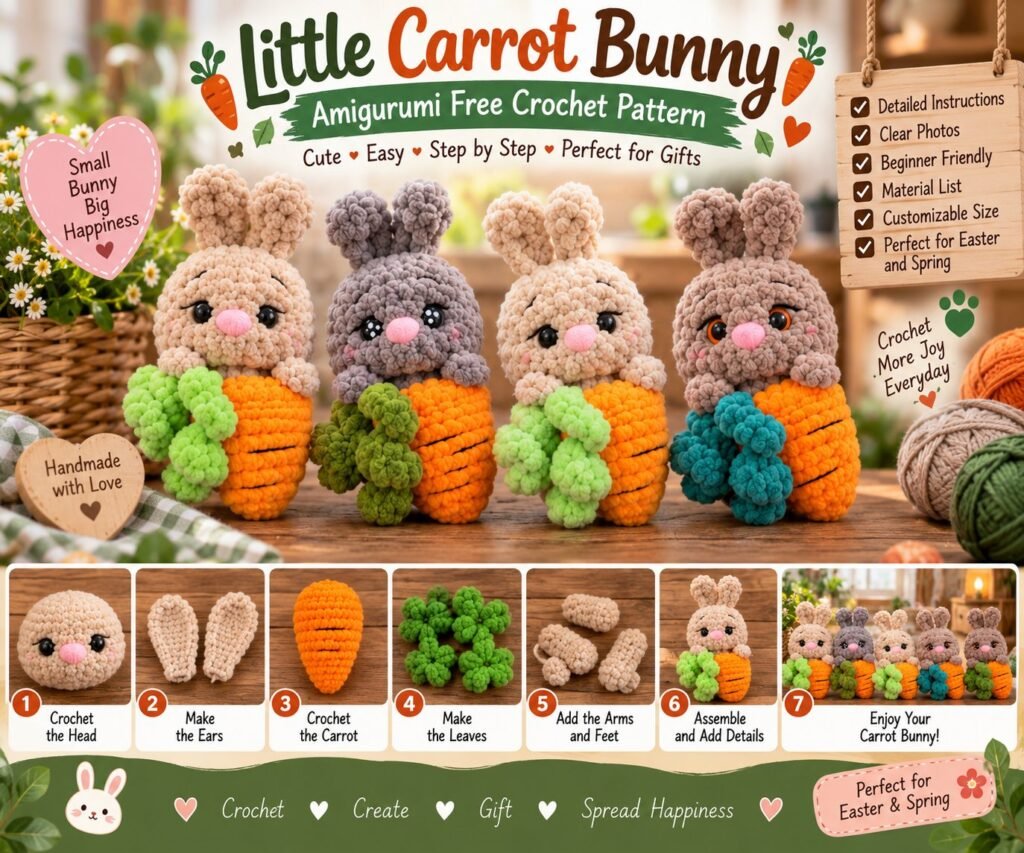
Create an adorable little spring-inspired friend with this Little Carrot Bunny Amigurumi Free Crochet Pattern. This cute handmade bunny combines a soft, rounded bunny body with a bright orange carrot, fluffy green leaves, long ears, tiny paws, and a sweet embroidered-style face.
The finished bunny is a charming crochet project for Easter, spring decorations, handmade gifts, nursery décor, or anyone who enjoys cute amigurumi animals.
This pattern is an original, adaptable design inspired by the reference image. Because the exact original pattern is not provided, stitch counts and finished measurements may vary depending on your yarn, hook, stuffing, and crochet tension.
Little Carrot Bunny Amigurumi Pattern
The project is made from several separate pieces that are assembled together.
The bunny’s head and ears are crocheted in a soft beige or cream color. The carrot is worked separately in bright orange yarn, while several green crochet leaves create the leafy carrot top.
The face is finished with black safety eyes, a pink nose, and simple embroidered details.
Materials Needed
Cream, beige, or light-brown yarn
Orange yarn
Light green yarn
Dark green yarn
Pink yarn
Black yarn or embroidery thread
Black safety eyes, approximately 6 mm
Fiberfill stuffing
2.5–3.5 mm crochet hook
Yarn needle
Scissors
Stitch marker
Sewing needle
Optional fabric glue
Finished Size
Using DK or worsted-weight yarn with a 2.5–3.5 mm crochet hook, the finished bunny will generally measure approximately 15–20 cm tall.
The size can be changed by using different yarn weights and hook sizes.
For a miniature bunny, use crochet thread or fine DK yarn.
For a larger plush, use bulky yarn and a larger hook.
Crochet Abbreviations
MR — magic ring
ch — chain
sc — single crochet
hdc — half double crochet
dc — double crochet
sl st — slip stitch
inc — increase
dec — decrease
st — stitch
sts — stitches
BLO — back loop only
FO — fasten off
Skill Level
Beginner to intermediate
This project uses basic amigurumi techniques, including crocheting in continuous rounds, increasing, decreasing, stuffing, and sewing separate pieces together.
How to Crochet the Bunny Head
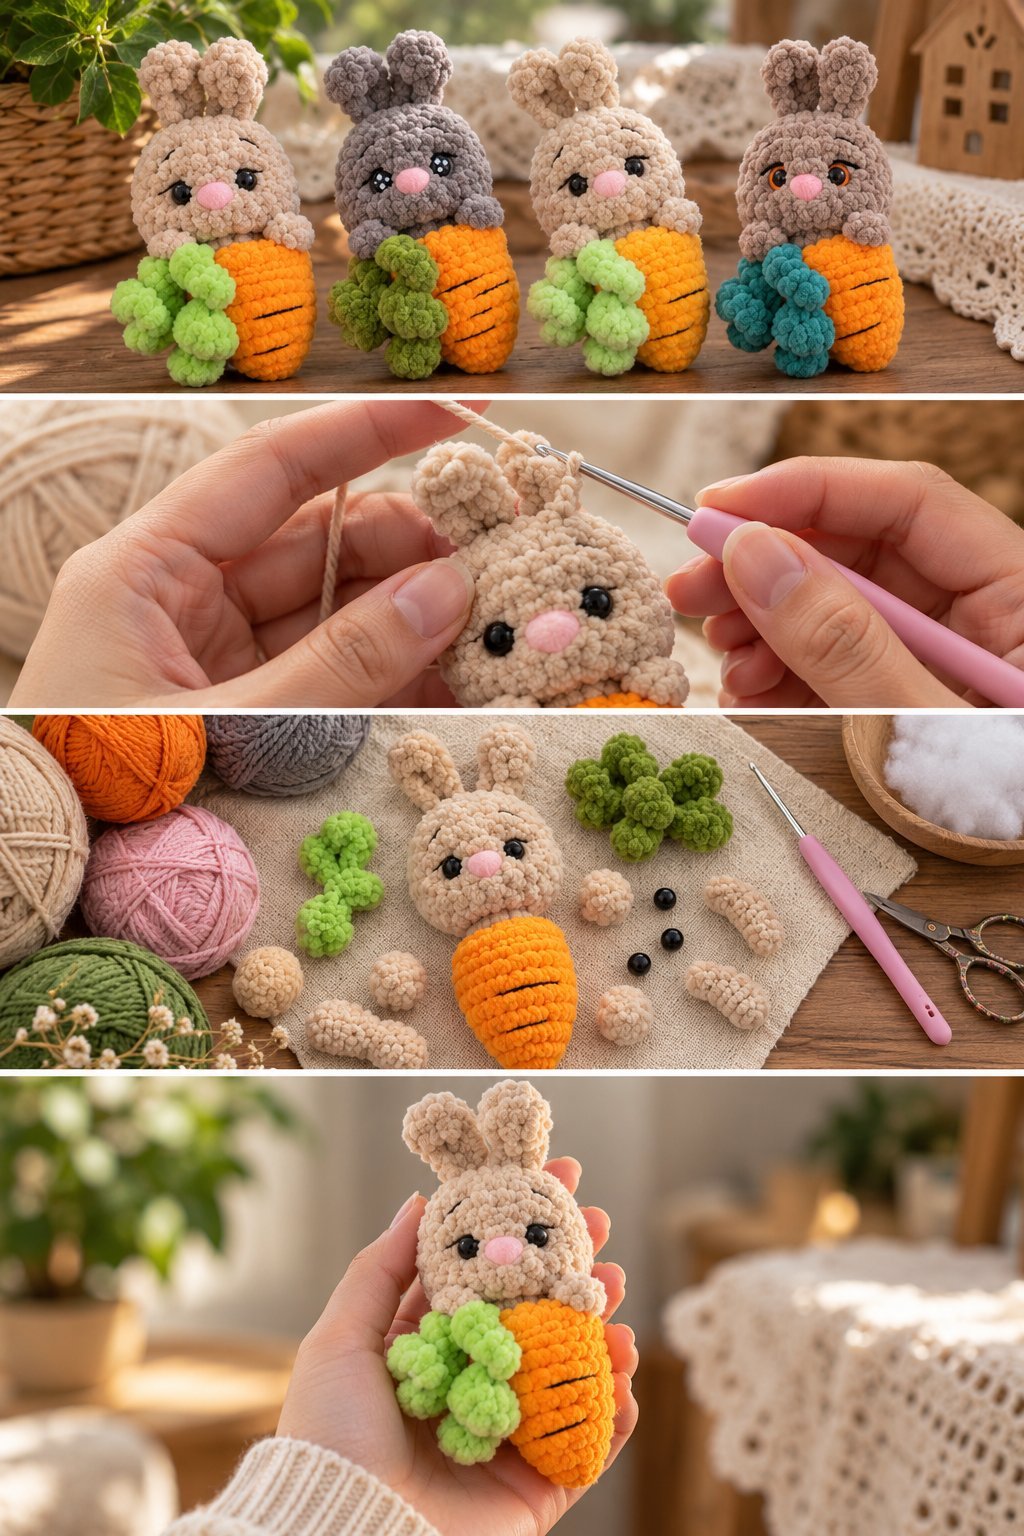
Use cream or beige yarn.
Work in continuous rounds and place a stitch marker at the beginning of each round.
Round 1
Make a magic ring.
Work 6 sc into the ring.
6 sts
Round 2
Work 2 sc in every stitch around.
12 sts
Round 3
Repeat:
1 sc in the next stitch, inc in the next stitch.
Repeat around.
18 sts
Round 4
Repeat:
2 sc, inc.
Repeat around.
24 sts
Round 5
Repeat:
3 sc, inc.
Repeat around.
30 sts
Rounds 6–11
Work 1 sc in every stitch around.
30 sts
The head should now have a rounded shape.
Begin adding small amounts of fiberfill.
Round 12
Repeat:
3 sc, dec.
Repeat around.
24 sts
Round 13
Repeat:
2 sc, dec.
Repeat around.
18 sts
Add more stuffing.
Round 14
Repeat:
1 sc, dec.
Repeat around.
12 sts
Round 15
Work dec around.
6 sts
Fasten off.
Close the opening and hide the yarn tail inside the head.
How to Crochet the Bunny Ears
Make two matching ears using cream or beige yarn.
The ears can be made slightly elongated to create the soft upright appearance shown in the reference.
Row 1
Chain 8.
Starting in the second chain from the hook, work sc across.
7 sts
Row 2
Ch 1 and turn.
Work 1 sc in each stitch.
Row 3
Increase at the beginning and end of the row.
Rows 4–10
Continue working sc.
Gradually decrease near the top to create a rounded point.
Fasten off and leave a long sewing tail.
Fold the lower section slightly and sew the ear onto the top of the bunny’s head.
Repeat for the second ear.
Adding Ear Details
For a two-tone appearance, crochet a smaller inner-ear piece using pink, beige, or a slightly darker shade.
Sew the smaller piece onto the front of each ear.
Alternatively, embroider a simple inner-ear shape using contrasting yarn.
Adding the Bunny Face
Position two black safety eyes on the front of the head.
Place them evenly apart.
Before permanently securing the backs, check the placement from several angles.
For a child-friendly version, embroider the eyes instead of using plastic safety eyes.
Crochet Bunny Nose
Use pink yarn.
Make a small oval or circle.
Round 1
Make a magic ring.
Work 6 sc.
Round 2
Work 2 sc in each stitch.
12 sts
Fasten off.
Sew the small pink nose between the eyes.
You can also embroider the nose directly onto the face.
Bunny Mouth
Using black embroidery thread, create a tiny curved line underneath the nose.
Add two short lines extending downward if you want a more traditional bunny expression.
Keep the stitches small and neat.
Bunny Cheeks
Use pink yarn or embroidery thread.
Add two tiny pink cheek details on either side of the nose.
The cheeks can be embroidered with a few small stitches or made as tiny crochet circles.
How to Crochet the Bunny Arms
Make two arms using cream or beige yarn.
Round 1
Make a magic ring.
Work 6 sc.
Rounds 2–6
Work 1 sc around.
6 sts
Fasten off.
Do not overstuff the arms.
Leave a long sewing tail.
Sew the arms onto the sides of the bunny’s body.
Position them so they gently rest against the carrot.
How to Crochet the Bunny Feet
Make two feet.
Round 1
Make a magic ring.
Work 6 sc.
Round 2
Work 2 sc in each stitch.
12 sts
Rounds 3–5
Work 1 sc in every stitch.
12 sts
Round 6
Repeat:
2 sc, dec.
Fasten off.
Lightly stuff each foot.
Sew the feet to the lower portion of the carrot or bunny body.
How to Crochet the Carrot
Use bright orange yarn.
The carrot is worked from the wide top toward the pointed bottom.
Round 1
Make a magic ring.
Work 6 sc.
6 sts
Round 2
Increase around.
12 sts
Round 3
Repeat:
1 sc, inc.
18 sts
Round 4
Repeat:
2 sc, inc.
24 sts
Rounds 5–8
Work 1 sc in each stitch around.
24 sts
Begin decreasing gradually.
Round 9
Repeat:
2 sc, dec.
18 sts
Round 10
Repeat:
1 sc, dec.
12 sts
Add fiberfill.
Round 11
Repeat:
1 sc, dec.
8 sts
Round 12
Work dec around until the opening is closed.
Fasten off.
Pull the yarn tail through the remaining stitches and close the point.
Shaping the Carrot
Use a strand of orange yarn and a yarn needle to add subtle horizontal lines across the carrot.
Insert the needle from the bottom and bring it out near the top.
Make several shallow lines around the carrot.
Pull gently.
The lines should create the appearance of natural carrot ridges without compressing the stuffing too much.
How to Crochet the Carrot Leaves
Use green yarn.
The leafy top is made from several small curled pieces.
Leaf 1
Chain 8.
Starting in the second chain:
sl st
sc
hdc
dc
hdc
sc
sl st
Fasten off.
Repeat to create several leaves.
Leaf 2
For a fuller carrot top, chain 10–12 stitches.
Work 2 sc into each chain.
The piece will naturally curl.
Fasten off.
Leaf 3
Create another short chain.
Work several increases along the chain.
This creates a rounded, curly leaf.
Make approximately 5–8 green leaves depending on how full you want the carrot top.
Assembling the Carrot Leaves
Arrange the green leaves around the wide top of the carrot.
Sew each leaf securely.
Mix shorter and longer leaves to create a natural leafy appearance.
Use both light and dark green yarn for more visual depth.
Attaching the Bunny to the Carrot
Position the bunny head above the carrot.
The carrot should sit directly in front of or underneath the bunny’s body.
Sew the bunny securely to the carrot using matching yarn.
Position the arms around the carrot so they appear to be holding it.
Make sure the carrot remains centered.
Step-by-Step Assembly
Step 1: Crochet the Bunny Head
Create the rounded cream bunny head and stuff it evenly.
Step 2: Make the Ears
Crochet two long ears and attach them securely to the top of the head.
Step 3: Add the Face
Attach the eyes and add the pink nose, cheeks, and embroidered mouth.
Step 4: Crochet the Carrot
Create the orange carrot using increases and decreases to form the tapered shape.
Step 5: Stuff the Carrot
Add fiberfill gradually and shape the carrot with your fingers.
Step 6: Add the Carrot Ridges
Use orange yarn to create subtle horizontal shaping lines.
Step 7: Make the Green Leaves
Crochet multiple green leaves and curly tendrils.
Step 8: Attach the Leaves
Sew the leaves securely around the top of the carrot.
Step 9: Crochet the Arms
Make two small cream arms and attach them around the carrot.
Step 10: Add the Feet
Attach the small bunny feet near the lower section of the carrot.
Step 11: Assemble the Bunny
Secure the head, carrot, arms, and feet together.
Step 12: Finish the Project
Weave in all loose yarn ends and gently shape the finished amigurumi.
How to Make the Bunny Extra Fluffy
For a softer-looking bunny, choose plush or chenille yarn.
Because plush yarn can make individual stitches harder to see, use a slightly larger hook and count your rounds carefully.
Keep the stuffing firm enough to maintain the shape but avoid overfilling the head and carrot.
How to Make the Carrot More Realistic
Use two shades of orange for subtle color variation.
Add several shallow horizontal ridges.
Make the leafy top slightly irregular.
Mix different shades of green for the leaves.
A slightly uneven handmade shape can make the finished carrot look more natural.
Crochet Color Ideas
Classic Carrot Bunny
Cream
Bright orange
Light green
Pink
Black
Soft Pastel Bunny
Cream
Peach
Sage green
Blush pink
Gray Bunny
Light gray
Orange
Dark green
Pink
Brown Bunny
Warm brown
Orange
Olive green
Cream
How to Make a Smaller Carrot Bunny
Use DK-weight yarn and a smaller crochet hook.
Reduce the number of increase rounds in the head.
Make shorter ears.
Reduce the size of the carrot.
Use fewer stitches for the arms and feet.
This creates a miniature bunny that works beautifully as a small Easter decoration or handmade gift.
How to Make a Larger Carrot Bunny
Use worsted or bulky yarn.
Add additional increase rounds to the head and carrot.
Make the ears longer.
Increase the size of the arms and feet proportionally.
A larger version can be used as a soft decorative plush.
Tips for Amigurumi Crochet
Keep your stitches tight.
Use a smaller hook than you would normally use with the same yarn.
Count every round carefully.
Use a stitch marker.
Add stuffing gradually.
Avoid large gaps between stitches.
Sew all parts securely.
Hide yarn tails inside the finished piece.
Check the face placement before permanently attaching the eyes and nose.
Safety Notes
If the finished bunny is intended for babies or toddlers, avoid detachable safety eyes, buttons, beads, and other small pieces.
Embroidered facial details are a safer alternative.
Make sure all sewn components are firmly attached.
Keep stuffing completely enclosed.
Always consider the intended age of the recipient when choosing decorative materials.
Crochet Little Carrot Bunny Gift Ideas
This adorable bunny can be made as a handmade gift for:
Easter
Spring birthdays
Baby showers
Nursery décor
Animal lovers
Crochet enthusiasts
Seasonal gift baskets
Handmade Easter baskets
You can also make several bunnies using different fur and carrot colors to create a cute spring collection.
Frequently Asked Questions
Is this Little Carrot Bunny suitable for beginners?
The basic pieces use simple amigurumi stitches, but assembling the bunny and carrot requires some sewing experience. It is a good project for beginners who have already practiced single crochet in the round.
What yarn should I use?
A soft acrylic or cotton-blend yarn works well. Chenille yarn can also be used for a plush version.
What hook size should I use?
A 2.5–3.5 mm crochet hook is a useful starting range for DK or worsted-weight yarn. Choose the hook that produces tight, even stitches.
Can I change the carrot color?
Yes. You can use orange, peach, yellow-orange, or even pastel colors for a different seasonal style.
How many leaves should I make?
Five to eight leaves will create a full carrot top, but you can add more or fewer depending on the size of your carrot.
Can I make the bunny without the carrot?
Yes. The bunny head, ears, arms, and feet can be adapted into a standalone amigurumi rabbit.
Can I use embroidered eyes?
Yes. Embroidered eyes are a great alternative to safety eyes, especially for small children.
How do I keep the bunny sitting upright?
Use firm but even stuffing and make sure the carrot has a stable bottom. You can also slightly flatten the lower section while shaping it.
Can I sell finished Little Carrot Bunnies?
If you make your own original finished items, you can decide how to use them. If you work from another designer’s pattern, check that designer’s terms before selling finished products.
Final Thoughts
This Little Carrot Bunny Amigurumi Free Crochet Pattern is a charming project for spring and Easter crafting. The combination of the soft bunny, oversized carrot, fluffy green leaves, long ears, and sweet facial details creates a playful handmade character with plenty of personality.
Experiment with different bunny colors, carrot sizes, and leafy greens to create your own collection. The finished bunny can become a seasonal decoration, handmade gift, or adorable addition to an amigurumi display.


1 thought on “Little Carrot Bunny Amigurumi Free Crochet Pattern”