
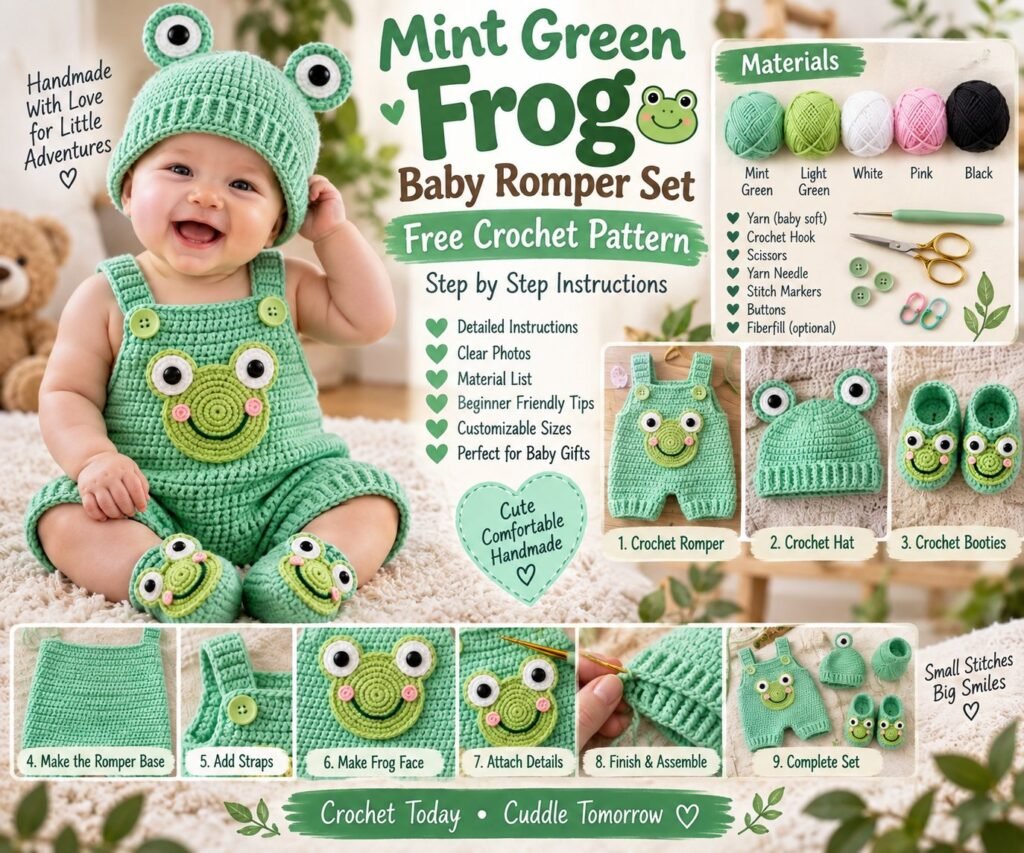
Create an adorable handmade outfit with this Mint Green Frog Baby Romper Set Free Crochet Pattern. This charming baby set includes a cute frog-themed crochet romper, matching frog hat, and coordinating baby booties.
The soft mint-green color gives the outfit a fresh, gentle appearance, while the frog face, large eyes, and playful details make it perfect for baby photos, gifts, birthdays, and everyday wear. This project is also a wonderful choice for crocheters who enjoy creating coordinated baby outfits.
Pattern note: This is an original, adaptable tutorial inspired by the provided reference image. Stitch counts may need to be adjusted according to the baby’s measurements, yarn weight, hook size, and crochet tension.
Crochet Frog Baby Romper Set Details
- Project type: Baby crochet clothing set
- Includes: Romper, frog hat, and booties
- Skill level: Intermediate
- Crochet terms: US terminology
- Main color: Mint green
- Accent colors: Light green, white, black, and pink
- Style: Cute animal-themed baby outfit
- Best for: Baby showers, gifts, photo sessions, and everyday wear
Materials
Yarn
Choose a soft baby-friendly yarn.
You will need:
- Mint green yarn for the romper and accessories
- Light green yarn for the frog face
- White yarn for the eyes
- Black yarn for the pupils and facial details
- Small amount of pink yarn for the cheeks
- Optional darker green yarn for accents
A soft cotton, cotton-acrylic, or baby-weight yarn is recommended.
Crochet Supplies
- 3.0–3.5 mm crochet hook
- Yarn needle
- Scissors
- Stitch markers
- Measuring tape
- Polyester fiberfill for stuffed eyes or facial details
- 4 small buttons for the shoulder straps
- Optional fabric lining for the hat
For baby garments, make sure all buttons and decorative elements are securely attached.
Crochet Abbreviations
- ch — Chain
- sc — Single crochet
- hdc — Half double crochet
- dc — Double crochet
- sl st — Slip stitch
- inc — Increase
- dec — Decrease
- BLO — Back loop only
- FLO — Front loop only
- st — Stitch
- rep — Repeat
- FO — Fasten off
Size and Measurements
Before starting, measure the baby carefully.
Take the following measurements:
- Chest circumference
- Waist circumference
- Hip circumference
- Body length
- Inseam
- Shoulder width
- Head circumference
- Foot length
The romper should allow enough room for comfortable movement and diaper changes.
Because crochet fabric can stretch, avoid making the garment excessively tight.
Step-by-Step Crochet Frog Romper
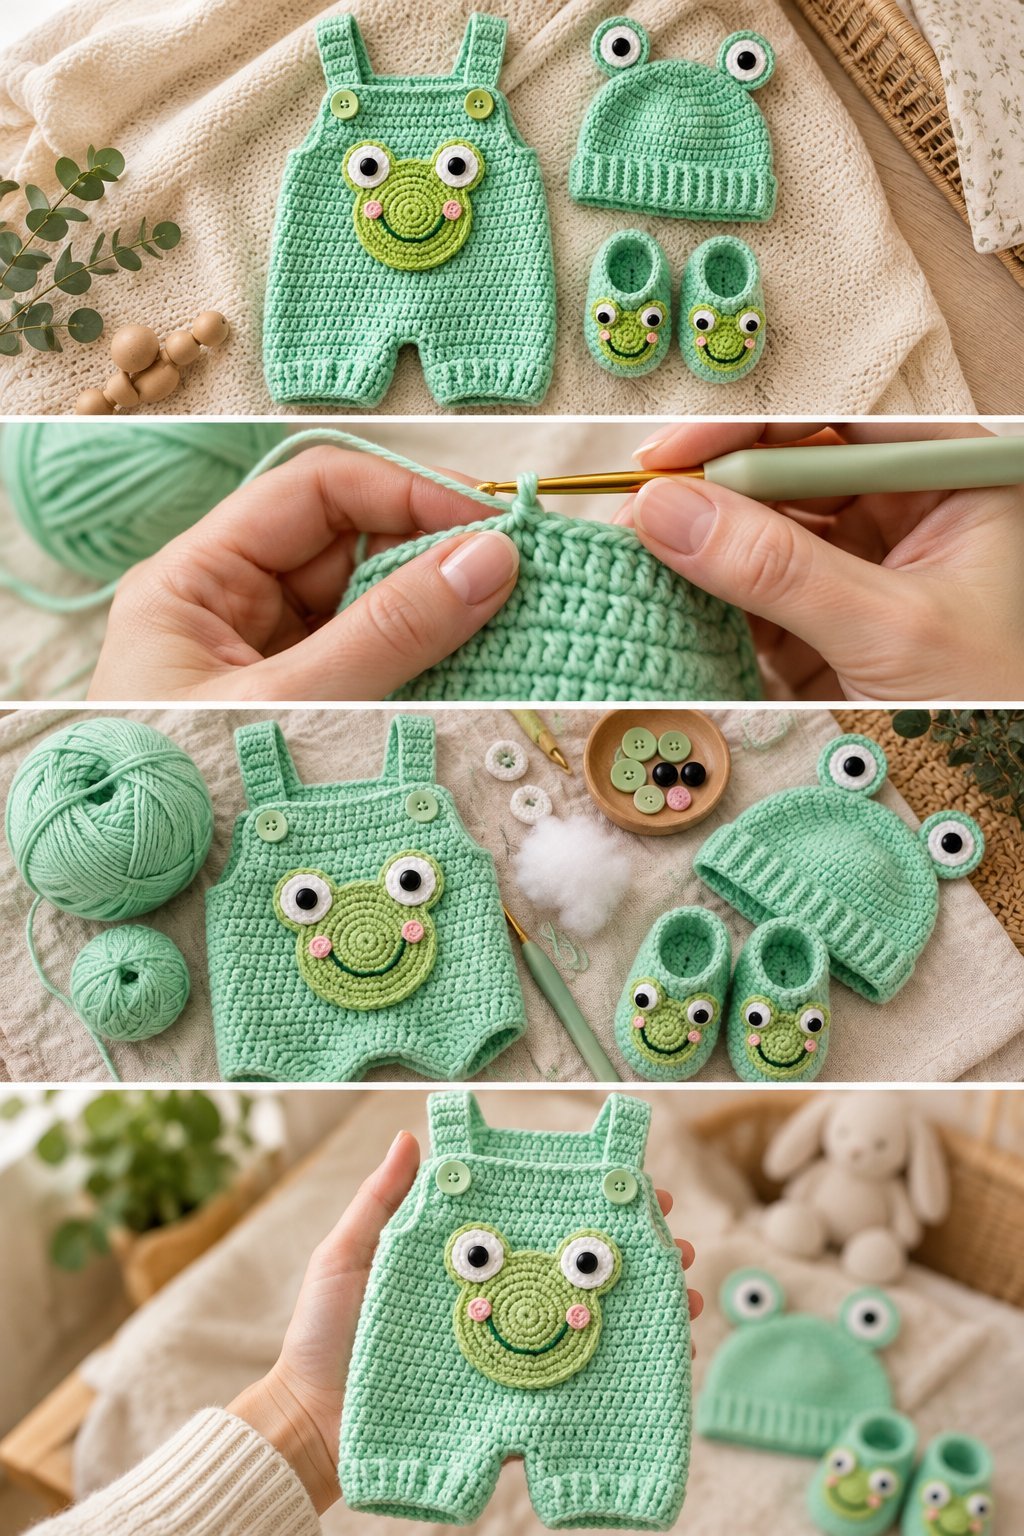
Step 1: Make the Romper Foundation
Begin with mint-green yarn.
Create a foundation chain based on the baby’s waist or hip measurement.
Join the chain carefully if working in rounds.
Work several rounds of single crochet or half double crochet.
Keep the tension even to create a stable fabric.
Step 2: Build the Main Body
Continue working around the body in rounds.
Use half double crochet for a slightly softer and faster-growing fabric.
Continue until the piece reaches the crotch area.
Check the width against the baby’s measurements as you work.
Step 3: Divide for the Legs
At the crotch, divide the stitches into two sections.
Each section will become one leg.
Join the yarn to the first section.
Work in rounds to create the first leg.
Fasten off and repeat for the second leg.
Step 4: Shape the Leg Openings
Continue crocheting each leg until it reaches the desired length.
Finish each leg with several rounds of single crochet.
For a more fitted ankle opening, use a smaller hook for the final rounds.
You can also add a ribbed border using alternating front-loop and back-loop stitches.
Step 5: Return to the Upper Body
Attach mint-green yarn to the upper edge of the romper.
Continue working upward.
Use even rounds of single crochet or half double crochet.
The upper section should fit comfortably around the baby’s torso.
Step 6: Create the Armholes
Mark the front and back sections.
Leave openings for the arms.
You can create a sleeveless romper by simply finishing the armholes with single crochet.
For a more detailed version, crochet small short sleeves around each opening.
Step 7: Shape the Shoulder Straps
Create two shoulder straps.
For each strap:
- Attach yarn to the front upper edge.
- Chain the desired strap width.
- Work several rows of single crochet.
- Continue until the strap reaches the back.
- Fasten off.
Repeat on the opposite side.
Step 8: Add Buttonholes
Create a small chain loop near the end of each strap.
The loop should be large enough for the selected button.
Sew a button securely onto the front or back section.
Repeat for the second strap.
Always reinforce baby garment closures carefully.
Creating the Frog Face
Step 9: Crochet the Frog Muzzle
Using light-green yarn, create a small oval or circular piece.
Start with a magic ring.
Work approximately 6 sc into the ring.
Increase evenly in subsequent rounds.
Continue until the piece reaches the desired size.
Fasten off and leave a long yarn tail for sewing.
Step 10: Shape the Frog Mouth
Using dark-green or black yarn, embroider a curved smile onto the muzzle.
Create a small curved line across the center.
Add tiny details at both ends of the smile.
Keep the embroidery secure and smooth.
Step 11: Make the Frog Eyes
Create two white circular pieces.
Begin with a magic ring.
Work sc stitches around the center.
Increase gradually until the eyes are large enough for the romper.
For the pupils, sew small black circles onto the white eyes.
You can embroider the pupils instead of using plastic safety eyes.
Step 12: Add the Pink Cheeks
Using pink yarn, add two small circular or embroidered cheeks.
Place one cheek on each side of the frog muzzle.
Keep both sides symmetrical.
Step 13: Attach the Frog Face
Position the muzzle in the center of the romper’s chest.
Sew around the entire outer edge.
Attach the eyes above the muzzle.
Sew them firmly into place.
The finished face should resemble a friendly frog.
Adding the Frog Details
Step 14: Create the Frog Eye Bulges
For a three-dimensional appearance, crochet two small raised circles.
Stuff them lightly with fiberfill.
Sew the white eye pieces onto the raised sections.
Attach the finished eyes securely to the romper.
Step 15: Add Optional Frog Spots
For additional character, add small darker-green circles or embroidered spots.
Place them around the frog face or near the lower body.
Keep the design simple so the main frog face remains the focal point.
Crochet Frog Hat
Step 16: Start the Hat
Using mint-green yarn, make a magic ring.
Work approximately 6 sc into the ring.
Increase evenly in each round.
Continue increasing until the crown matches the baby’s head circumference.
Step 17: Build the Hat Sides
Once the crown reaches the correct width, stop increasing.
Continue working even rounds of single crochet.
Work until the hat reaches the baby’s desired depth.
Try the hat against the baby’s measurements before finishing.
Step 18: Create the Hat Ribbed Border
Finish the hat with several rounds of ribbing.
You can alternate BLO and FLO stitches to create a stretchy edge.
Make sure the border is comfortable and not too tight.
Frog Eyes for the Hat
Step 19: Make the Eye Pieces
Create two small mint-green circles.
Add white circular sections on top.
Then add black pupils.
Stack the pieces to create raised frog eyes.
Step 20: Attach the Eyes
Sew the eyes securely to the top of the hat.
Position them evenly.
Make several stitches through the base of each eye.
Check the attachment carefully before the baby wears the hat.
Crochet Frog Booties
Step 21: Crochet the Sole
Using mint-green yarn, create a foundation chain matching the baby’s foot length.
Work around both sides of the chain.
Increase at the rounded ends to create an oval sole.
Continue until the sole matches the desired foot size.
Step 22: Build the Bootie
Stop increasing.
Work several rounds of single crochet around the sole.
Continue upward to create the sides of the bootie.
Keep the opening wide enough to comfortably fit the baby’s foot.
Step 23: Add the Frog Face
Create tiny frog eyes using white and black yarn.
Sew them onto the front of each bootie.
Add a small embroidered smile.
Repeat for the second bootie.
Finishing the Romper
Step 24: Finish the Armholes
Work one or two rounds of single crochet around each armhole.
This creates a clean edge and helps prevent excessive stretching.
Step 25: Finish the Neckline
Work a round of single crochet around the neckline.
For extra decoration, add a small picot or scalloped border.
Keep the neckline soft and flexible.
Step 26: Reinforce the Crotch
The crotch area receives additional tension during dressing and movement.
Reinforce the seams with matching yarn.
Make several secure stitches along both sides.
Step 27: Weave in the Yarn Ends
Use a yarn needle to weave all loose yarn tails through the wrong side of the crochet.
Secure each end.
Trim the excess yarn carefully.
Final Assembly
Step 28: Check the Buttons
Make sure every button is securely sewn.
Pull gently on each button to test the attachment.
For baby clothing, avoid loose buttons or small decorations that could become detached.
Step 29: Check the Frog Face
Make sure the eyes, muzzle, cheeks, and embroidered smile are securely attached.
Check the inside of the garment for loose threads.
Step 30: Block the Finished Pieces
Lightly dampen the crochet pieces.
Lay them flat and gently shape them.
Allow the romper, hat, and booties to dry completely.
Blocking helps improve the final shape and appearance.
Color Variations
Classic Frog
- Mint green
- Light green
- White
- Black
- Pink
Soft Pastel Frog
- Sage green
- Cream
- Soft pink
- Light brown
Woodland Frog
- Olive green
- Forest green
- Cream
- Brown
Spring Frog
- Mint
- Butter yellow
- White
- Soft pink
How to Customize the Set
Make a Larger Romper
Increase the foundation chain according to the baby’s chest and hip measurements.
Make a Smaller Romper
Use fewer stitches and adjust the body length.
Add Sleeves
Work several rounds around the armholes to create short sleeves.
Add a Hood
Instead of a separate hat, continue crocheting the neckline upward and shape a frog hood.
Add a Pocket
Crochet a small square pocket and attach a tiny frog motif to the front.
Make Matching Accessories
You can also create:
- Frog mittens
- Frog blanket
- Frog headband
- Frog stuffed toy
- Frog diaper cover
Tips for a Successful Crochet Baby Set
Use soft yarn
Choose a yarn that feels comfortable against delicate baby skin.
Check measurements frequently
Baby sizes vary considerably, so use actual measurements whenever possible.
Keep the fabric flexible
Avoid making the stitches excessively tight.
Reinforce closures
Buttons and strap attachments should be sewn securely.
Avoid loose embellishments
Decorative parts should be firmly attached, particularly when making clothing for very young children.
Wash before use
Follow the care instructions for the yarn and wash the finished garment before the first wear.
Frequently Asked Questions
Is this frog romper suitable for beginners?
The individual stitches are relatively simple, but shaping the romper and creating the facial details makes the complete project better suited to an advanced beginner or intermediate crocheter.
What yarn is best for a baby romper?
Soft cotton, cotton blends, and baby yarn are good choices. Choose a yarn that is washable, comfortable, and suitable for the baby’s skin.
Can I make the frog face with embroidered eyes?
Yes. Embroidered eyes are a good alternative to plastic safety eyes, especially for garments intended for very young babies.
Can I make this outfit in another animal design?
Absolutely. The same basic romper can be adapted into a bear, bunny, cat, duck, dinosaur, or other animal by changing the facial details and colors.
Can I make the romper larger?
Yes. Adjust the foundation chain and body length according to the baby’s chest, hip, and torso measurements.
Can I make the hat without the romper?
Yes. The frog hat works as a standalone project and can be paired with a simple baby outfit.
Final Thoughts
This Mint Green Frog Baby Romper Set Free Crochet Pattern is a charming project for creating a coordinated handmade baby outfit. The simple mint-green crochet base provides the perfect canvas for the playful frog face, while the matching hat and booties complete the adorable set.
The design can be customized with different shades of green, alternative facial expressions, embroidered details, or additional accessories. By adjusting the measurements and stitch counts, you can create the romper for different baby sizes while maintaining the same cute frog-inspired style.
Whether you’re preparing a handmade baby-shower gift, creating a special photo-session outfit, or simply enjoying a fun crochet project, this frog-themed set offers plenty of opportunities to personalize your work.
SEO Keywords: Mint Green Frog Baby Romper Set, Frog Baby Crochet Pattern, Crochet Frog Romper, Free Baby Crochet Pattern, Crochet Baby Romper, Frog Crochet Baby Outfit, Crochet Frog Hat, Crochet Baby Booties, Baby Girl Crochet Outfit, Baby Boy Crochet Outfit, Animal Crochet Baby Clothes, Frog Amigurumi Baby Set, Handmade Baby Gift, Crochet Baby Clothes, Frog Baby Outfit.

