
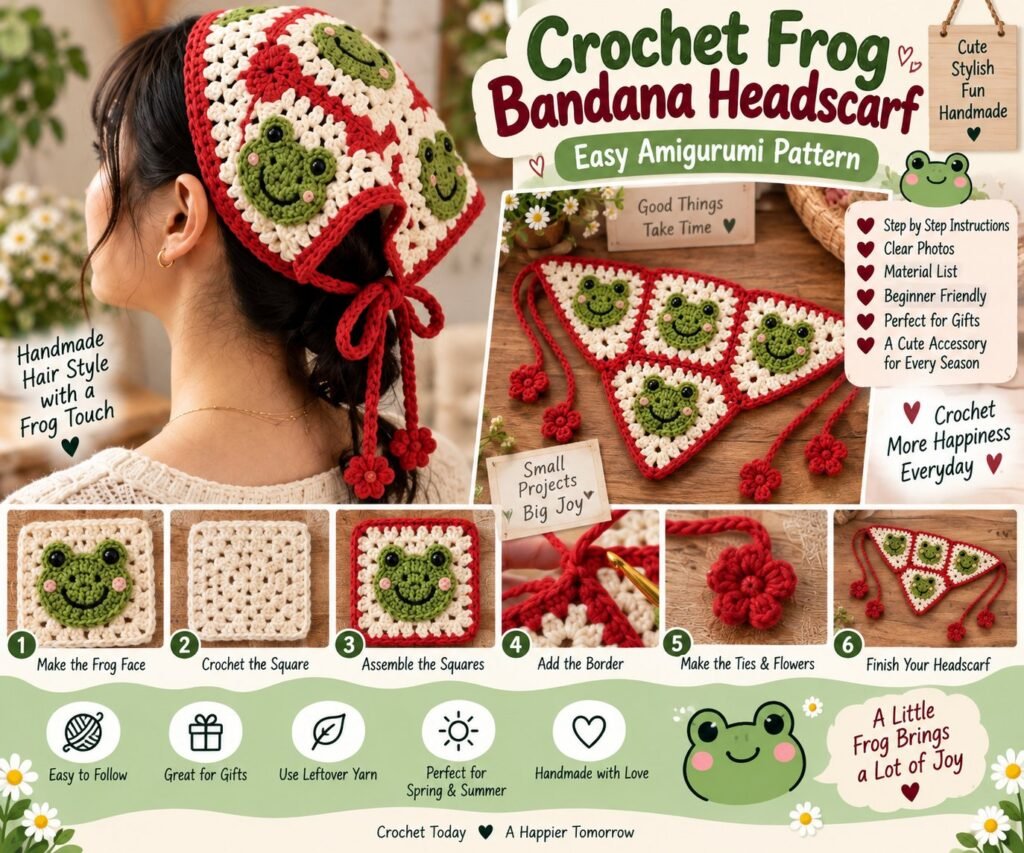
Create a charming Crochet Frog Bandana Headscarf with this detailed step-by-step pattern. This cute handmade accessory combines granny-style crochet squares, adorable frog faces, a bold red border, and long adjustable ties finished with tiny crochet flowers.
The finished bandana is a fun accessory for spring and summer outfits, festivals, picnics, casual days, handmade gifts, and anyone who loves playful frog-inspired crochet fashion.
This pattern uses US crochet terminology.
CROCHET FROG BANDANA HEADSCARF OVERVIEW
The headscarf is constructed from individual crochet squares featuring cute frog faces.
Each square consists of:
A cream background
A green crochet frog face
Black eyes
Pink cheeks
A simple embroidered smile
A red decorative border
The squares are joined together to create a triangular bandana shape.
Long crochet ties are added to both sides so the headscarf can be adjusted comfortably around the head.
Small crochet flowers at the ends of the ties add the final decorative detail.
The instructions below are an original adaptable construction inspired by the supplied reference image. The exact original designer’s pattern is not available, so stitch counts and dimensions may need to be adjusted according to yarn, hook size, tension, and desired head size.
MATERIALS NEEDED
Cream or ivory cotton yarn
Green cotton yarn
Red cotton yarn
Black yarn or embroidery thread
Pink yarn
Small amount of darker green yarn
2.5–3 mm crochet hook
Tapestry needle
Sewing needle
Scissors
Stitch markers
Optional small black safety eyes
Measuring tape
RECOMMENDED YARN
Cotton or cotton-blend yarn works particularly well for this project.
Cotton provides good stitch definition and keeps the bandana relatively lightweight.
Use yarn of a similar thickness for all colors so the squares remain consistent in size.
CROCHET ABBREVIATIONS
CH – Chain
SC – Single Crochet
HDC – Half Double Crochet
DC – Double Crochet
TR – Treble Crochet
SL ST – Slip Stitch
INC – Increase
DEC – Decrease
ST – Stitch
STS – Stitches
SP – Space
SKILL LEVEL
Beginner to intermediate.
The individual granny-style squares are simple, while creating the frog faces and joining the pieces requires some additional detail work.
FINISHED SIZE
The finished bandana can be approximately:
Width: 45–55 cm
Center depth: 25–30 cm
Ties: 30–45 cm each
The size can easily be changed by making more or fewer squares or adjusting the number of rounds.
GAUGE
Gauge is not critical for this project.
However, try to keep every crochet square approximately the same size.
If your squares are too large, use a smaller hook.
If they are too small, use a larger hook.
IMPORTANT PATTERN NOTES
Keep the tension consistent when making the squares.
Count your stitches after every round.
Make all frog faces before joining the squares.
Lay the squares out before sewing them together.
The red border can be added after the complete bandana has been assembled.
PART 1 — CROCHET THE FROG FACE
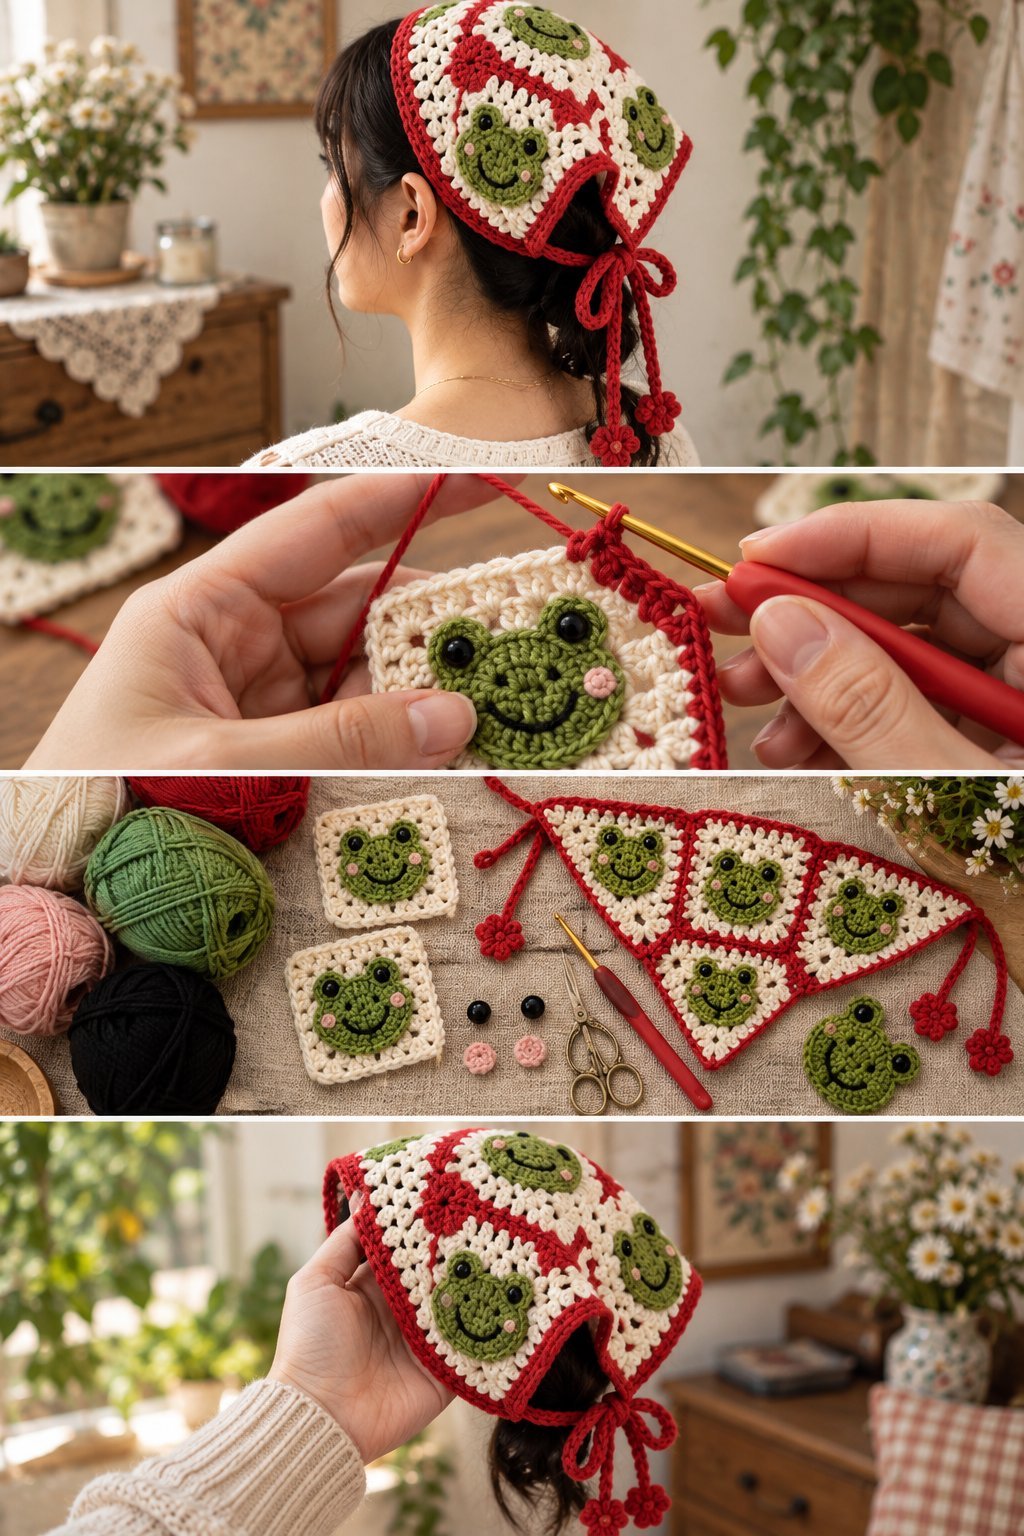
STEP 1 — MAKE THE FROG CENTER
Use green yarn.
Make a magic ring.
Work 6 SC into the ring.
Pull the ring closed.
Join with a SL ST.
STEP 2 — INCREASE THE FROG FACE
Round 2:
Work 2 SC into each stitch around.
12 STS
Round 3:
SC in the next stitch.
INC in the next stitch.
Repeat around.
18 STS
Round 4:
SC in the next 2 stitches.
INC in the next stitch.
Repeat around.
24 STS
Continue increasing until the frog face reaches approximately 4–5 cm in diameter.
Fasten off.
Leave a long tail if you plan to sew the face onto the square.
PART 2 — MAKE THE FROG EYES
STEP 3 — CREATE THE EYE BASES
Use green yarn.
Make two small circles.
A simple eye base can be made with:
Magic ring
6 SC
Increase around
Fasten off
Make two identical pieces.
STEP 4 — ADD THE BLACK EYES
Use black yarn or small safety eyes.
Place one black center on each green eye base.
Sew securely.
If using embroidery thread, create several small stitches to form a neat black circle.
PART 3 — ADD THE FROG CHEEKS
STEP 5 — MAKE THE PINK CHEEKS
Use pink yarn.
Create two tiny crochet circles.
Alternatively, embroider small pink circles directly onto the frog face.
Place one cheek on each side of the mouth.
Keep them symmetrical.
PART 4 — EMBROIDER THE FROG FACE
STEP 6 — ADD THE SMILE
Use black embroidery thread.
Create a curved smile underneath the eyes.
Add a short curved line on each side if desired.
Keep the expression simple and friendly.
STEP 7 — SEW THE EYES TO THE FACE
Position the two eyes toward the upper portion of the green frog face.
Sew them securely.
Check that both eyes are aligned.
Your frog face is now complete.
PART 5 — CROCHET THE CREAM GRANNY SQUARE
STEP 8 — START THE SQUARE
Use cream yarn.
Make a magic ring.
CH 3.
Work 2 DC into the ring.
CH 2.
Work 3 DC into the ring.
CH 2.
Work 3 DC into the ring.
CH 2.
Work 3 DC into the ring.
CH 2.
Join with a SL ST.
This creates the first four corners.
STEP 9 — BUILD THE SECOND ROUND
Work into each corner space.
In each corner:
3 DC
CH 2
3 DC
CH 1
Continue around the square.
Join with a SL ST.
STEP 10 — CONTINUE THE GRANNY SQUARE
Continue working granny-square rounds.
In every corner space, work:
3 DC
CH 2
3 DC
Between corners, work:
CH 1
Continue until the square reaches approximately 9–11 cm.
Fasten off.
PART 6 — ATTACH THE FROG FACE
STEP 11 — POSITION THE FROG
Place the completed frog face in the center of the cream square.
Make sure it is centered.
Pin it temporarily if necessary.
STEP 12 — SEW THE FROG FACE
Use green yarn or matching sewing thread.
Sew around the outer edge of the frog face.
Use small, neat stitches.
Make sure the face lies flat.
STEP 13 — ADD THE FACIAL DETAILS
Check the position of:
Eyes
Cheeks
Smile
Adjust any details before continuing.
PART 7 — MAKE THE FROG SQUARES
STEP 14 — REPEAT THE SQUARE
Repeat the cream granny-square construction.
Make approximately 5–7 frog squares depending on the desired bandana size.
For a wider bandana, make additional squares.
Try to keep every square the same dimensions.
PART 8 — ARRANGE THE BANDANA
STEP 15 — CREATE THE TRIANGULAR SHAPE
Lay your squares on a flat surface.
Arrange them into a triangular bandana shape.
A simple arrangement can use:
Top row: 1 square
Second row: 2 squares
Third row: 3 squares
Adjust the arrangement depending on your desired size.
The bottom edge should form a wider line while the upper section remains narrower.
PART 9 — JOIN THE CROCHET SQUARES
STEP 16 — JOIN WITH A SLIP STITCH
Place two squares together with the wrong sides facing.
Insert the hook through corresponding stitches.
Work SL ST across the edge.
Continue until the squares are completely joined.
STEP 17 — JOIN THE REMAINING SQUARES
Repeat the same method for all remaining pieces.
Check the alignment after each seam.
Keep the joins relatively flat.
STEP 18 — HIDE THE SEAMS
Turn the bandana over.
Weave all yarn tails through the back of the crochet fabric.
Trim excess yarn.
PART 10 — ADD THE RED BORDER
STEP 19 — ATTACH RED YARN
Attach red yarn to one corner of the bandana.
Work SC evenly around the outside edge.
Do not pull the stitches too tightly.
STEP 20 — CREATE A DECORATIVE BORDER
For a simple scalloped edge:
SL ST into the next stitch.
Skip 1 stitch.
Work 5 DC into the next stitch.
Skip 1 stitch.
SL ST into the next stitch.
Repeat around the bandana.
This creates a soft decorative edge similar to the reference.
STEP 21 — FINISH THE BORDER
Join with a SL ST.
Fasten off.
Weave the yarn tail securely into the back of the bandana.
PART 11 — CROCHET THE SIDE TIES
STEP 22 — MAKE THE FIRST TIE
Attach red yarn to one upper corner of the bandana.
Chain approximately 100–140 stitches.
For a longer tie, add more chains.
For a shorter tie, use fewer chains.
Work SL ST back across the chain.
Fasten off.
STEP 23 — MAKE THE SECOND TIE
Repeat on the opposite side.
Make sure both ties are approximately the same length.
PART 12 — ADD DECORATIVE FLOWERS
STEP 24 — CROCHET A SMALL FLOWER
Use red yarn.
Make a magic ring.
Work 5 SC into the ring.
Join with a SL ST.
For each petal:
CH 2
3 DC into the same stitch
CH 2
SL ST into the same stitch
Repeat around.
Fasten off.
STEP 25 — MAKE MORE FLOWERS
Create several small red flowers.
You can make two or more for each tie.
Add small green leaves if desired.
STEP 26 — ATTACH THE FLOWERS
Sew the flowers near the ends of the crochet ties.
Make sure they are firmly attached.
Trim the yarn ends neatly.
PART 13 — OPTIONAL FROG EYE DETAILS
STEP 27 — ADD SMALL HIGHLIGHTS
Use white embroidery thread.
Add one tiny stitch to each black eye.
This creates a small highlight and gives the frog a more expressive appearance.
Keep the stitches small and symmetrical.
PART 14 — FINAL FINISHING
STEP 28 — CHECK THE BANDANA
Lay the completed bandana flat.
Check all seams.
Check the red border.
Check the ties.
Check every frog face.
Make sure there are no loose yarn ends.
STEP 29 — WEAVE IN LOOSE ENDS
Use a tapestry needle.
Weave each yarn tail through several stitches on the back.
Trim the excess.
STEP 30 — BLOCK THE BANDANA
Lightly dampen the finished bandana.
Lay it flat.
Shape the triangular edges.
Straighten the granny squares.
Allow it to dry completely.
Blocking helps the bandana maintain a clean shape.
HOW TO MAKE THE BANDANA SMALLER
Use fewer granny-square rounds.
Make smaller frog faces.
Use fewer squares.
Shorten the side ties.
Use a smaller crochet hook.
HOW TO MAKE THE BANDANA LARGER
Add additional granny-square rounds.
Make larger frog faces.
Add another row of squares.
Increase the length of the ties.
Use a slightly larger hook.
COLOR COMBINATIONS
Classic Frog
Cream
Leaf green
Red
Pink
Black
Forest Frog
Beige
Dark green
Brown
Cream
Pastel Frog
Ivory
Sage green
Dusty pink
Lavender
Strawberry Frog
Cream
Light green
Red
Pink
This combination creates a playful strawberry-inspired look.
TIPS FOR MAKING THE HEADSCARF
Keep all granny squares the same size.
Count the stitches around each square.
Make a test frog face before creating all the motifs.
Arrange the squares before joining them.
Keep the border tension loose enough to prevent curling.
Make the ties long enough to comfortably tie around the head.
Reinforce the points where the ties attach.
Use cotton yarn for a lightweight summer accessory.
COMMON PROBLEMS AND SOLUTIONS
THE SQUARES ARE DIFFERENT SIZES
Your tension may have changed between squares.
Use the same hook and try to maintain consistent tension.
THE BANDANA CURLS
Your border may be too tight.
Try using a slightly larger hook for the border.
Blocking can also help.
THE FROG FACES LOOK UNEVEN
Mark the center of each square before attaching the face.
Use the same eye placement on every frog.
THE TIES ARE TOO SHORT
Add additional chain stitches to each tie.
THE BANDANA DOES NOT SIT FLAT
Check the square joins and gently block the finished piece.
CARE INSTRUCTIONS
Hand wash gently in cool water.
Use a mild detergent.
Do not wring or twist.
Press excess water out using a towel.
Lay flat to dry.
Reshape the bandana while damp.
Avoid high heat.
Store flat or loosely folded.
FREQUENTLY ASKED QUESTIONS
Is this frog bandana beginner-friendly?
Yes. The granny squares use basic crochet stitches, making the project accessible to beginners who are comfortable with DC stitches and working in rounds.
What yarn is best for this project?
Cotton or cotton-blend yarn is recommended because it is lightweight, breathable, and provides excellent stitch definition.
Can I make the frog faces larger?
Yes. Add additional increase rounds to the green circle before attaching the eyes and facial details.
Can I use safety eyes?
Yes, but make sure they are securely attached. For very young children, embroidered eyes are a safer alternative.
Can I make the bandana without frog faces?
Yes. The same construction can be used with flowers, hearts, mushrooms, butterflies, cherries, or other crochet motifs.
How many squares do I need?
A small bandana can use approximately 5–7 squares. Add more squares for a larger headscarf.
Can I change the red border?
Yes. You can use green, black, pink, purple, or any contrasting color.
Can I sell finished bandanas?
You can make and sell finished handmade items based on your own adaptation of the construction. Do not copy or redistribute another designer’s written pattern or photographs.


1 thought on “CROCHET FROG BANDANA HEADSCARF”