
Introduction
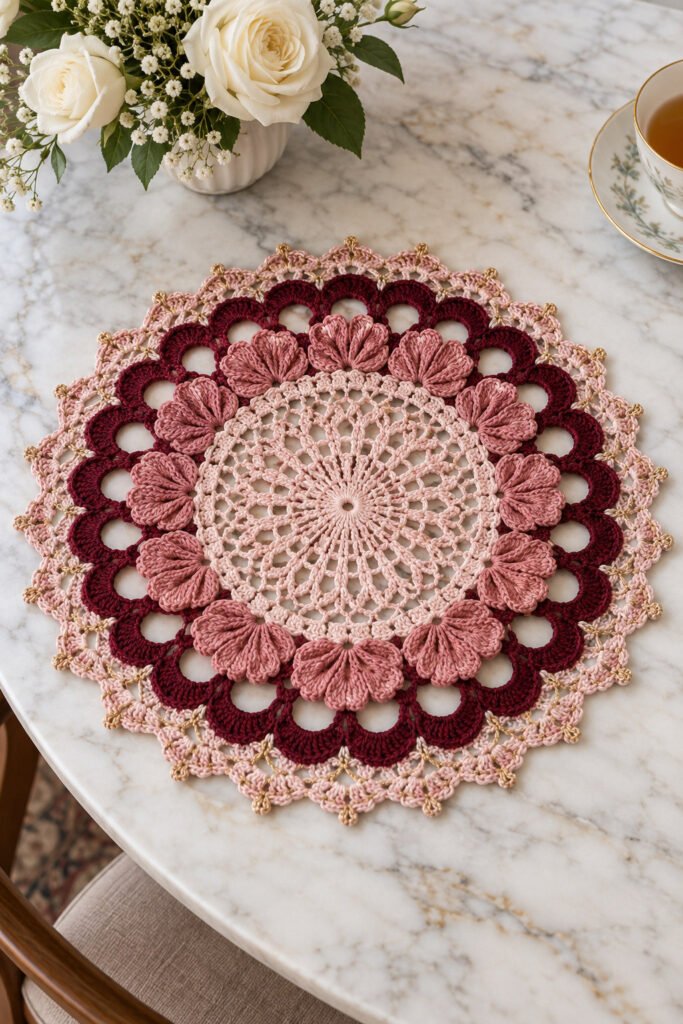
This peony pink lace placemat brings a romantic, flower-inspired look to a table setting. The reference shows a round openwork center in soft pink, surrounded by layered dusty-rose petals and a deep berry-colored scalloped border. A small, dark rose motif anchors the center, while delicate gold-toned accents appear around the edge.
This is an original visual planning guide based on the supplied image, not a tested, counted crochet pattern. The photograph does not reveal the yarn weight, hook, stitch sequence, gauge, finished size, or how the dimensional flower motifs are formed. Use a circular lace pattern you trust as a foundation, then adapt its color changes and decorative border to create a similar look.
Why You’ll Love This Placemat
- A romantic floral palette: Blush pink, rose, and deep berry create a rich layered effect, while a restrained gold accent adds a polished finish.
- A pretty table accent: The round shape and open lace can dress up a breakfast nook, tea table, or seasonal tablescape.
- A chance to play with texture: Pairing a flatter lace center with raised floral details creates contrast without changing the overall silhouette.
- Easy to personalize: Adjust the color balance, simplify the border, or use a smaller flower detail to fit your home.
- A satisfying finishing project: Blocking and a carefully shaped edge help the circular lace lie neatly.
Skill Level
Suggested level: Intermediate. A circular lace base is manageable for a crocheter who can keep track of repeats and maintain a flat circle. The dimensional petals and layered border add shaping and finishing work. A confident beginner can use a simpler round placemat pattern and add a separate flower or scalloped edging after practicing the details on a swatch.
Materials
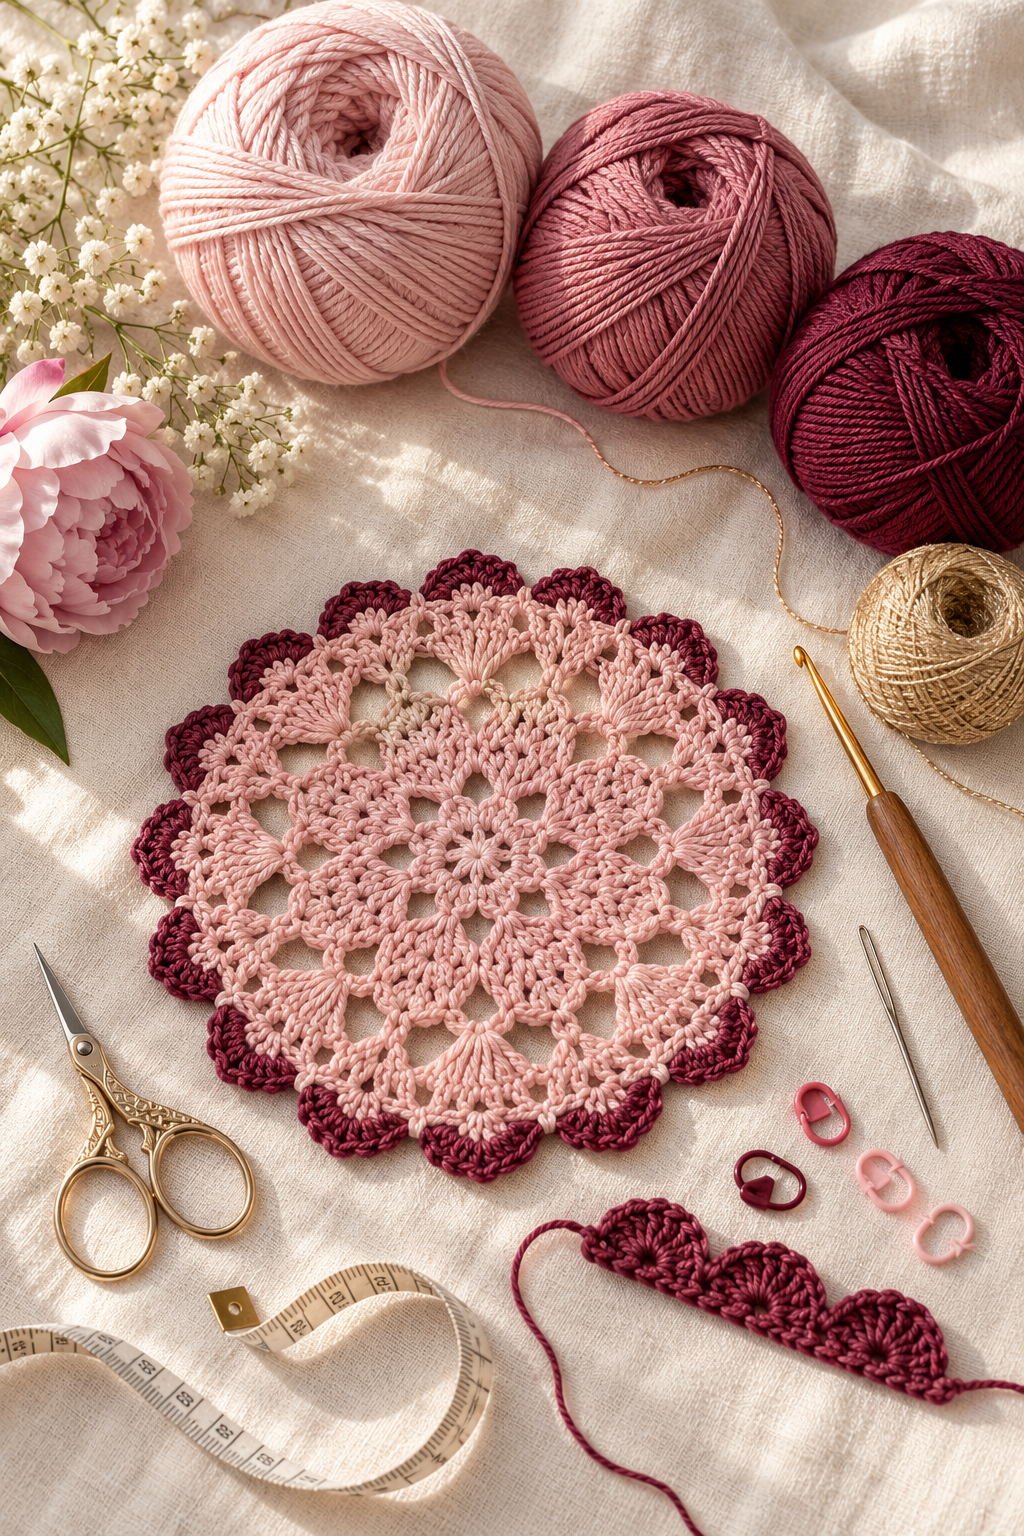
- Smooth yarn in peony or blush pink for the lace center
- Dusty rose yarn for the raised flower details
- Deep berry, burgundy, or wine yarn for the outer scallops and center rose
- Optional gold or cream yarn for a narrow accent line
- Crochet hook chosen to suit the yarn and desired fabric drape
- Scissors and a yarn needle
- Stitch markers for tracking rounds or motif placement
- Blocking mat and rustproof pins, if suitable for the yarn
- Optional measuring tape for checking the planned diameter
Yarn Recommendations
Choose a smooth cotton or cotton-blend yarn that holds its shape and is comfortable for a table accessory. Cotton makes the lace definition easy to see and is often practical for items that may need regular washing. The image does not establish the fiber or yarn weight, so select a yarn that suits your intended placemat size and the amount of drape you want.
Use compatible yarns across the colors so the border and center behave similarly after washing. If you want a gold-toned outline, a fine contrast yarn or a simple embroidered line can echo the photograph without adding small hard decorations to a dining surface.
Hook Size
The hook size cannot be identified from the image. Begin with the yarn label’s recommendation and make a swatch in the lace stitch you plan to use. Choose a hook that gives you open, defined stitches while keeping the fabric firm enough to lie flat. A hook that is too large can make the placemat floppy; one that is too small may close up the lace.
Gauge
No reliable gauge can be measured from the photograph. Make and wash a sample using the yarn, hook, and stitch pattern you intend to use. Check that the fabric opens into lace without ruffling or cupping. For a circular project, also check how the fabric behaves as the rounds grow; the photo does not provide a stitch repeat or target gauge.
Finished Measurements
The reference image does not provide a dependable finished diameter. Decide how the placemat will be used, then measure a plate or the place setting it needs to accommodate. Follow the sizing guidance of your chosen circular pattern and stop when the piece reaches your preferred size. Record your own diameter after blocking so you can make a matching set.
Crochet Abbreviations
These common US crochet terms may appear in the circular pattern you choose. Follow that pattern’s stitch definitions and repeat notation.
- ch: chain
- sl st: slip stitch
- sc: single crochet
- hdc: half double crochet
- dc: double crochet
- tr: treble crochet
- st(s): stitch(es)
- sp(s): space(s)
- rep: repeat
- RS: right side
- WS: wrong side
- BLO: back loop only
Construction Overview
The visible placemat is round and appears to build outward from a small central flower into a pale pink openwork field. Around that center are raised dusty-rose petal shapes, a dark berry ring of rounded open scallops, and a final pale pink lace edge. Fine gold-toned dots or stitches decorate portions of the outer border.
Those visual details suggest a center-out circular base with decorative layers added around it, but the image cannot confirm the stitch sequence or whether the flowers are made as separate motifs. For a reliable project, start from a circular lace placemat pattern with clear increases, then use swatches to plan the colors and added texture.
Step-by-Step Guidance for a Similar Look
These steps describe how to plan a placemat inspired by the photo. They are not a counted pattern and do not supply a stitch repeat, motif chart, or exact sizing.
1. Choose the intended size and yarn
Decide whether the placemat will sit under a dinner plate, a tea setting, or a centerpiece. Pick smooth yarns that can be cared for in a similar way. Measure a plate or table setting to guide your target diameter rather than estimating scale from the photograph.
2. Swatch the lace fabric
Make a sample in the yarn and hook you plan to use. Wash and dry it as you would the finished piece, then check whether the lace opens clearly and remains comfortable for table use. If the sample curls or ripples, adjust your hook or use a circular pattern with shaping that suits your yarn.
3. Work a flat circular center
Follow a circular lace placemat pattern you trust, keeping its increase sequence intact so the fabric stays flat. The image shows an open, radiating center, but it does not reveal the stitches or the number of rounds. Use your own target diameter and the chosen pattern’s instructions to determine when to move to the next design section.
4. Plan the pink transition and center flower
Use the soft pink for the broad lace field and add a small dark rose motif at the center if you want to echo the reference. The center flower could be crocheted separately, worked into the fabric, or embroidered; the photo does not establish its construction. Test your chosen method on a sample before attaching it.

5. Add dimensional petal details
Arrange raised dusty-rose shapes in a ring around the lace field. You can crochet individual petals or flower motifs and attach them evenly, or choose a texture stitch that gives a similar rounded look. Keep the layers balanced and secure the motifs so the placemat can be handled and washed safely.
6. Shape the berry scallop border
Work or attach a deep berry-colored scalloped layer outside the petals. The photo shows repeated rounded open shapes, but it does not reveal their stitch construction or spacing. Use a border repeat from a pattern you understand, and check regularly that the outer edge stays circular rather than drawing inward or flaring.
7. Finish the pale edge and accents
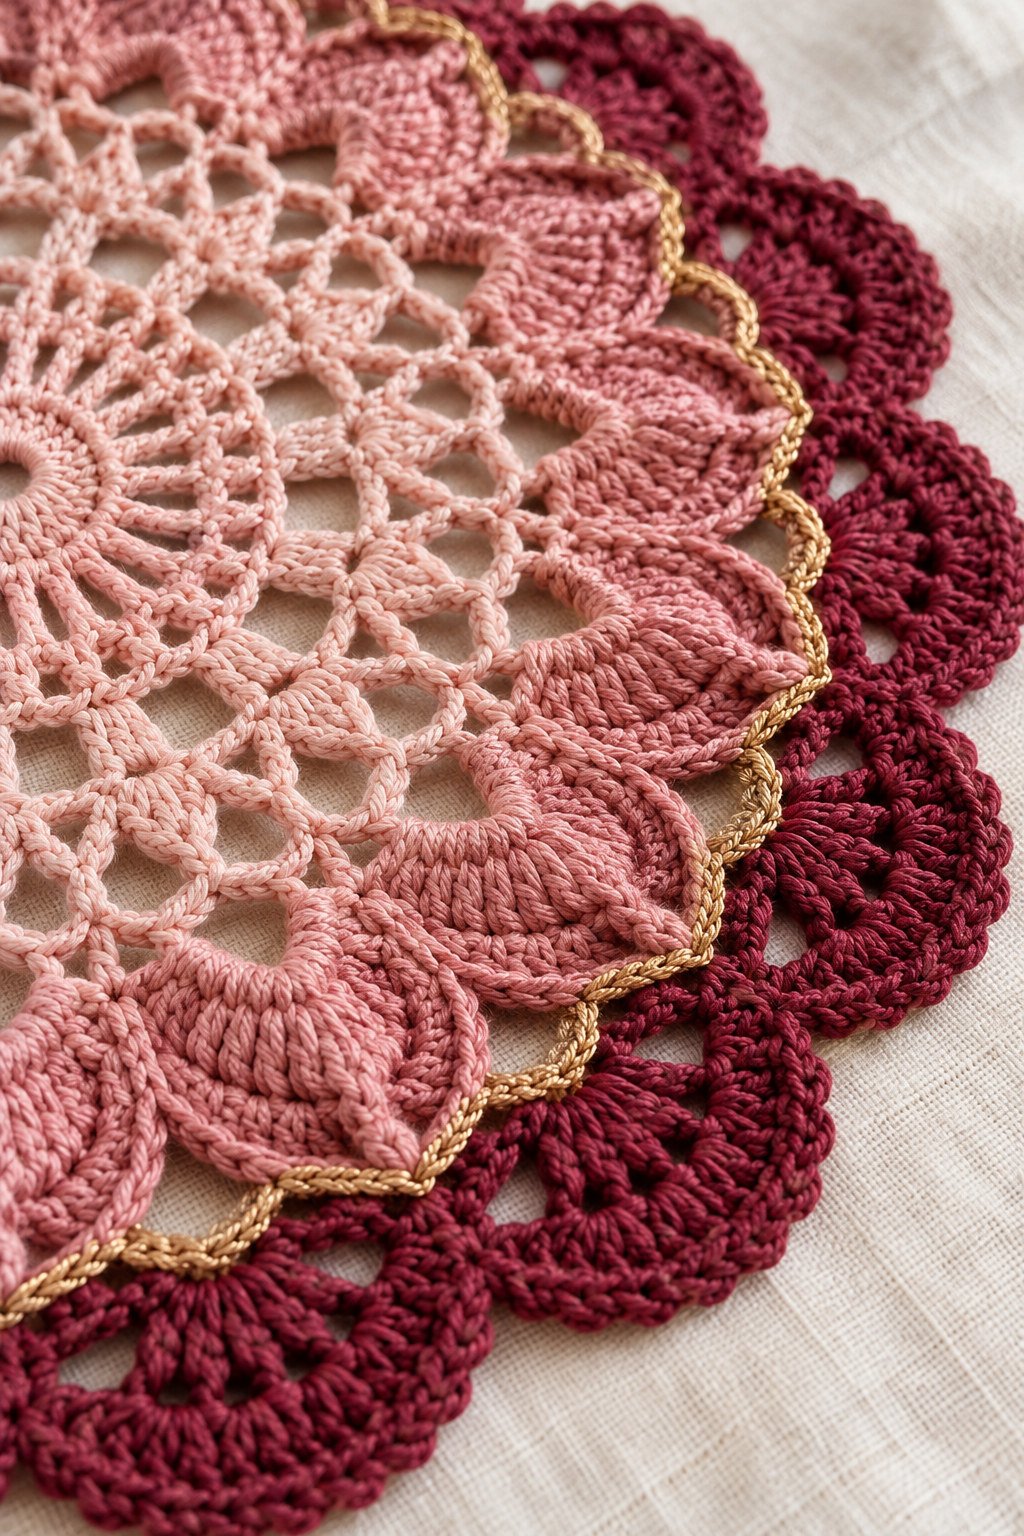
Add a final pale pink lace edging to frame the darker scallops. If you want a gold detail, embroider a fine line or add small yarn stitches around selected edges. Avoid hard or loose embellishments that could snag, scratch a tabletop, or come away during laundering.
8. Block and check the shape
Weave in the ends securely, then block according to the yarn label. Pin the circle evenly without stretching the lace out of shape. Let it dry fully and check that the center lies flat, the border is balanced, and the edge is smooth before placing it on a table.
Customization Ideas
- Use an all-pink palette for a softer, monochromatic placemat.
- Replace the deep berry border with plum, wine, or a contrasting cream.
- Simplify the raised ring to one flower motif at the center.
- Make the scalloped edge with one color if you prefer a calmer finish.
- Use a tone-on-tone embroidered accent instead of a metallic detail.
- Create a coordinated set with the same center and different border colors.
- Adapt the circular base into a small doily or centerpiece by following an appropriate pattern and adjusting the size.
Finishing
Weave in each yarn end on the wrong side and secure the flower and border layers firmly. Check for loose loops or tails that could catch on cutlery or snag during use. Block gently and evenly, following the care instructions for the yarn. If you are making a set, measure each placemat after blocking so the finished pieces stay consistent.
Care Instructions
Follow the yarn label for washing and drying. Test the colors on a small swatch first, especially the deep berry shade, to check for color transfer. Hand wash or use a gentle cycle only if the yarn allows it, avoid twisting the lace, and dry flat to preserve the circle. Store the placemat flat or loosely folded so the raised details do not become crushed.
Helpful Tips
- Use stitch markers to keep track of the circular pattern’s repeats.
- Check the fabric on a flat surface as you work; address cupping or ruffling early.
- Swatch each color transition to see how the yarns behave together.
- Pin the outer edge evenly during blocking to preserve a round shape.
- Secure separate flower motifs around their full base so the layers do not curl.
- Keep decorative accents smooth where plates, cups, or hands may touch them.
- Treat the photo as a style reference; it does not show exact counts, gauge, or finished dimensions.
Frequently Asked Questions
Is this a complete counted crochet pattern?
No. This is an original image-based design guide. The photo does not show enough construction detail to provide stitch counts, a chart, gauge, or exact dimensions. Use a separate circular lace placemat pattern for the counted foundation.
What stitch is used in the lace center?
The stitches are not clear enough to identify with confidence. Choose an openwork stitch pattern from a circular placemat design you trust and swatch it with your chosen yarn.
What size should I make the placemat?
The image does not establish a finished diameter. Measure the plate or table setting you want to use, then follow the sizing guidance of your chosen circular pattern.
How can I create the raised petals?
The photograph does not reveal how the petal shapes are made. You could use separate crochet motifs, a textured stitch, or embroidery, depending on your skill and the pattern you choose. Make a sample first to check that the layers lie smoothly.
Can I use a different color palette?
Yes. Keep a light center, a contrasting decorative ring, and an outer edge if you want to preserve the same layered effect. Any palette can work if the yarns have compatible care needs.
Is the gold trim made with beads?
The image does not make the material clear. A fine yarn accent or embroidery can suggest a gold outline; choose a smooth, securely attached finish for a placemat that will be handled and washed.
Final Thoughts
The Peony Pink Lace Placemat pairs a delicate circular lace center with dimensional rose-toned petals and a bold scalloped border. Start with a circular pattern that keeps the fabric flat, swatch the colors and textures, and build the decorative layers only after you are happy with the base. The photograph offers a romantic palette and silhouette, while your chosen yarn, pattern, and measurements will shape the finished placemat.


